- Semiconductor BusinessHOME
- Products and Services of Macnica,Inc.
-
technical information

-
Events and Seminars
- Handling Manufacturer
- Support
- Inquiry
- Click here to purchase products
- Semiconductor business e-mail magazine registration
![]()
![]() Narrow down by specifying conditions
Narrow down by specifying conditions
現在2158件がヒットしています。check

Introduction
NVIDIA's NVIDIA AI Blueprint for Video Search and Summarization (VSS) is currently attracting attention. VSS is a platform that uses the power of AI to analyze, summarize, and search video files and camera footage, and is expected to be used in a variety of industries and applications. Another feature that has attracted attention is its ability to perform on-premises AI video analysis.
*For an overview of VSS, please see this article (NVIDIA's latest AI video analysis solution: Introduction to NVIDIA AI Blueprint for VSS).
VSS offers multiple deployment methods, and the minimum on-premise deployment supports one NVIDIA RTX PRO™ 6000 Blackwell GPU card or one NVIDIA H100 GPU card (hereafter referred to as single-GPU deployment). However, when actually trying VSS with a single-GPU deployment, there are cases where strange Japanese characters are output.
One reason for this is that the model size of the LLM used by default when deploying with a single GPU is relatively small. When VSS is put into practical use, usability can be improved by using an LLM that can output natural Japanese.
Therefore, in this article, we will explain how to change the default LLM to an LLM with a larger model size and relatively stable multilingual performance in an on-premises VSS environment equipped with multiple GPUs, with the aim of achieving more natural Japanese output.
Goals and scope of this article
goal
When running VSS on-premise, you will understand how to change the default LLM and deploy using multiple GPUs.
subject
- Anyone interested in implementing VSS
- Anyone interested in deploying VSS on-premise
- Those who want to be able to handle natural Japanese with VSS
Scope of this article
- How to deploy VSS on-premise
- How to change the default LLM in an on-premise deployment of VSS
- How to use multiple GPUs in an on-premise deployment of VSS
Execution environment
hardware
A workstation equipped with two NVIDIA RTX PRO 6000 Blackwell Max-Q Workstation Edition cards
For information on the platforms required for on-premise deployment of VSS, see Supported Platforms — Video Search and Summarization Agent.
LLM Model
openai/gpt-oss-120b:gpt-oss-120b Model by OpenAI | NVIDIA NIM
prerequisite
- Ubuntu 22.04
- NVIDIA driver: 580.65.06 or higher
- CUDA: 13.0 or higher (CUDA drivers are installed together with NVIDIA drivers)
- NVIDIA Container Toolkit: 1.13.5 or later
- Docker: 27.5.1 or later
- Docker Compose:2.32.4
- The nvidia-smi command confirms all installed GPUs (two in this case).
*This information is current as of VSS version 2.4.1. Please check the latest version accordingly. : Release Notes — Video Search and Summarization Agent
procedure
In this configuration, the GPU roles are divided as follows:
・GPU0: Embedding model / Reranker model / VLM / VSS engine
・GPU1: Modified LLM (gpt-oss-120b)
*In this article, GPU0/GPU1 are specified based on the display order in nvidia-smi.
Below are the high-level steps to deploy VSS on-premise with two GPUs:
- Clone the VSS repository from Github (first time only)
- Log in to NGC (first time only)
- Modify config.yaml (first time only)
- Adding and modifying the env file (first time only)
- Setting environment variables
- Deploy LLM on GPU1
- Deploy Embedding NIM on GPU0
- Deploying Reranker NIM on GPU0
- Deploy VSS agent (including VLM) on GPU0. ※VLM = Vision Language Model
- (Optional) Check the container log for startup
*For more information and other deployment methods, please see NVIDIA's official VSS documentation (Deploy Using Docker Compose X86 — Video Search and Summarization Agent).
Below we will explain the steps one by one.
*The first time you use the service, you will need to download the model.
*This procedure is based on local_deployment_single_gpu, but due to Docker options, the actual configuration uses multiple GPUs.
Step 1: Clone the VSS repository from GitHub (first time only)
First, download the official VSS repository (NVIDIA-AI-Blueprints/video-search-and-summarization: Blueprint for Ingesting massive volumes of live or archived videos and extract insights for summarization and interactive Q&A) to your local environment.
git clone https://github.com/NVIDIA/video-search-and-summarization.gitStep 2: Log in to NGC (first time only)
To use NIM's Docker container, set the NGC API key.
Enter "$oauthtoken" in "Username" and your "NGC API key" in "Password".
*If you do not have an NGC API key, create an account and log in by clicking "Welcome Guest" → "Sign In / Sign Out" in the upper right corner of the web page here (GPU-optimized AI, Machine Learning, & HPC Software | NVIDIA NGC), then create a key by clicking "Setup" → "Generate API Key" → "Generate Personal Key."
If you have been logged out, please log in again.
# NGCのAPIキーをパスワードに入れてログイン docker login nvcr.io Username: $oauthtoken Password: <PASTE_API_KEY_HERE>Step 3: Modify config.yaml (first time only)
Modify config.yaml, which defines the overall VSS configuration and dependencies.
Specifically, change the part that contains the default LLM model name (meta/llama-3.1-8b-instruct) to openai/gpt-oss-120b.
# ディレクトリ移動 cd video-search-and-summarization/deploy/docker/local_deployment_single_gpu# config.yaml内のLLMモデル名記載部分を変更 #変更前 chat_llm: type: llm params: model: meta/llama-3.1-8b-instruct #ここを変更 base_url: "http://host.docker.internal:8007/v1" max_tokens: 2048 temperature: 0.2 top_p: 0.7 summarization_llm: type: llm params: model: meta/llama-3.1-8b-instruct #ここを変更 base_url: "http://host.docker.internal:8007/v1" max_tokens: 2048 temperature: 0.2 top_p: 0.7 notification_llm: type: llm params: model: meta/llama-3.1-8b-instruct #ここを変更 base_url: "http://host.docker.internal:8007/v1" max_tokens: 2048 temperature: 0.2 top_p: 0.7#変更後 chat_llm: type: llm params: model: openai/gpt-oss-120b #変更済み base_url: "http://host.docker.internal:8007/v1" max_tokens: 2048 temperature: 0.2 top_p: 0.7 summarization_llm: type: llm params: model: openai/gpt-oss-120b #変更済み base_url: "http://host.docker.internal:8007/v1" max_tokens: 2048 temperature: 0.2 top_p: 0.7 notification_llm: type: llm params: model: openai/gpt-oss-120b #変更済み base_url: "http://host.docker.internal:8007/v1" max_tokens: 2048 temperature: 0.2 top_p: 0.7Step 4: Adding and modifying the env file (first time only)
Add the following content to the .env file in the local_deployment_single_gpu directory.
*A Hugging Face access token is required when using Cosmos-Reason2 as a VLM.
*If you do not have a Hugging Face access token, please register an account with Hugging Face to obtain one.
NGC_API_KEY=abc123*** #NGCのAPIキー HF_TOKEN=hf_*** #Hugging FaceのAPIキーStep 5: Set environment variables
Execute the following command.
# NGC APIキーを設定 export NGC_API_KEY=<PASTE_API_KEY_HERE> # NIMキャッシュディレクトリを設定 export LOCAL_NIM_CACHE="$HOME/.cache/nim"Step 6: Deploy LLM on GPU1
By adding the option --gpus "device=1", you specify that GPU1 will be used.
docker run -d -u "$(id -u)" -it --gpus "device=1" --shm-size=16GB -e NGC_API_KEY="$NGC_API_KEY" -v "$LOCAL_NIM_CACHE:/opt/nim/.cache" -p 8007:8000 nvcr.io/nim/openai/gpt-oss-120b:latestStep 7: Deploy Embedding NIM on GPU0
By adding the option --gpus "device=0", you specify that GPU0 should be used.
docker run -d -u "$(id -u)" -it --gpus "device=0" --shm-size=16GB -e NGC_API_KEY="$NGC_API_KEY" -v "$LOCAL_NIM_CACHE:/opt/nim/.cache" -p 8006:8000 -e NIM_SERVER_PORT=8000 -e NIM_MODEL_PROFILE="f7391ddbcb95b2406853526b8e489fedf20083a2420563ca3e65358ff417b10f" -e NIM_TRT_ENGINE_HOST_CODE_ALLOWED=1 nvcr.io/nim/nvidia/llama-3.2-nv-embedqa-1b-v2:1.9.0Step 8: Deploy Reranker NIM on GPU0
By adding the option --gpus "device=0", you specify that GPU0 should be used.
docker run -d -u "$(id -u)" -it --gpus "device=0" --shm-size=16GB -e NGC_API_KEY="$NGC_API_KEY" -v "$LOCAL_NIM_CACHE:/opt/nim/.cache" -p 8005:8000 -e NIM_SERVER_PORT=8000 -e NIM_MODEL_PROFILE="f7391ddbcb95b2406853526b8e489fedf20083a2420563ca3e65358ff417b10f" nvcr.io/nim/nvidia/llama-3.2-nv-rerankqa-1b-v2:1.7.0Step 9: Deploy VSS Agent (including VLM) on GPU0
Make sure the current directory is local_deployment_single_gpu and run the following command.
docker compose up -dStep 10: (Optional) Check the container log to see if it's running.
After executing the command in step 9, you can check the container logs with the following command.
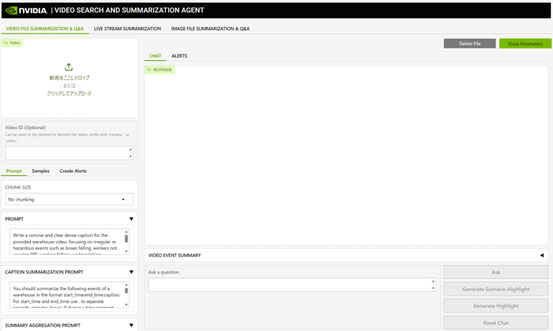
Look at the local_deployment_single_gpu-via-server-1 log and when you see Started server process, you can access the GUI from http://<internal IP address>:9100 or http://localhost:9100.
docker logs -f local_deployment_single_gpu-via-server-1Screen image when VSS GUI is started
Stop
To stop VSS, stop/remove the container with the following command:
# ディレクトリ移動 cd video-search-and-summarization/deploy/docker/local_deployment_single_gpu# VSSエージェント(VLMを含む) を停止/削除 docker compose down# LLM、Embedding NIM、Reranker NIMのコンテナを停止 docker stop <コンテナ名 または コンテナID># (必要に応じて)LLM、Embedding NIM、Reranker NIMのコンテナを削除 docker rm <コンテナID>Streamlined by consolidating into a shell script
If you put the commands explained in the previous chapter into a shell script so that they can be executed all at once, you can reduce the effort required for starting and stopping the system.
*Since you need to download the model, for the first deployment, do not run the shell script, but run the commands explained in the procedure one by one.
in conclusion
We hope this article will be helpful in making better use of VSS.
In VSS, the output quality of LLM directly affects usability.
By adopting LLM, which can handle more natural Japanese, video search and summary results will be easier to understand, improving the quality of user interaction.
Furthermore, the wider range of Japanese expressions makes it easier to design and adjust prompts, and increases the flexibility of improvements and operations according to the application, which can be said to be a practical benefit.
Macnica also provides support for installing VSS and selecting and supporting GPU workstations.
If you are considering implementing this system, please contact us using the inquiry button at the bottom.
Contact Us


NVIDIA RTX PRO 6000 Blackwell Max-Q Workstation Edition Desktop GPU
NVIDIA DGX™ Systems
NVIDIA® Jetson Thor™