Okta
Octa
Introduction
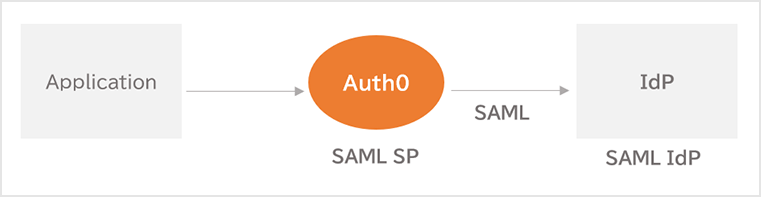
Auth0 can integrate SAML with both Service Provider (SP) and Identity Provider (IdP).
The SP uses the user account managed by the external IdP to log in to the Auth0 linked application.
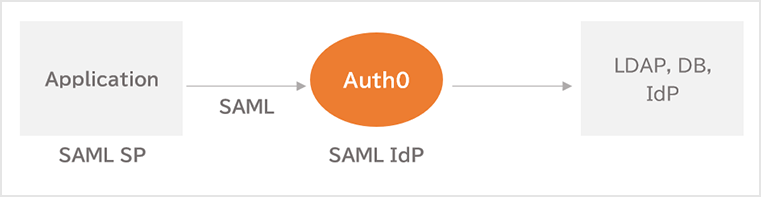
External IdP integration (SAML) with Auth0 Enterprise Connection function
The IdP uses user accounts managed by Auth0 to achieve authentication in applications.
This page introduces how to implement SAML authentication (SP-initiated) for Splunk Cloud using Auth0 and an example of how it works.
premise
The information on functions and settings described on this page is current as of June 2023.
In addition, Splunk Cloud uses the trial environment (Ver.9.0.2209.2) that can be issued from Splunk Cloud Trial.
Setting overview
The settings required to achieve Splunk Cloud SAML authentication with Auth0 are as follows.
- Get SP metadata to set Auth0 as IdP
- Application creation for setting Splunk Cloud as SP
- Granting Auth0 Roles to Auth0 Users
- Create a Rule to customize the SAML response
- SAML settings
- SAML group creation and Splunk role grant
The definitions of users, roles and groups in the setting example are as follows.
| Auth0 settings | Splunk Cloud settings | ||
| A user | Auth0 role | SAML group | Splunk roll |
| Auth0 user | admin | admin | sc_admin |
- Auth0 Roles and SAML Groups
During SAML authentication, assign the Auth0 user to a SAML group in Splunk Cloud based on the Auth0 role associated with the Auth0 user. Auth0 role information is passed to Splunk Cloud via SAML response. The process of including Auth0 role information in the SAML response is achieved by Auth0's Rules function.
supplement
Auth0 provides the Actions feature as the successor to the Rules feature. However, customizing SAML responses with the Actions feature is currently not supported.
Migrate from Rules to Actions - Auth0 docs
- SAML groups and Splunk roles
By assigning Splunk roles to SAML groups, you define the functions available on Splunk Cloud depending on which SAML group an Auth0 user belongs to.
Setting Example
- Get SP metadata to set Auth0 as IdP
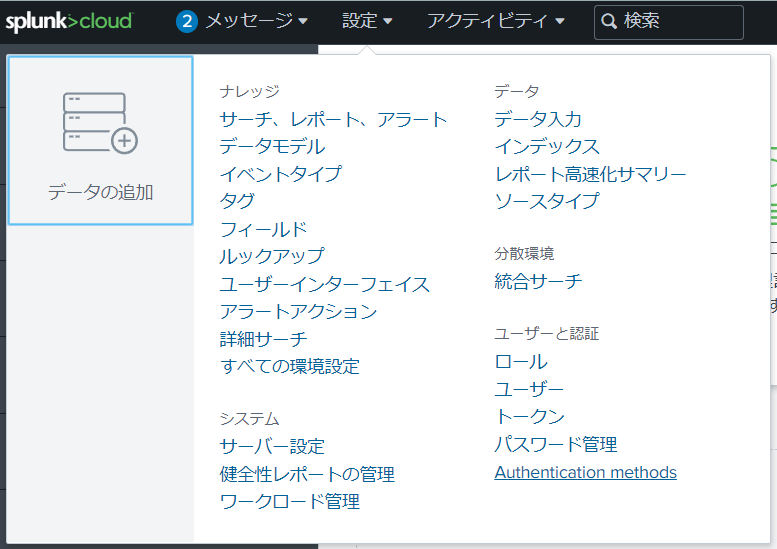
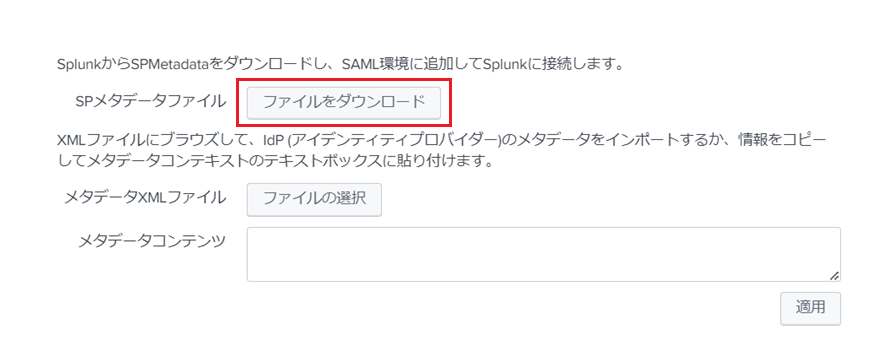
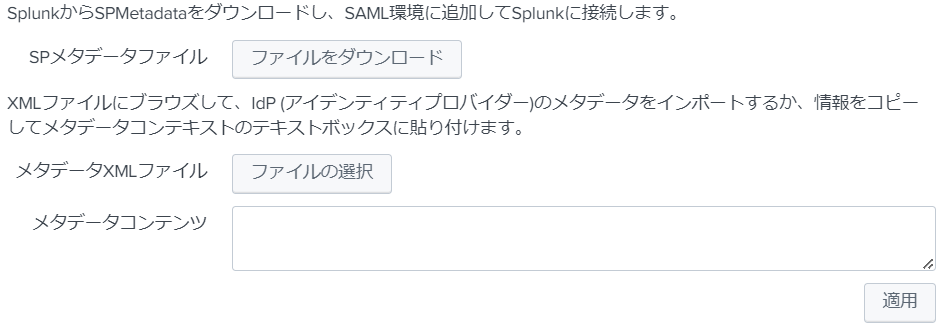
- In the Splunk Cloud dashboard, click Settings > Authentication methods
- Select SAML and click Configure Splunk to use SAML
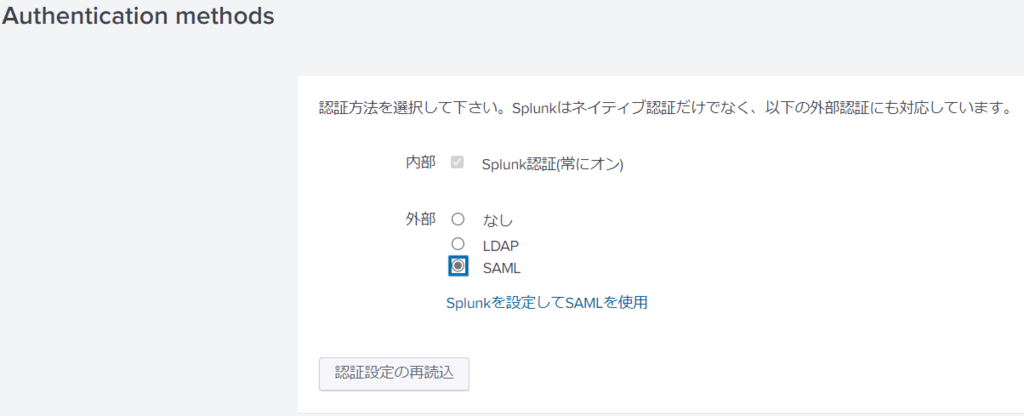
- Click Download File to download the SP metadata file
- Application creation for setting Splunk Cloud as SP
- On the Auth0 admin screen, click Applications > Applications
- Click [+ Create Application]
![Click [+ Create Application]](/business/security/okta/image/okta_auth0_saml_splunk_dr03.png)
- Set the following and click [Create]
- Name: Set any name
- Choose an application type: Select "Regular Web Applications"
![Set the following and click [Create]](/business/security/okta/image/okta_auth0_saml_splunk_dr04.png)
- In the [Addons] tab, click [SAML2 WEB APP]
![In the [Addons] tab, click [SAML2 WEB APP]](/business/security/okta/image/okta_auth0_saml_splunk_dr05.png)
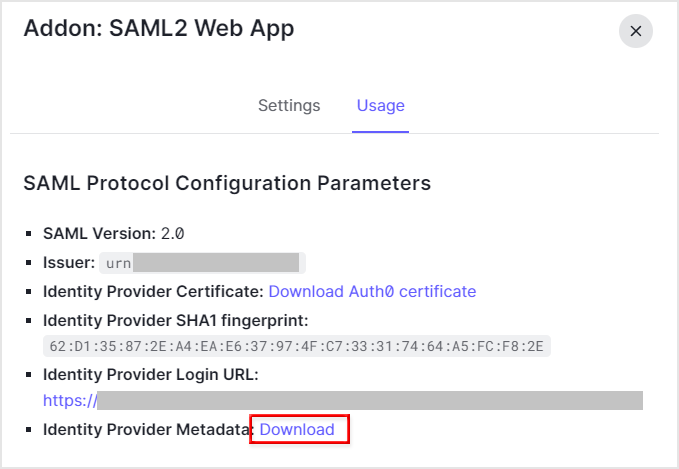
- In the Usage tab, download Identity Provider Metadata
- Add Application Callback URL and Settings on the [Settings] tab according to the contents of the SP metadata file obtained in "1. Splunk Cloud Settings (1) (SAML SP)"
- Application Callback URL: URL to send SAML assertions to SP after authentication
- nameIdentifierFormat: NameID format (specify email address)
- nameIdentifierProbes: Values to use for NameID (specify email address value)
- callback: URL to which Auth0 requests logout
- slo_enabled(true): Request logout to SP side when logging out on IdP side
- signatureAlgorithm: Signature algorithm to use for SAML Assertion/Response (specify RSA-256)
- signingCert: Public key certificate used to validate SAML Request
{
  "nameIdentifierFormat":"urn:oasis:names:tc:SAML:1.1:nameid-format:emailAddress",
  "nameIdentifierProbes": [
    "http://schemas.xmlsoap.org/ws/2005/05/identity/claims/emailaddress"
  ],
  "logout": {
    "callback": "{SingleLogoutService > Location > URLにて取得した値}",
    "slo_enabled": true
  },
  "signatureAlgorithm": "rsa-sha256",
  "signingCert": "-----BEGIN CERTIFICATE-----\n{X509Certificateの中身}\n-----END CERTIFICATE-----\n"
}
![Add Application Callback URL and Settings on the [Settings] tab according to the contents of the SP metadata file obtained in "1. Splunk Cloud Settings (1) (SAML SP)"](/business/security/okta/image/okta_auth0_saml_splunk_dr2_04.png)
- Click [Enable]
![Click [Enable]](/business/security/okta/image/okta_auth0_saml_splunk_dr2_05.png)
- Confirm that the settings are reflected correctly

- Confirm that [SAML2 WEB APP] is ON
![Confirm that [SAML2 WEB APP] is ON](/business/security/okta/image/okta_auth0_saml_splunk_dr10.png)
- Granting Auth0 Roles to Auth0 Users
- Grant Auth0 role: admin to Auth0 user

- Create a Rule to customize the SAML response
- On the Auth0 admin screen, click [Auth Pipeline] > [Rules]
- Click + Create
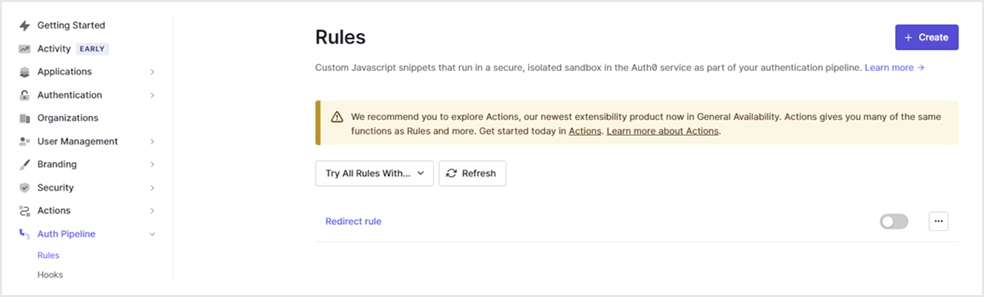
- Click [<> Empty rule]
![Click [<> Empty rule]](/business/security/okta/image/okta_auth0_saml_splunk_dr13.png)
- Set the following and click [Save Changes]
- Name: Set any name
- Script: Describe the process of embedding the login user's role information in the SAML response
function (user, context, callback) {
	// Get the user roles from the Authorization context
	const assignedRoles = (context.authorization || {}).roles;
	// Update the user object.
	user.rolez = assignedRoles;
	callback(null, user, context);
}
![Set the following and click [Save Changes]](/business/security/okta/image/okta_auth0_saml_splunk_dr14.png)
- Confirm that it is reflected correctly

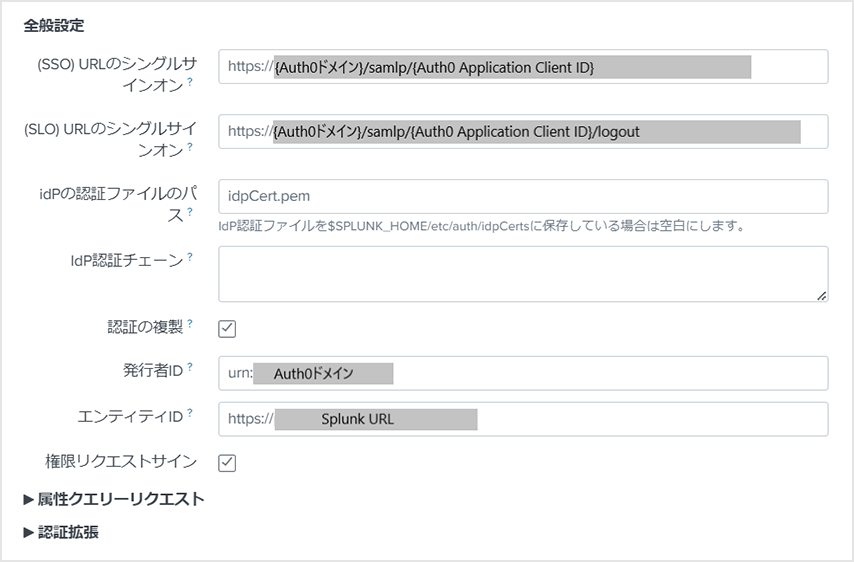
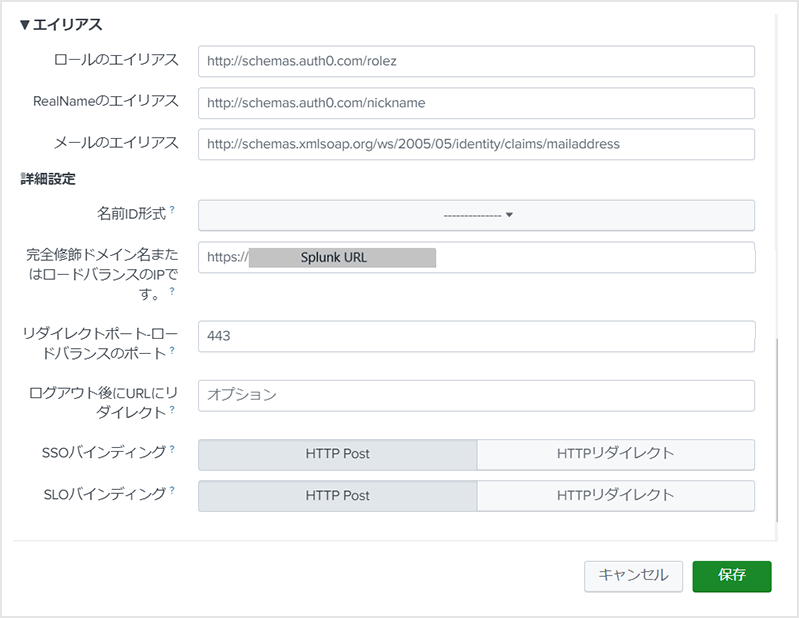
- SAML settings
- Click [Select File] and upload the Identity Provider Metadata file obtained in "2. Auth0 Settings (SAML IdP)"
- Set the following and click [Save]
- set entity id
* Set the value of the Entity ID described in the SP metadata obtained in "1. Splunk Cloud Settings (1) (SAML SP)" - Role Alias: http://schemas.auth0.com/rolez
*Role aliases defined in the Auth0 Rules function in "2. Auth0 Settings (SAML IdP)" - Alias for RealName: http://schemas.auth0.com/nickname
- Email alias: http://schemas.xmlsoap.org/ws/2005/05/identity/claims/emailaddress
- SAML group creation and Splunk role grant
- Click [New Group]
![Click [New Group]](/business/security/okta/image/okta_auth0_saml_splunk_dr21.png)
- Set the following and click [Save]
- Group Name: Same name as the corresponding Auth0 role
- Splunk role: select the Splunk role to assign
![Set the following and click [Save]](/business/security/okta/image/okta_auth0_saml_splunk_dr22.png)
Operation example

in conclusion
On this page, we introduced an example of implementing SAML authentication using Auth0, using Splunk Cloud as an example. By implementing SAML authentication with Auth0, you can use multi-factor authentication and Auth0's login security features together.
You can also try the SAML authentication function in the free Auth0 trial environment. If you are interested in Auth0's SAML authentication capabilities, please contact us.
reference
Inquiry/Document request
In charge of Macnica Okta Co., Ltd.
- TEL:045-476-2010
- E-mail:okta@macnica.co.jp
Weekdays: 9:00-17:00