- 半導体事業HOME
- マクニカの製品・サービス
-
技術情報

-
イベント・セミナー
- 取扱メーカー
- サポート
- お問い合わせ
- 製品購入はこちら
- 半導体事業のメルマガ登録
![]()
![]() 条件を指定して絞り込む
条件を指定して絞り込む
現在2164件がヒットしています。check

概要
NXP社のi.MX8M PlusとHailo社のAIアクセラレーターHailo-8を組み合わせて、小型のEdge-AIシステムを構築してみました。
その手順をまとめてみましたので、小型/高性能/低消費電力のAI実行環境が欲しい方はぜひお試しください!
<今回使用した主な製品>
・LEC-IMX8MP-Q-N-4G-32G-ER (NXP i.MX 8MPlus搭載SMARCショートサイズモジュール, 4G RAM, NPU内蔵、温度拡張品(-40℃~85℃))
https://www.adlinktech.com/Products/Computer_on_Modules/SMARC/LEC-IMX8MP?lang=ja
NXP社 i.MX8M Plus搭載のSMARCモジュールです
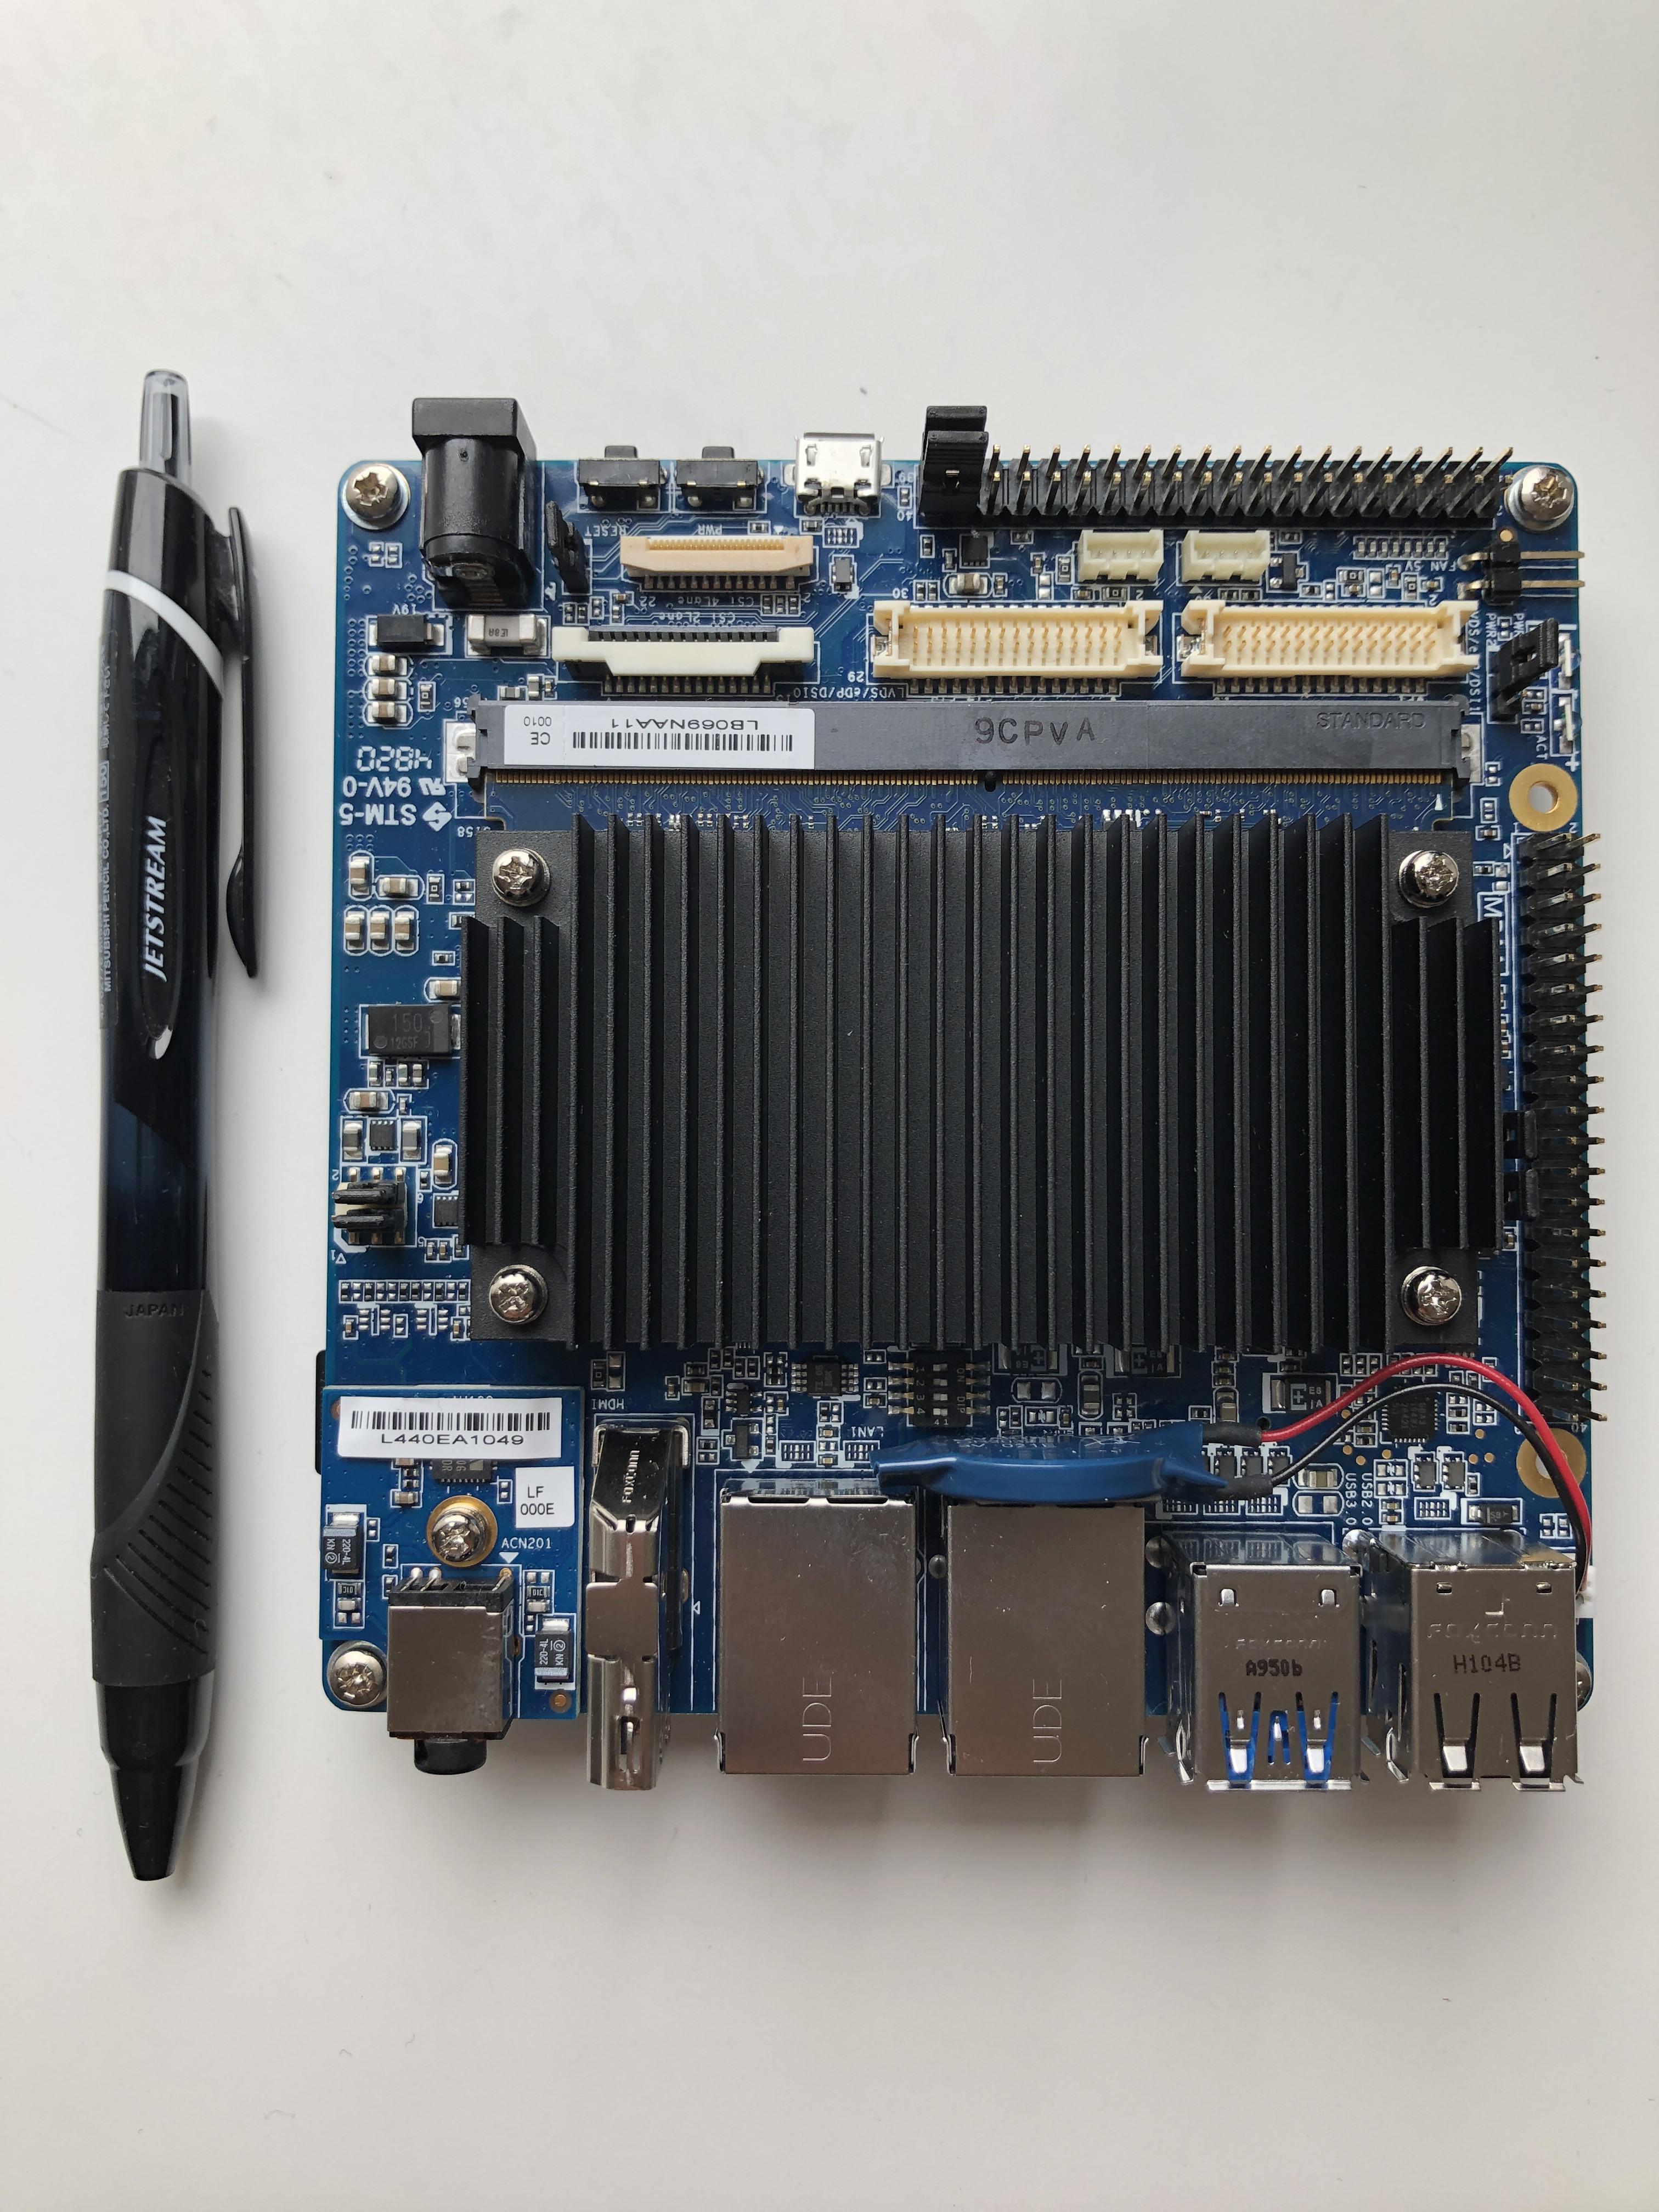
・I-Pi SMARC IMX8M Plus
https://www.ipi.wiki/pages/i-pi-smarc-imx8m-plus
キャリアボードを含む上記SMARCモジュールのStarter Kitです。
(Starter Kitには2GRAMのSMARCモジュールが含まれておりますが、今回は4GRAMの上記SMARCモジュールに差し替えております)
・Hailo-8 M.2 Module(B+M Key)
https://hailo.ai/product-hailo/hailo-8-m2-module/
Hailo社のAIアクセラレーター搭載のM.2モジュールです
セットアップ手順
事前準備(ハードウェア)
I-Pi SMARC IMX8M Plusは下記リンクに従い組み上げてください。
https://www.ipi.wiki/pages/imx8mp-docs?page=index.html
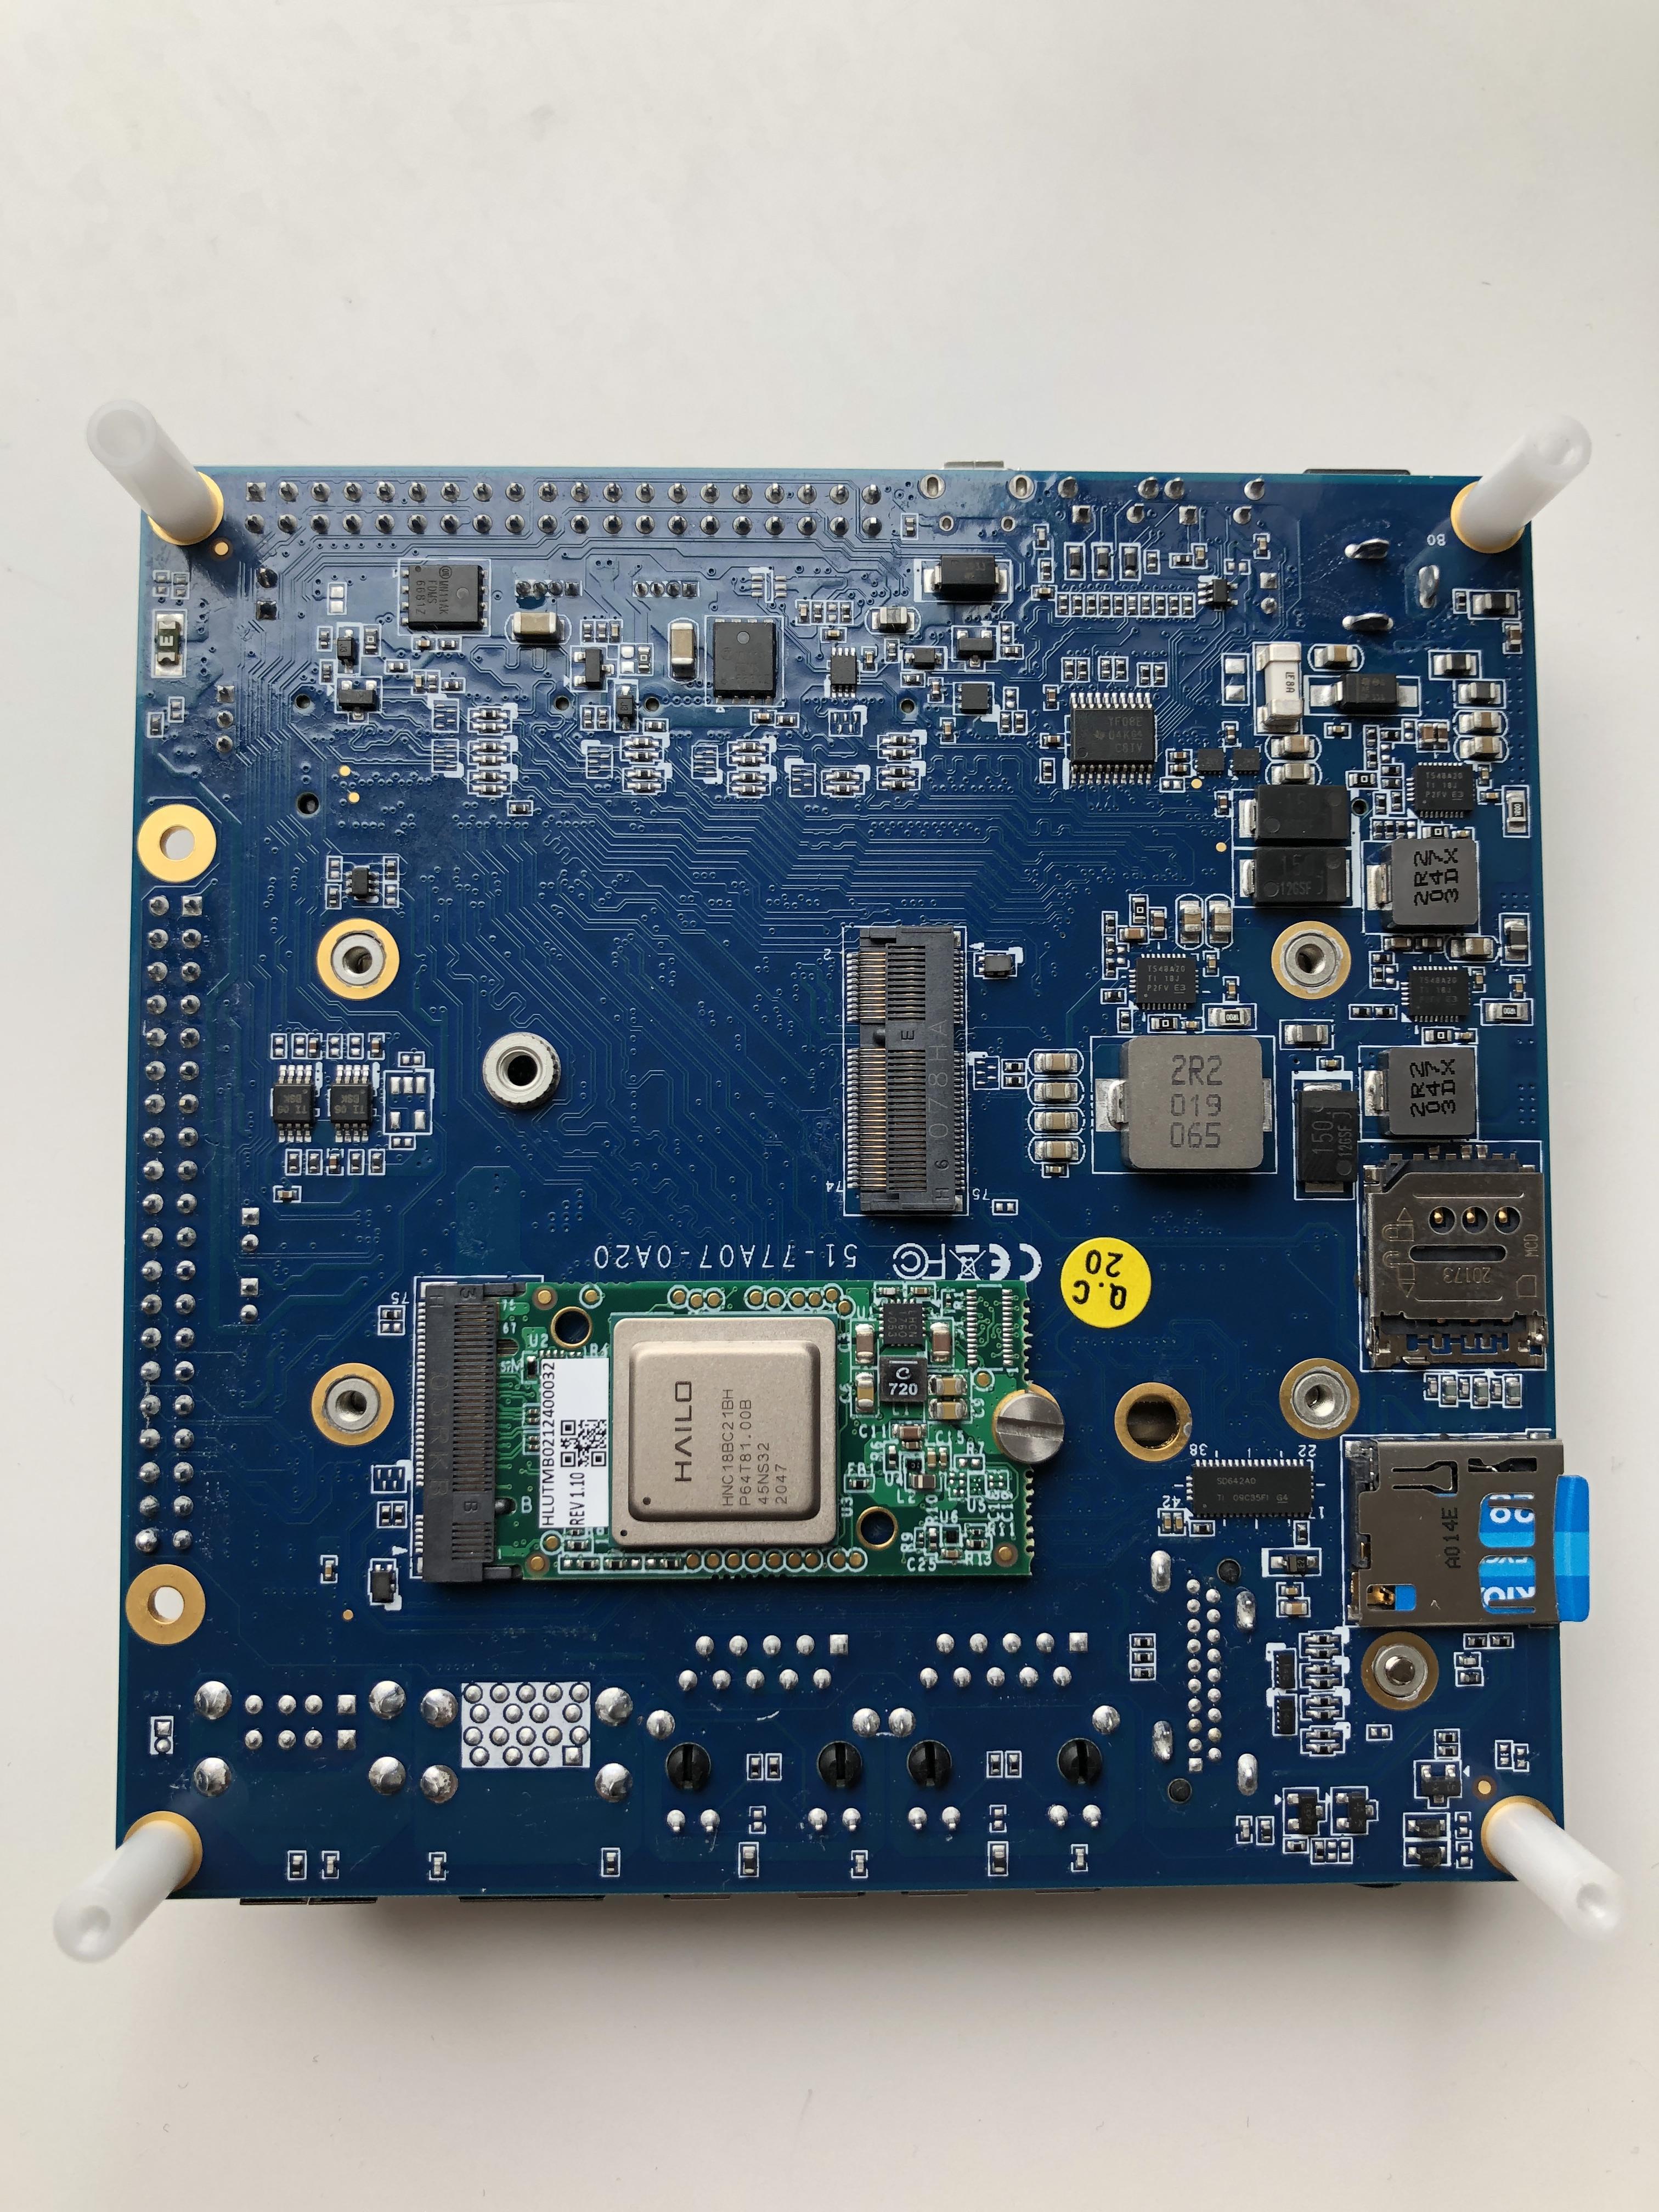
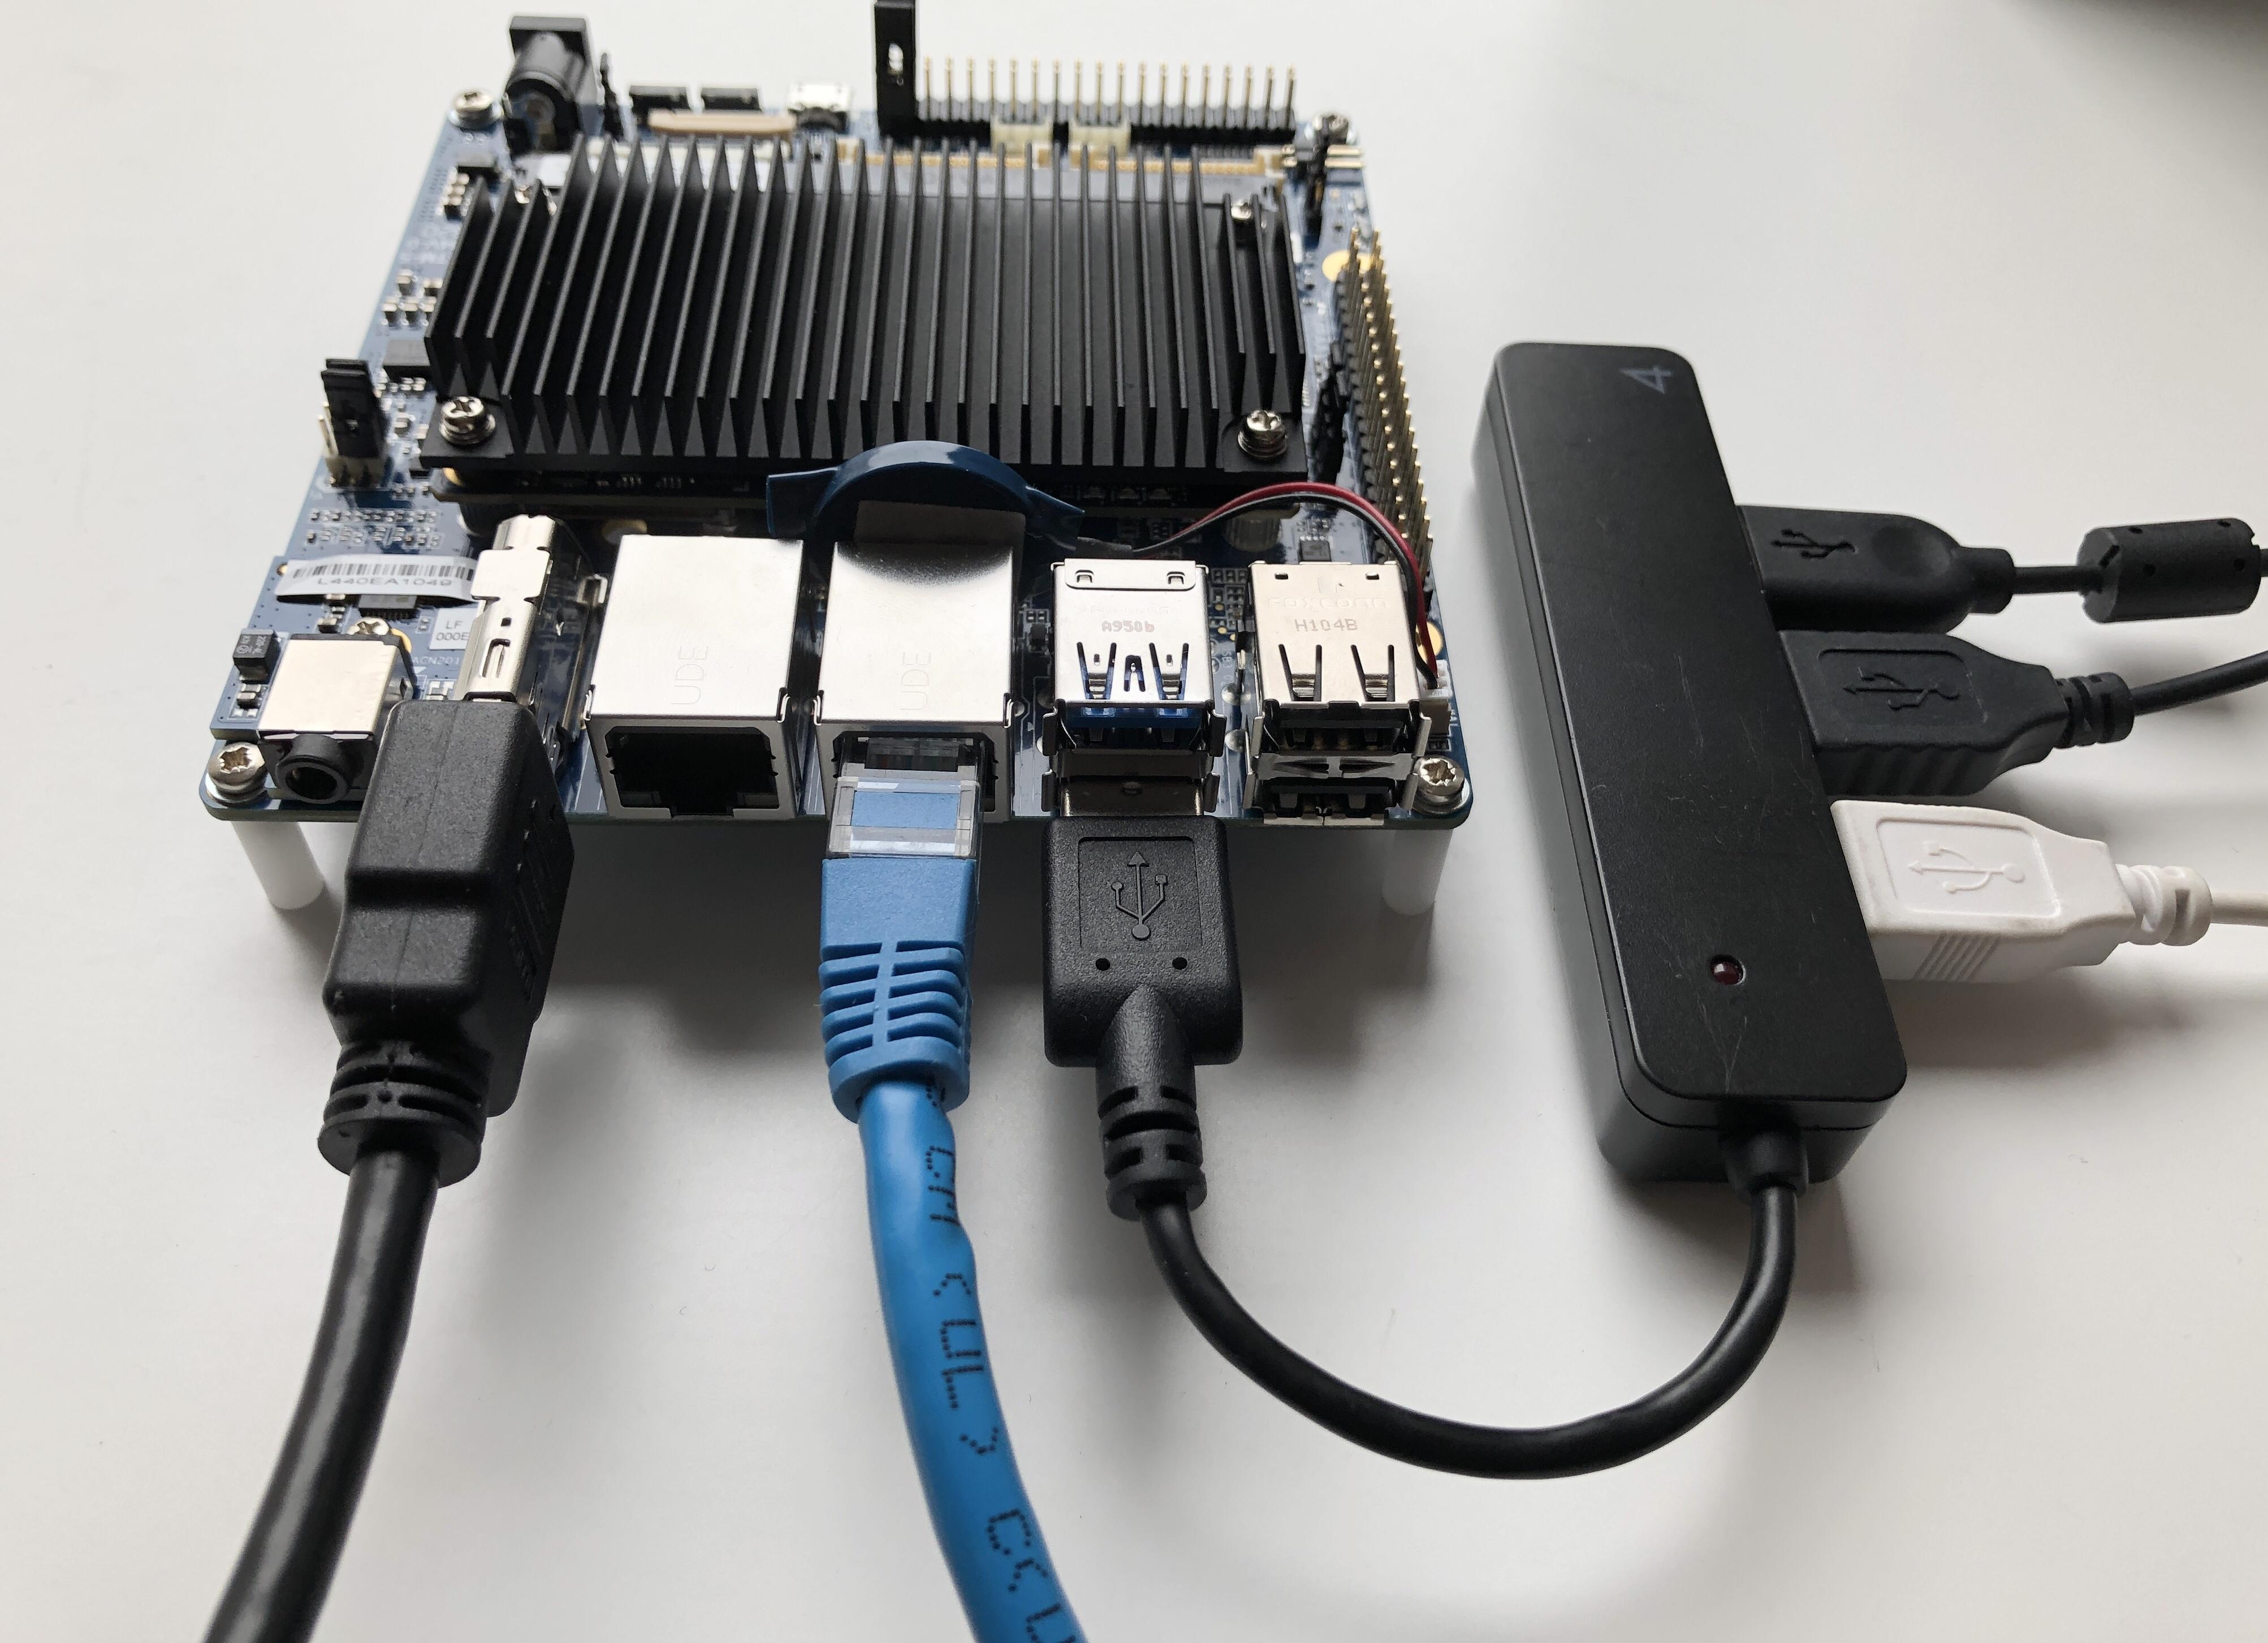
次に背面にHailo-8 M.2 module(B+M key)を挿して固定します。
完成形は以下の写真のようになります。
キャリアボードも110mm x 110mmなので小型であることを実感いただけるかと思います。
事前準備(SDカード)
今回はOSとしてADLINK社が準備しているUbuntu20.04のイメージファイルをそのまま利用します。
以下リンクよりUbuntuのところの「+」ボタンを押して(All Releasesを表示させて)、「LEC-IMX8MP-4G-IPi-SMARC-PLUS-Ubuntu20_04-1v2-20220425.img」をダウンロードします。
https://www.ipi.wiki/pages/downloads-imx8mplus
次に128GのmicroSDカードを準備し、上記でダウンロードしたイメージファイルを書き込みます。
(Hailo社提供のデモツールのサイズが大きいので128G以上のmicroSDカードが必要になります)
今回はWin32DiskImagerを使って書き込みました。
Win32DiskImager上でイメージファイルの選択、microSDカードドライブの確認をして、Writeボタンで書き込み実行します。
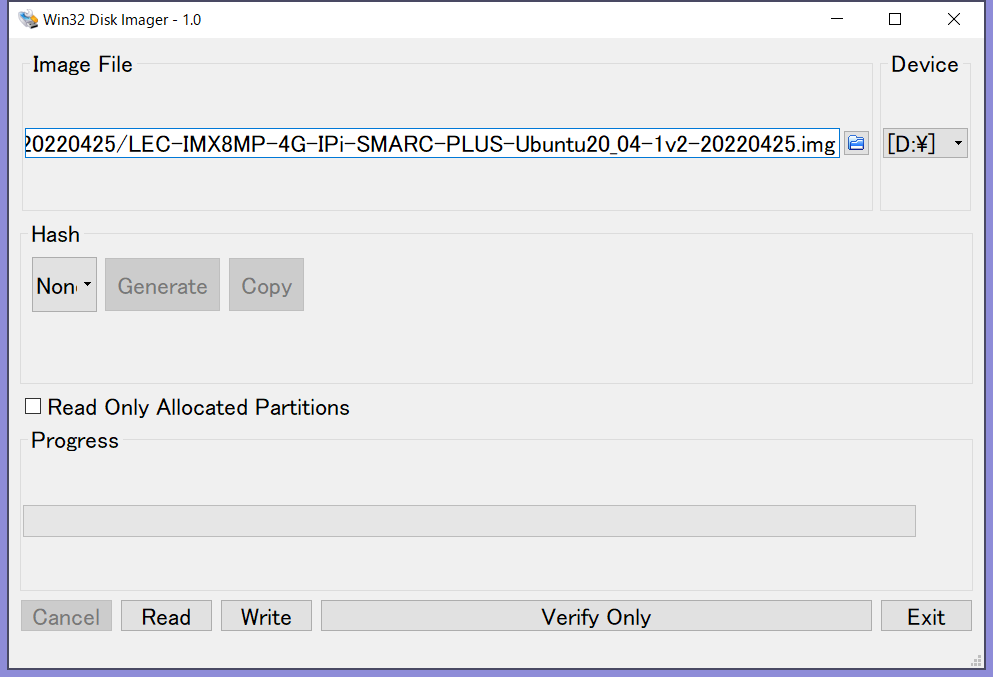
書き込みが成功すればmicroSDカードの準備は完了です。
事前準備(各種設定/接続)
以下の設定/接続を実施します
・イメージ書き込み済みのmicroSDカードのスロットへの挿入
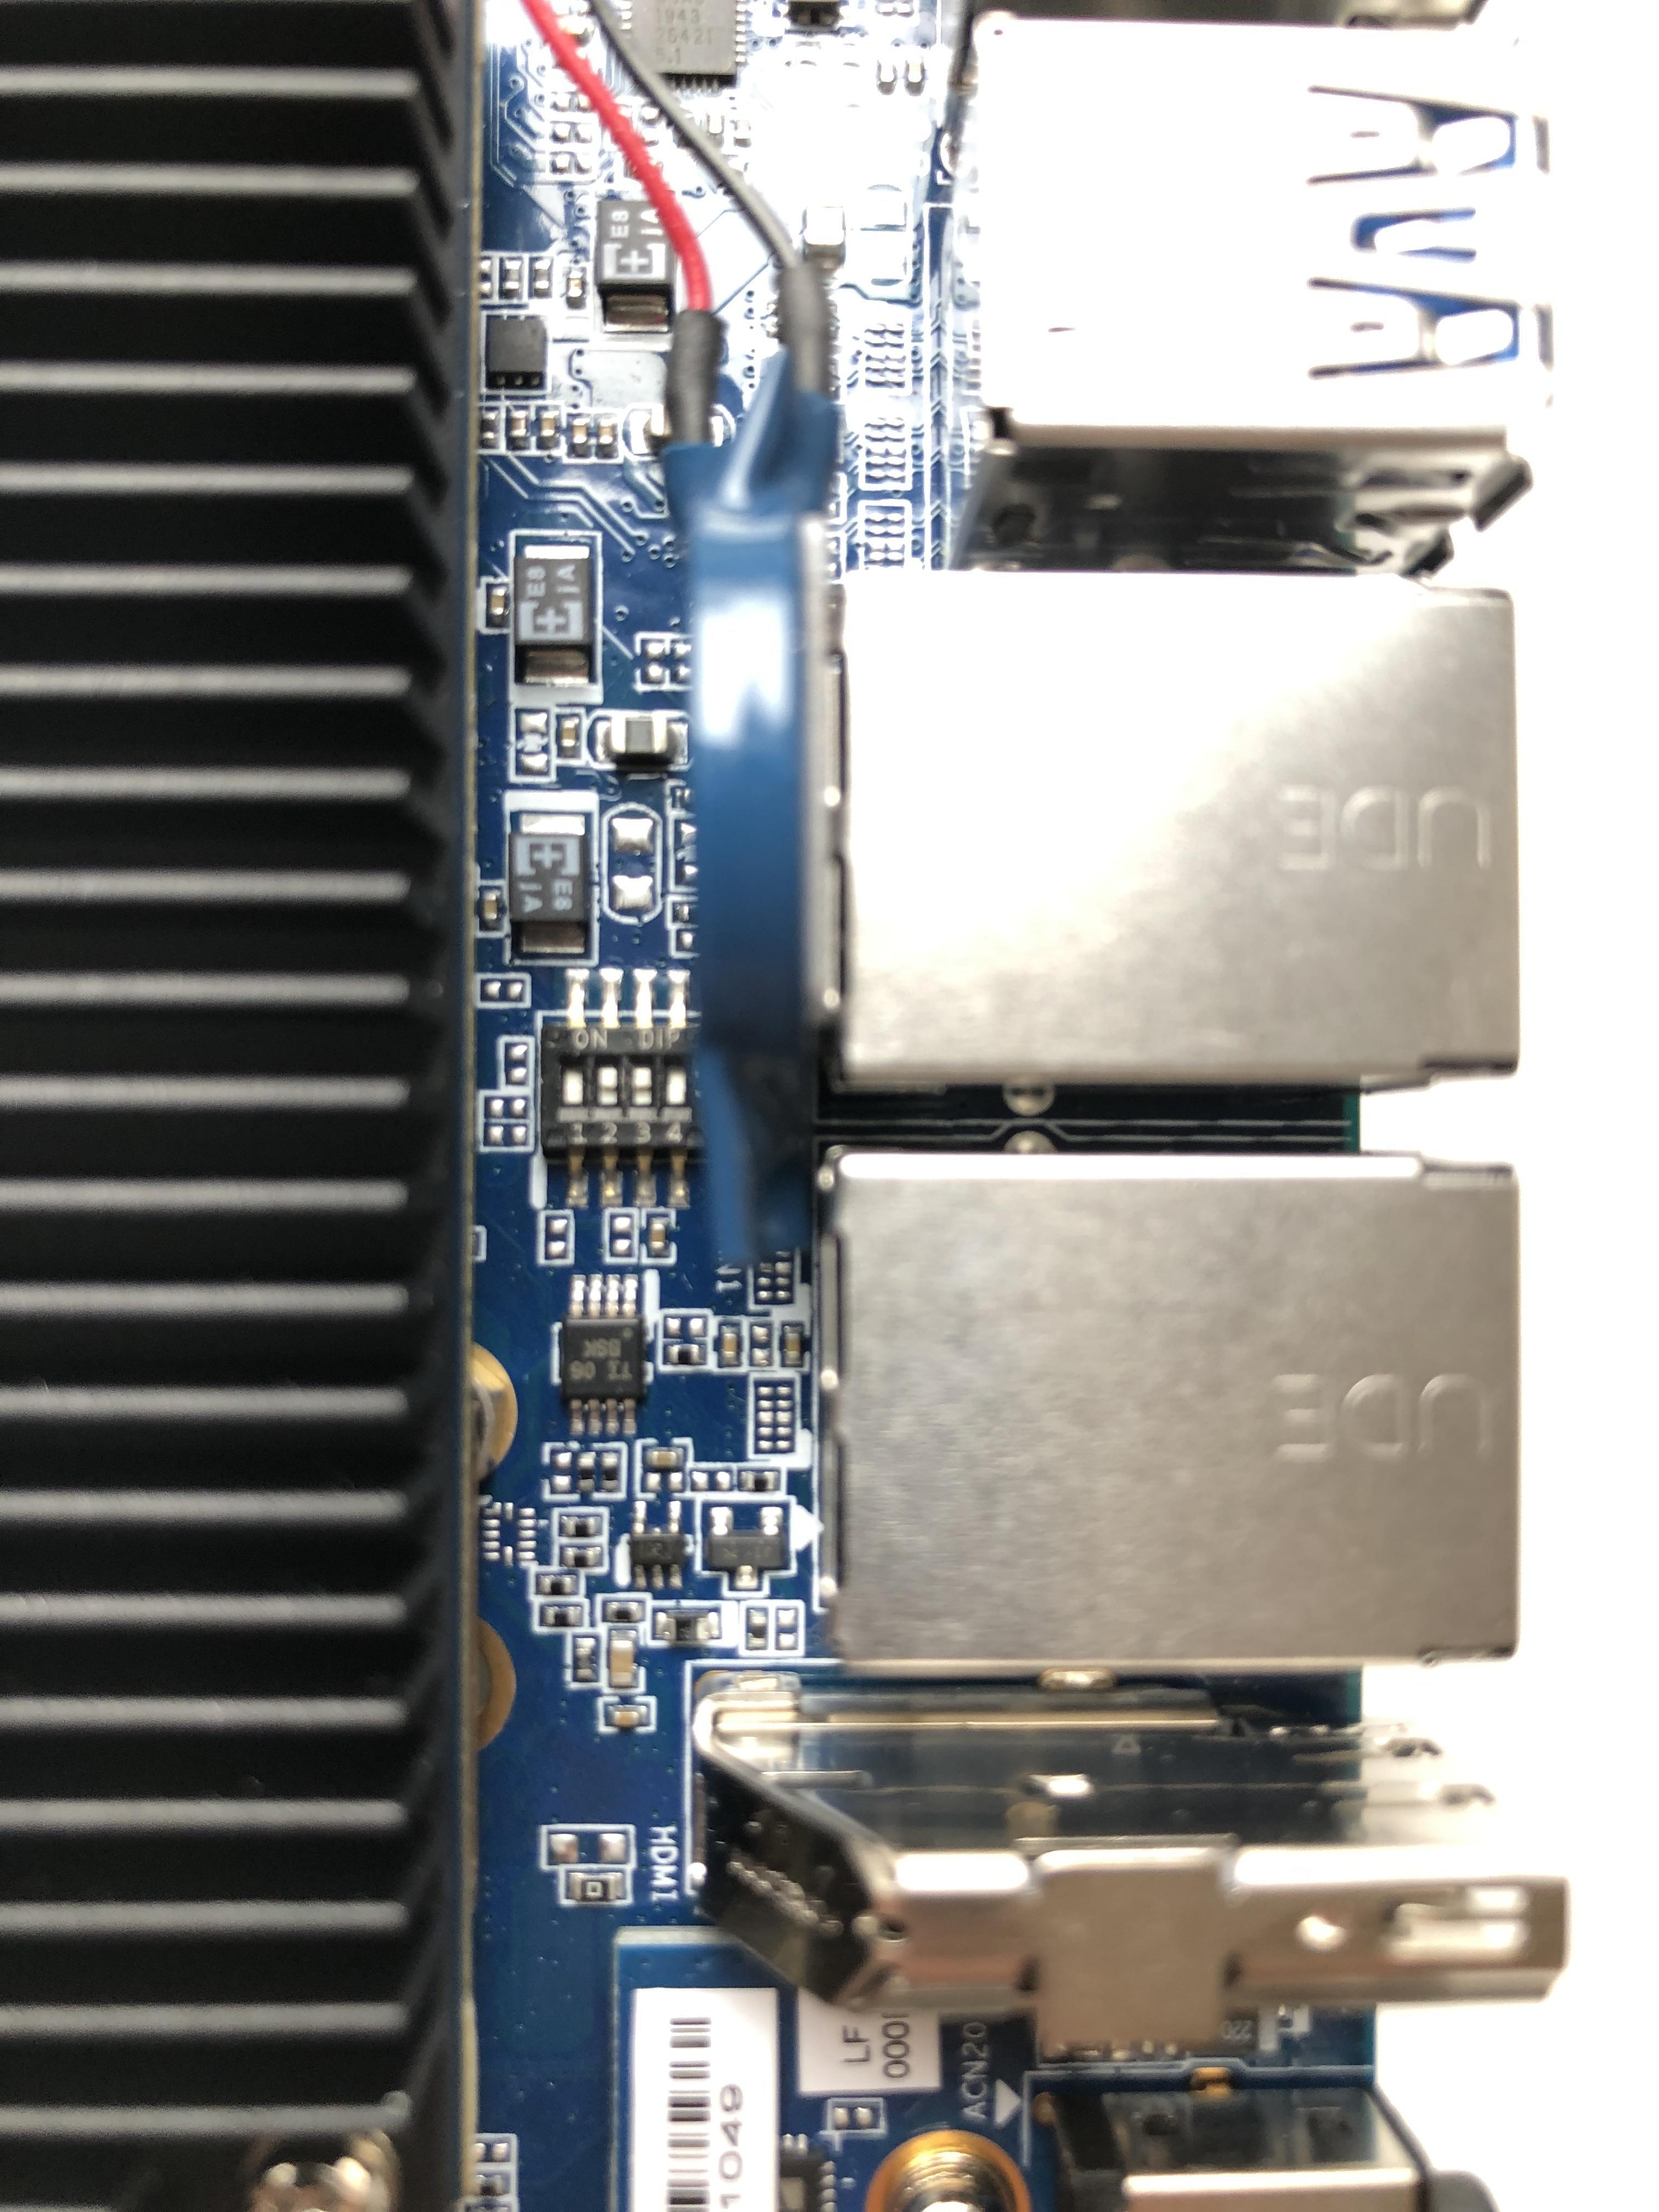
・ブートデバイスをmicroSDカードに設定
以下左の写真のようにDIP SWを"0110"に設定ください
・HDMIケーブルでモニターと接続
・LANケーブルの挿入
・USBマウス/キーボードの接続
※今回使用のSMARCモジュールではUSBポートが一つしか使えません。
以下右の写真のように、左下のコネクターにUSB Hubをつなげてご使用ください
最後に電源アダプターを接続し起動します。
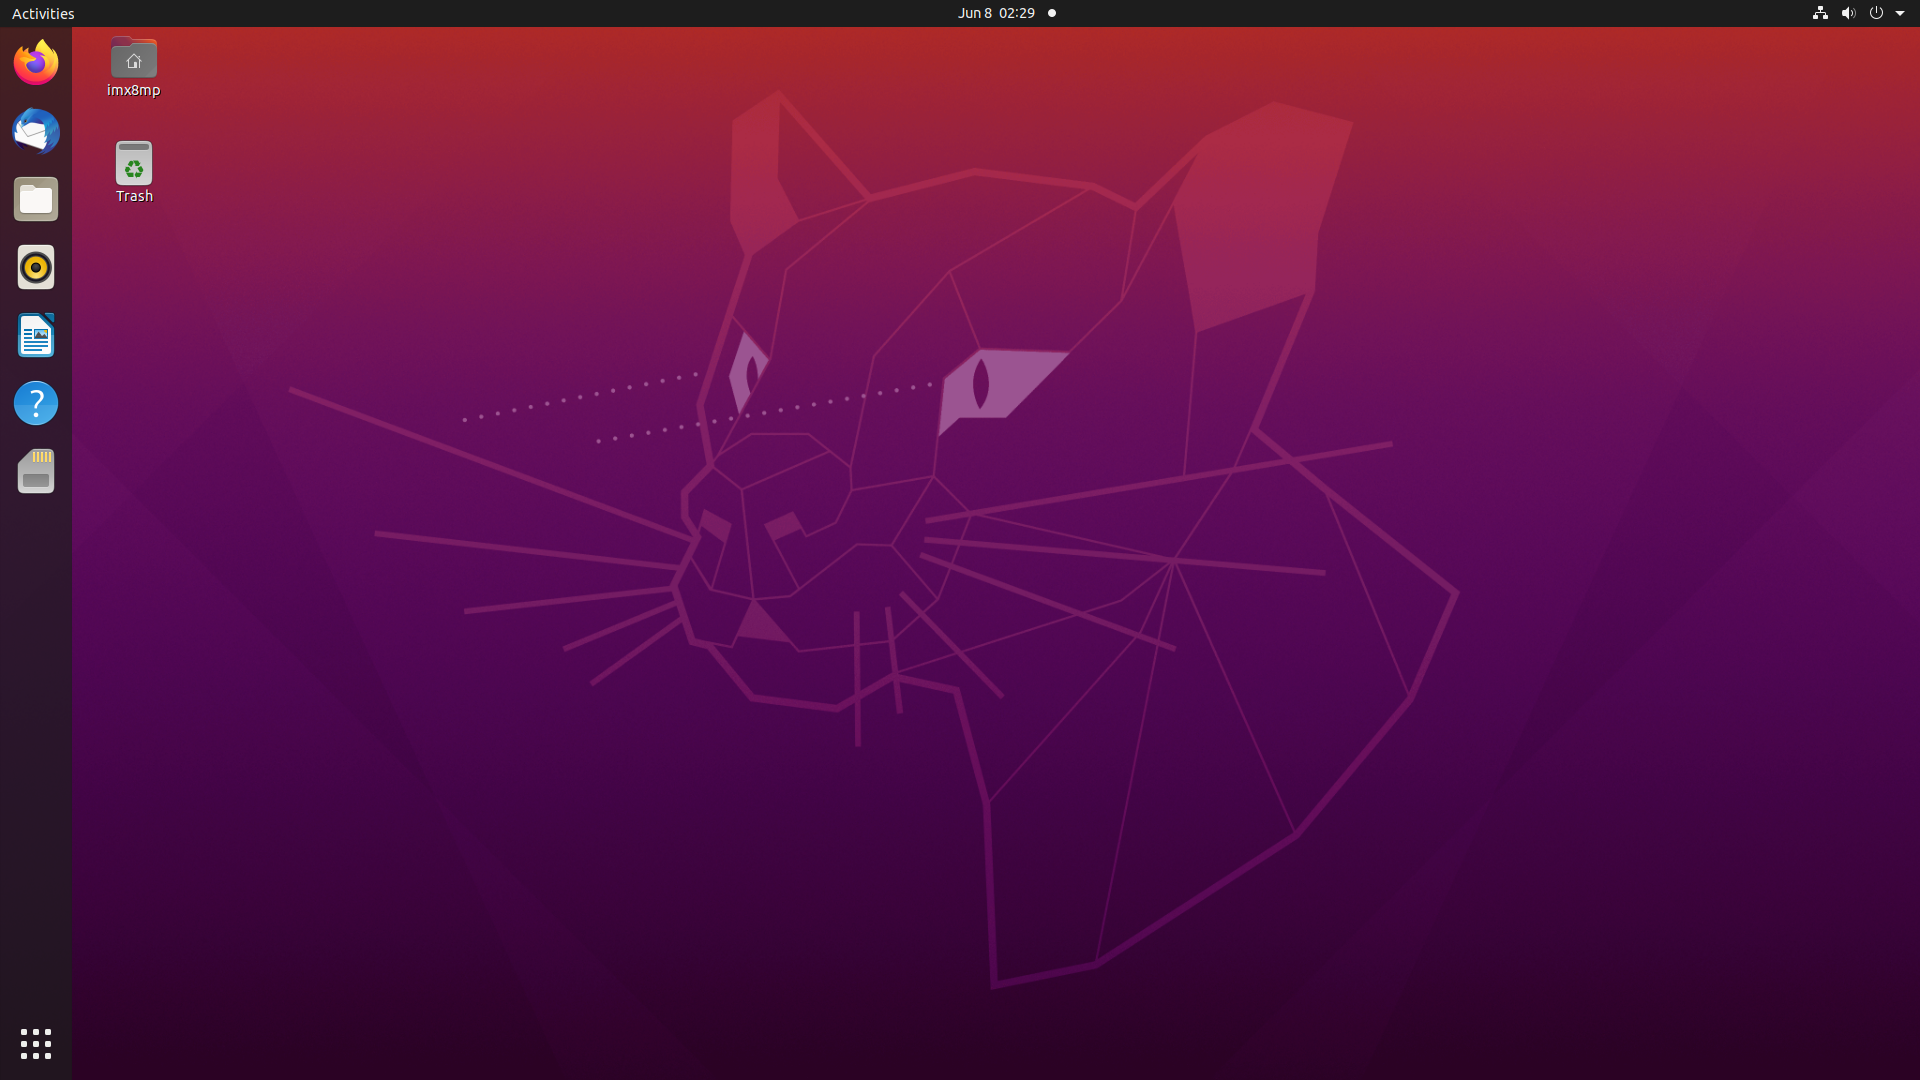
事前準備がうまくいけば以下のようにUbuntu20.04の画面がHDMIモニターに表示されます。
(ログイン画面でのパスワードは"adlink"です)
Hailo関連ツールのインストール
Ubuntuセットアップ
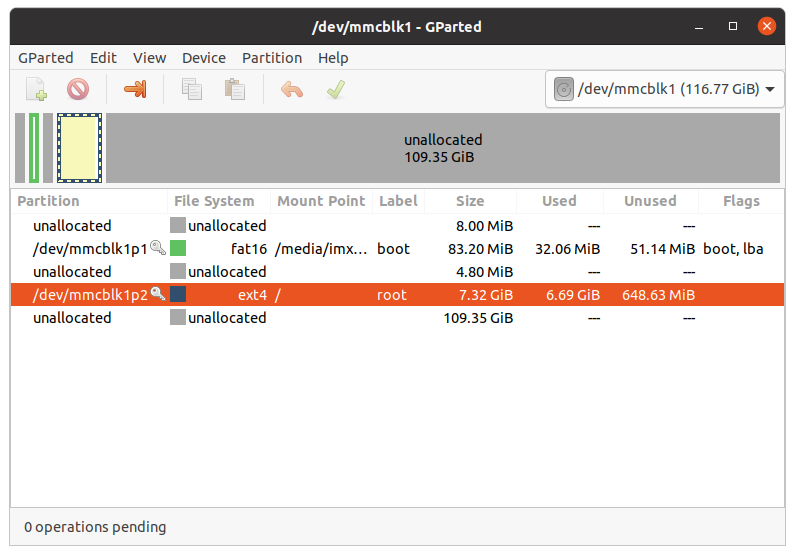
UbuntuイメージファイルをSDカードに書き込んですぐの状態では、SDカードの空き容量が残りわずかの状態となっております。
今回はgpartedにより空き容量を拡張しました。
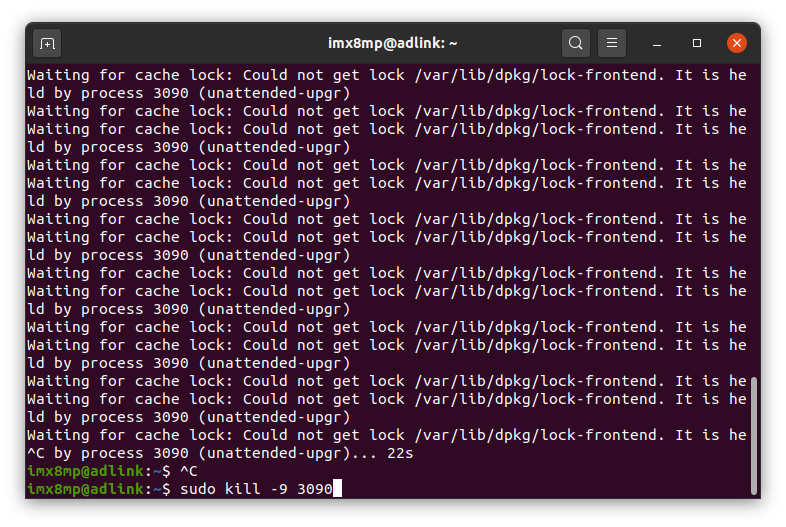
sudo apt install gparted
によりインストールするのですが、動いているProcessが発生したのでkillコマンドで停止させ、再度インストールを実行しました。毎回発生するかは分かりませんが、念のため下記に画面を載せておきますので、発生時には参考にしてください。
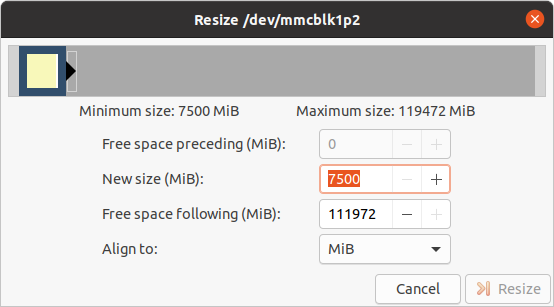
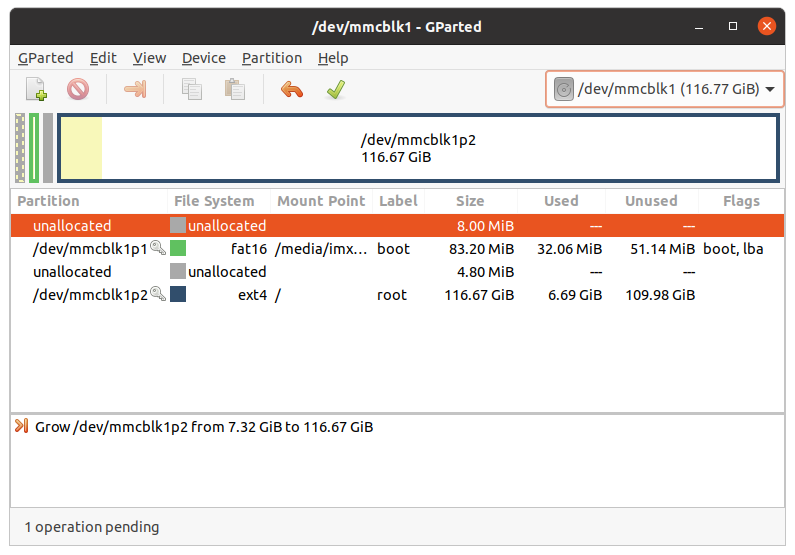
gpartedインストール後、sudo gpartedにて起動します。
下記左図の黄色のところを選択し右クリックでResizeを実行します。そうすると下記真ん中図の画面となりますのでドラックして最大値まで引っ張ります。その後、Edit→Apply All Operations で反映させれば完了です(下記右図)
次に念のため、sudo apt updateとupgradeは実行しておきました。
(upgradeは結構な時間がかかります・・・)
HailoRTインストール
次にHailoの環境をインストールしていきます。
今回インストールするツールを以下に簡単に説明します。
HailoRT---Hailo Runtime。HailoのHWへアクセスするためのAPI集であり、HailoRTを介して推論を実行する
Tappas---様々なネットワークモデルを確認できるデモアプリケーション
それぞれ以下のHailo Websiteよりダウンロード可能ですが、ユーザー登録するだけではダウンロードできるようになりませんのでご注意ください。
ご興味ございましたら弊社までお問い合わせをお願いします。
https://hailo.ai/developer-zone/sw-downloads/
今回はHailoRTはVer4.5.0、TappasはVer3.16.0を使っています。
それではHailoRTのインストールに移ります。
基本的にはHailoRTのマニュアルが用意されておりますので、そこに沿えば難しくはありません。今回はUbuntu Installerを使用しています。
必要なパッケージとして以下が指定されていますので、最初にaptでインストールしておきます。
• build-essential package (needed to compile the PCIe driver)
• (Optional) bison, flex, libelf-dev and dkms packages (needed to regsiter the PCIe driver using DKMS)
• (Optional) cmake (needed to compile the HailoRT examples)
• (Optional) pip and virtualenv (needed for pyhailort)
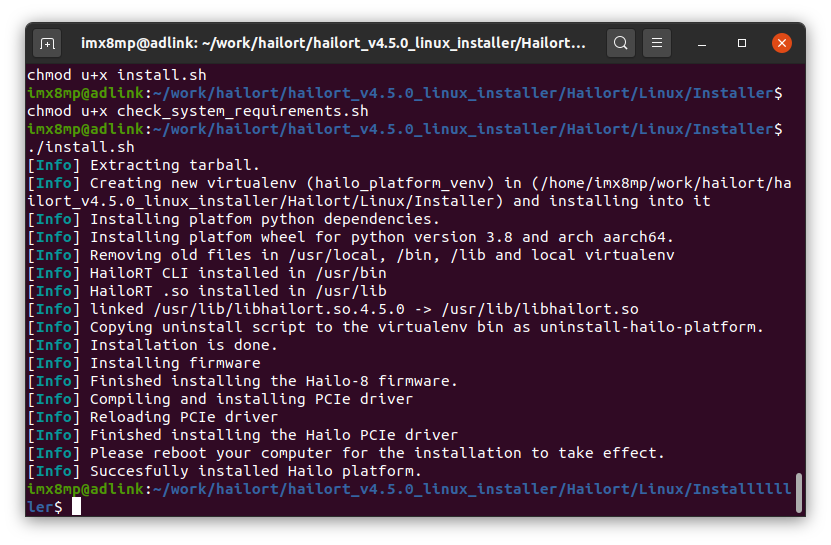
ダウンロードファイルの中にinstall.shというシェルスクリプトが用意されていますので、こちらを実行するだけで簡単にインストールできます。
(インストール画面は下記左図です)
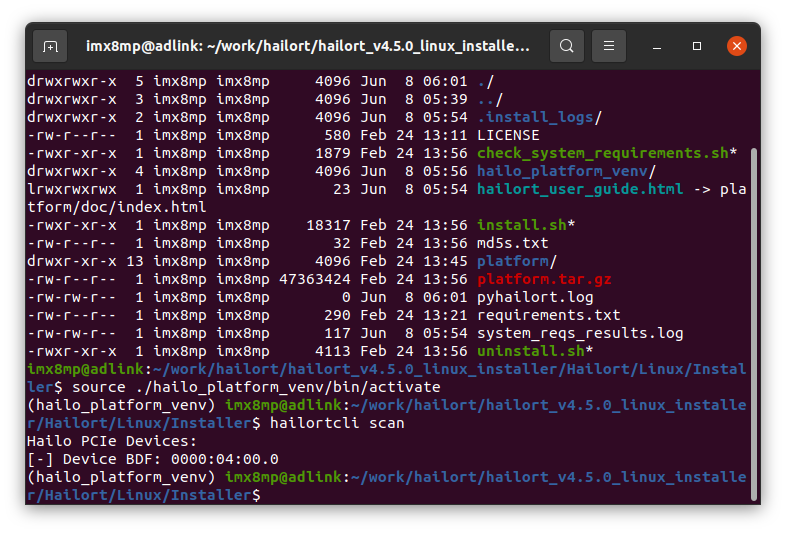
インストール後再起動すれば完了です。
動作確認として、HailoRTの仮想環境に入りscanを実行すると無事HailoのHWの認識ができていました(下記右図)。
Tappasインストール
次にTappasインストールですが、こちらもマニュアルに沿ってインストールいただければ難しくはないです。
最初にDockerをインストールする必要がありますが、こちらはすでに入っていましたので念のためDocker groupへの登録のみしておきました。
sudo usermod -aG docker $USER
今回はpre-built Docker imageを使用せずに"Build Docker image by your own"でインストールしております。
ダウンロードするファイルは小さいですが、自分でDocker imageをBuildするので時間がかかります(実はあとで後悔しましたが・・・)。
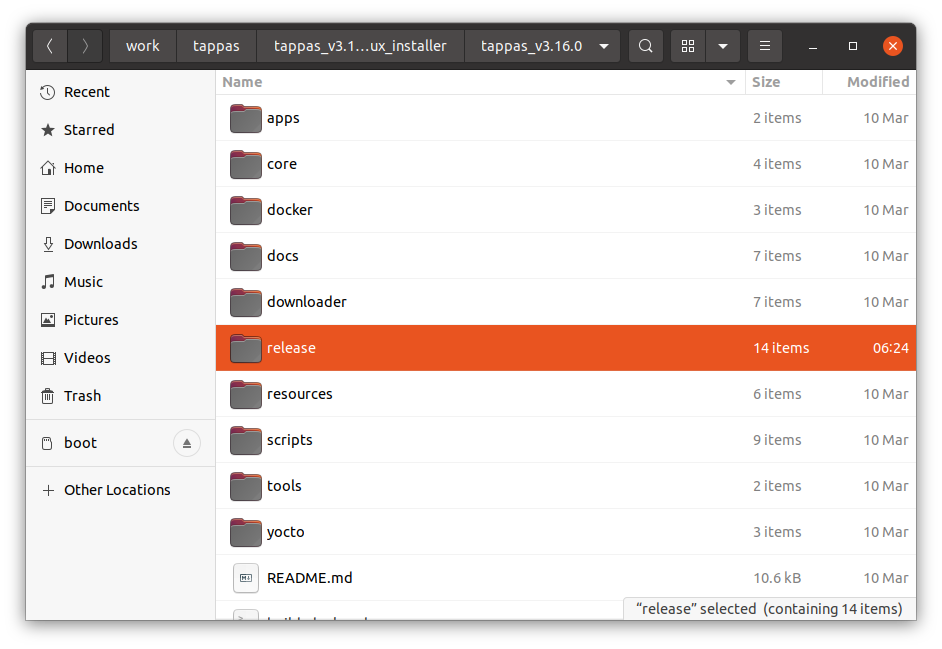
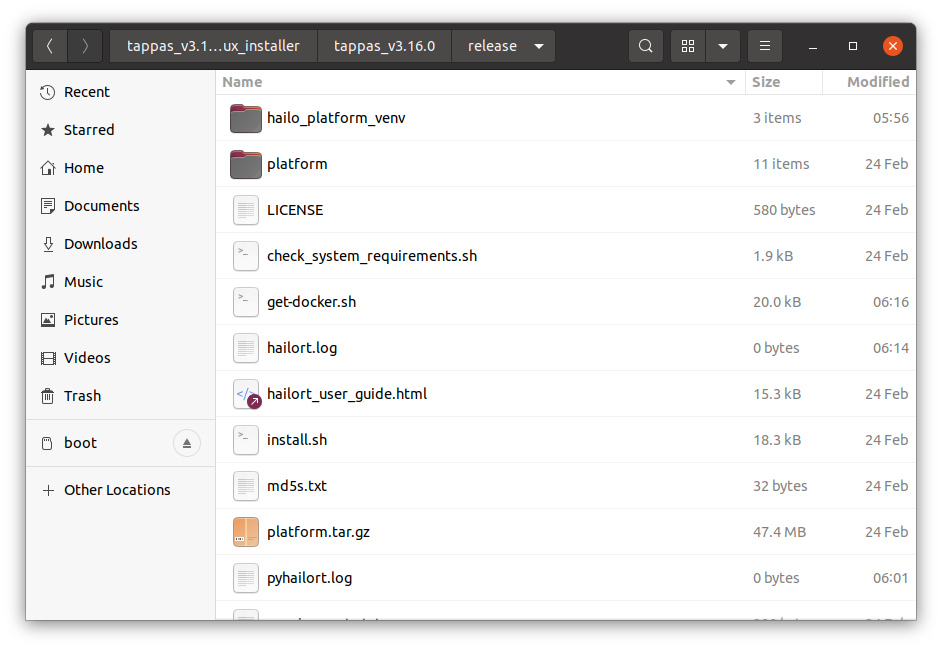
この場合はHailoRTのインストールフォルダーを丸ごとreleaseフォルダーへコピーすることが必要であり、以下のような感じになります。
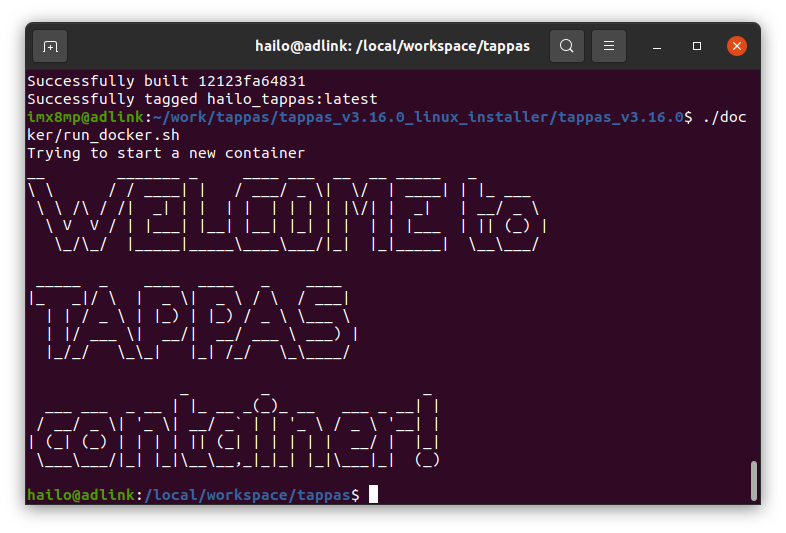
その後、DockerのBuildとRunをさせていきますが、いずれもシェルスクリプト(build_docker.sh, run_docker.sh)が用意されており、自分でコマンドを打つ必要はなく簡単にインストールできます。
ただし、Buildには5時間ぐらいかかりましたので、シェルスクリプトを実行したら放置推奨です。
(ARMベースCPUなのでこのあたりは仕方がないですね。次回以降はクロスコンパイルなど検討したいと思います)
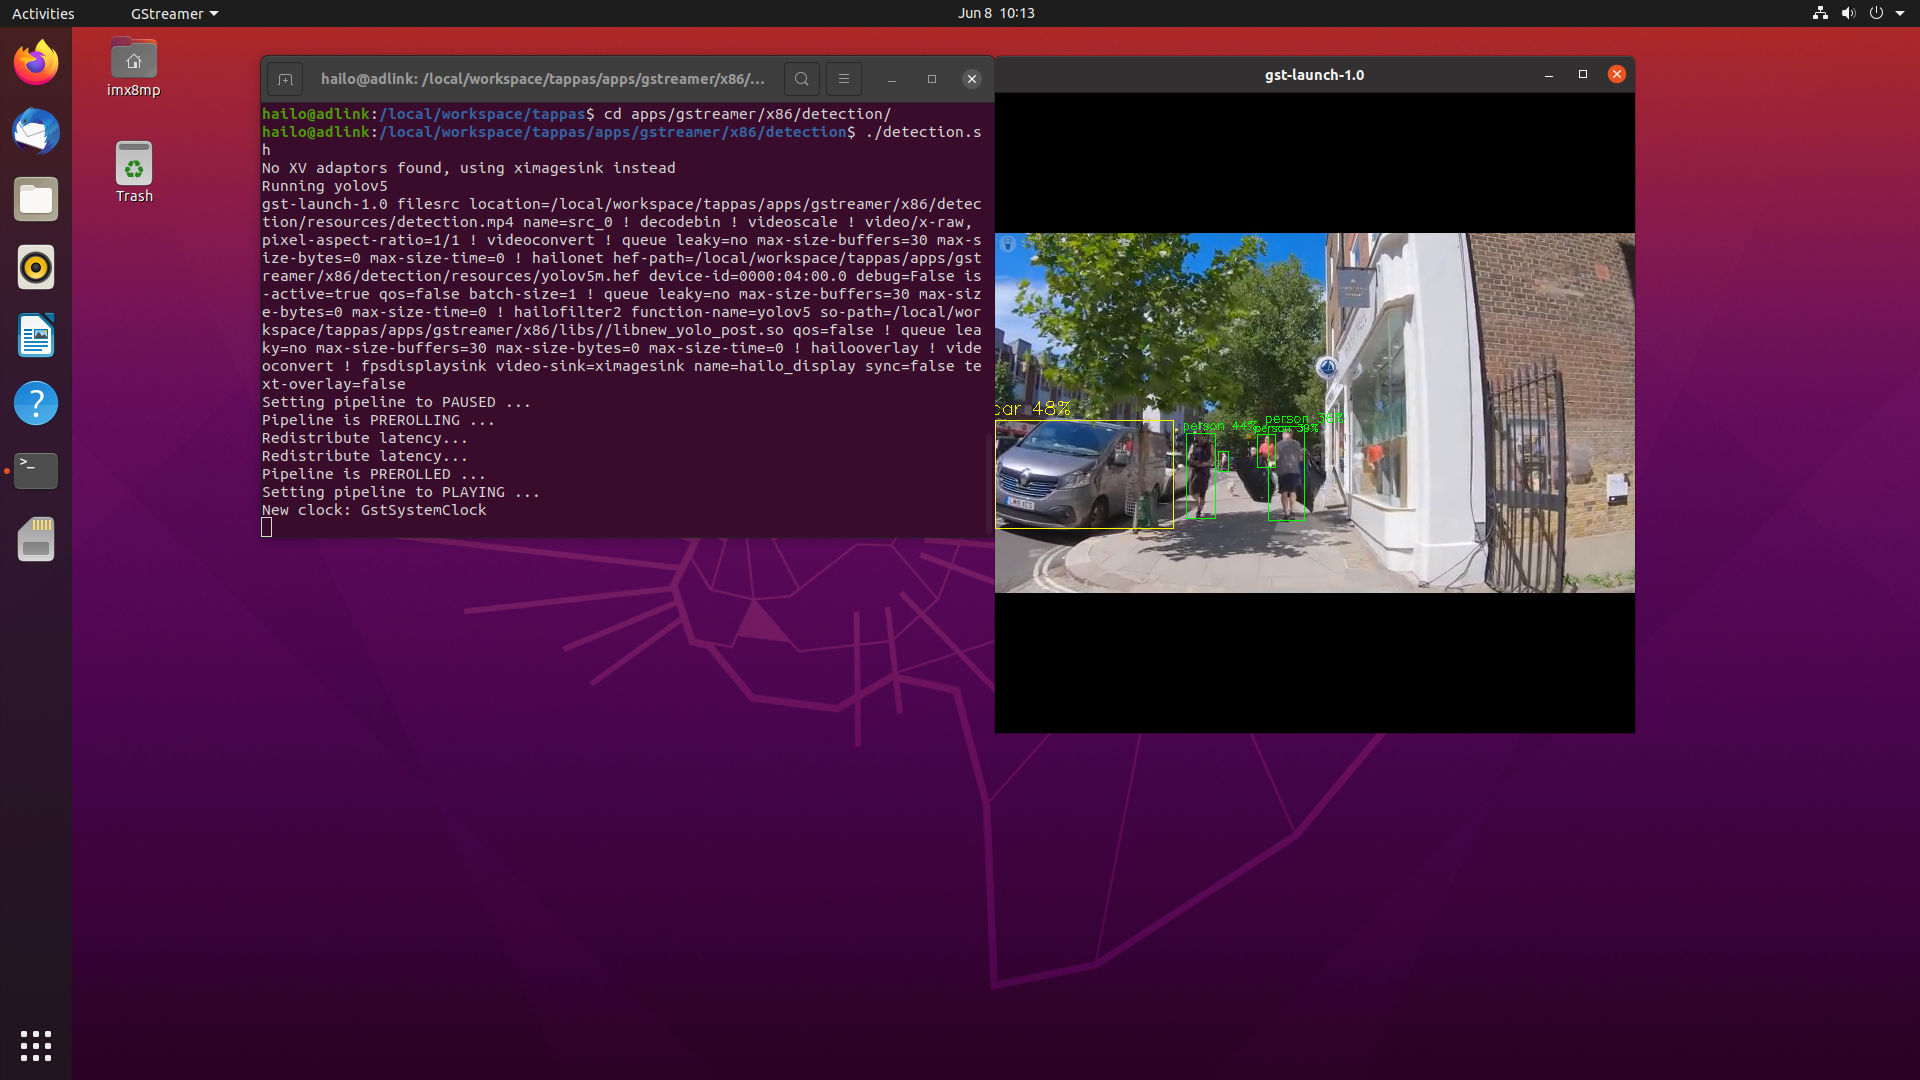
終わると下記左図のようにコンテナが立ち上がり、Tappasを実際に動かしてみると下記右図のような感じで動作確認できます。
まとめ
ARMマイコンベースで小型/低価格でありながらもパフォーマンスに妥協しないEdge-AIシステムを狙って構築しましたが、思いのほか簡単に構築できました(時間はかかりましたが・・・)。
こちらのシステムでのAIパフォーマンスは動画にて紹介しています。ご興味ございましたらこちらのリンクをご確認ください。
本記事を閲覧いただきまして、ありがとうございました。
お問い合わせ
本記事に関してご質問がありましたら、以下よりお問い合わせください。
Hailo メーカー情報Topへ
Hailoメーカー情報Topページへ戻りたい方は、以下をクリックください。