Okta
オクタ
概要説明
OktaのAD同期機能の概要を説明します。
AD同期機能について
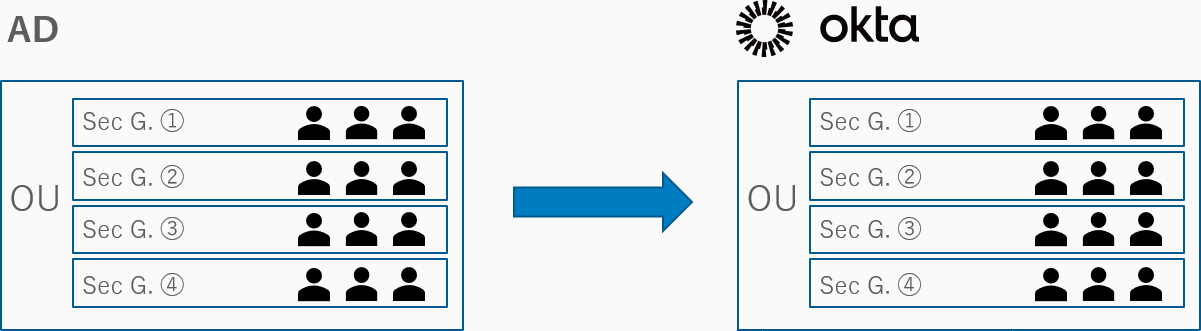
オンプレミスのADからOktaへユーザ同期を行う機能です。OU単位で同期することができ、ADのSecurity GroupはOktaのグループに自動同期されます。
ADからOktaへのユーザ・グループの同期
ADからOktaへのユーザ・グループの同期
Active Directory上のユーザ及びグループをOktaへ同期させる方法として以下2つがあります。
- 手動でのユーザインポート
- JITプロビジョニングによるユーザインポート
手動でのユーザインポートにおいては、Okta管理画面からAD上のユーザ及びグループを手動にて一括でOkta上にインポートすることができます。
JITプロビジョニングによるユーザインポートにおいては、ADアカウントにてOkta portalへログインした際に自動的にOkta上にユーザ作成及び属性情報の更新がされます。
また、1日1回といった定期的なインポート設定についても説明します。
手動でのユーザインポート
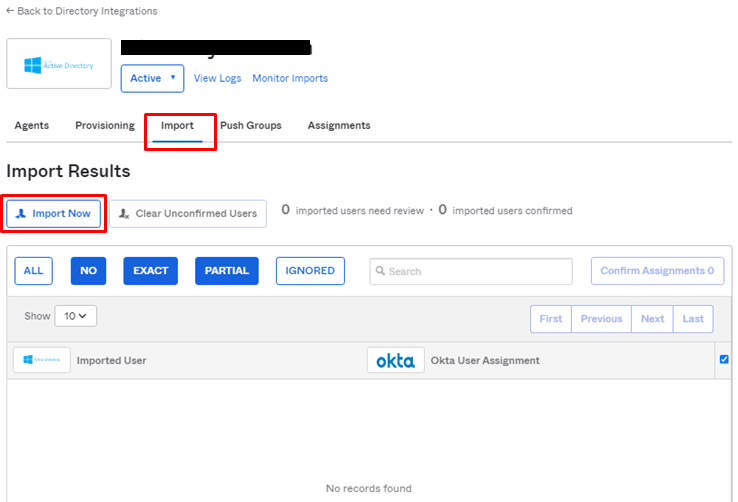
- Directory>Directory Integrations に遷移し、対象ADをクリック

- ImportタブにてImport Nowをクリック
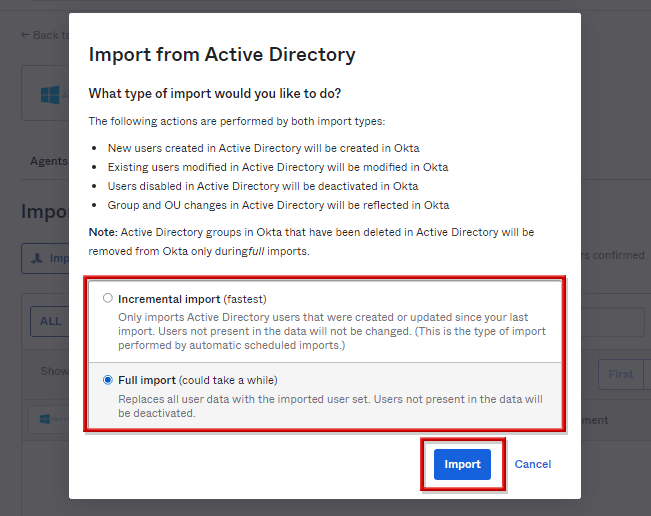
- インポート方法が選択でき、Incremental Import(増分)もしくはFull Import(フル)を選択し、Importをクリック
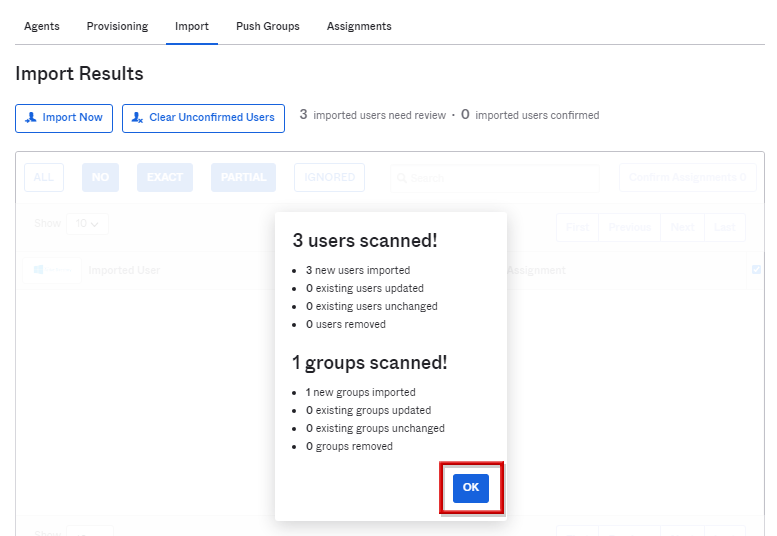
- スキャンされたユーザとグループの数が表示されるのでOKをクリック
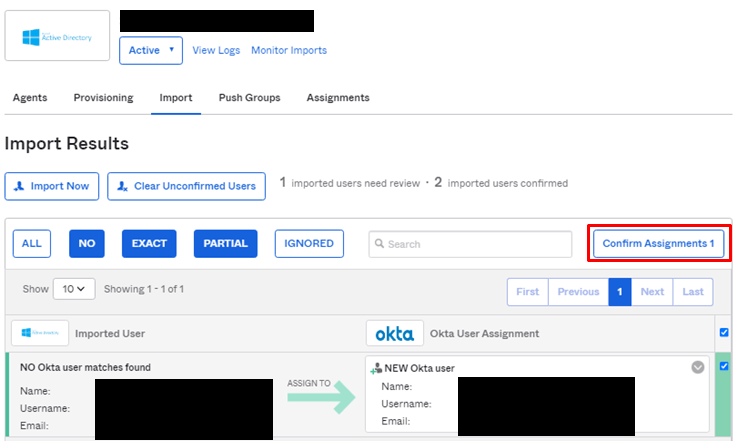
- インポートするユーザにチェックを入れ、Confirm Assignmentsをクリック
- Auto-activate users after confirmationにチェックを入れ、Confirmをクリック
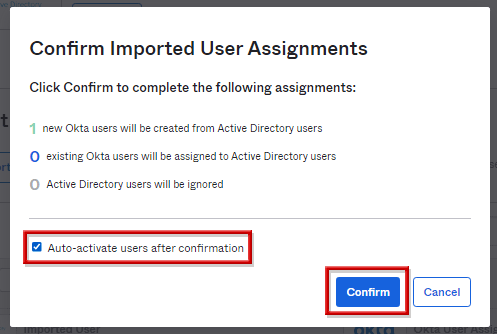
※Auto-activate users after confirmationにチェックを入れることで、対象ユーザがOkta上で有効化される
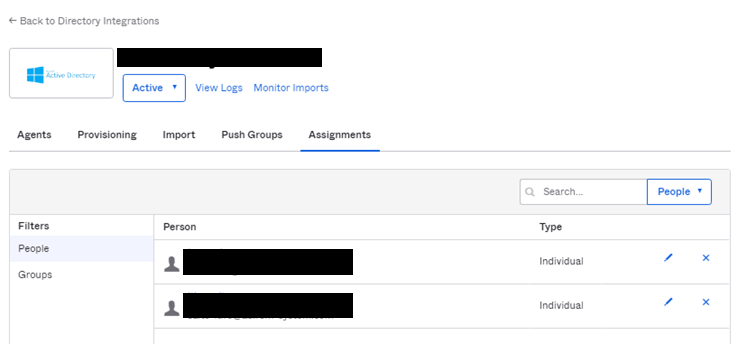
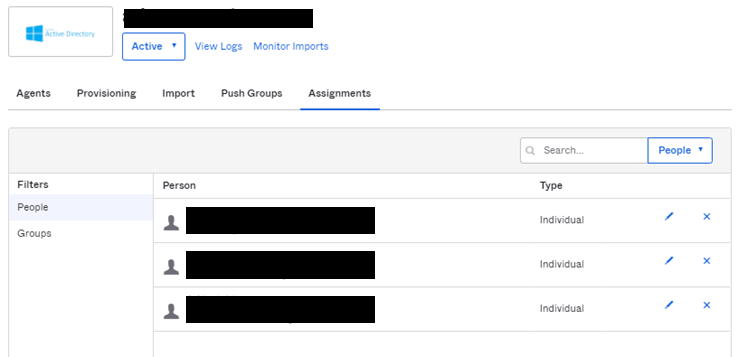
- Assignmentsタブにインポートしたユーザが表示されることを確認
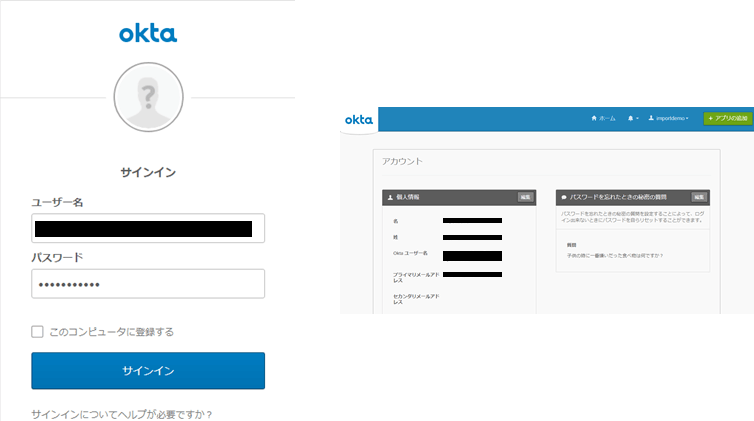
- 該当ユーザがログインできることを確認
JITプロビジョニングによるユーザインポート
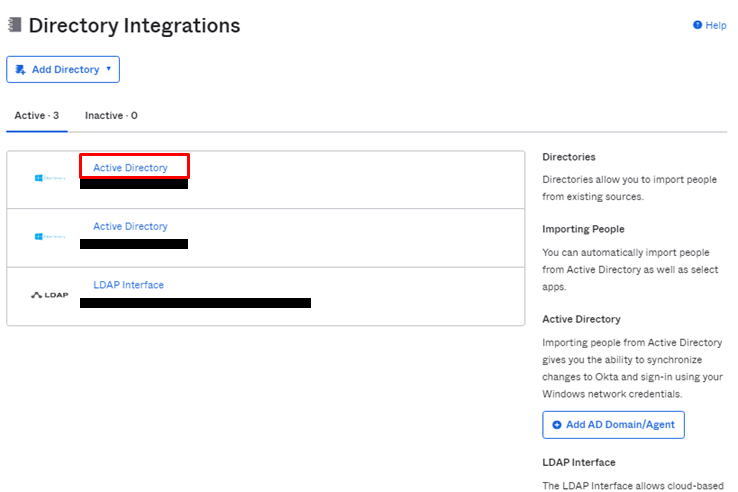
- Directory > Directory Integrationsに遷移し、対象ADをクリックします。
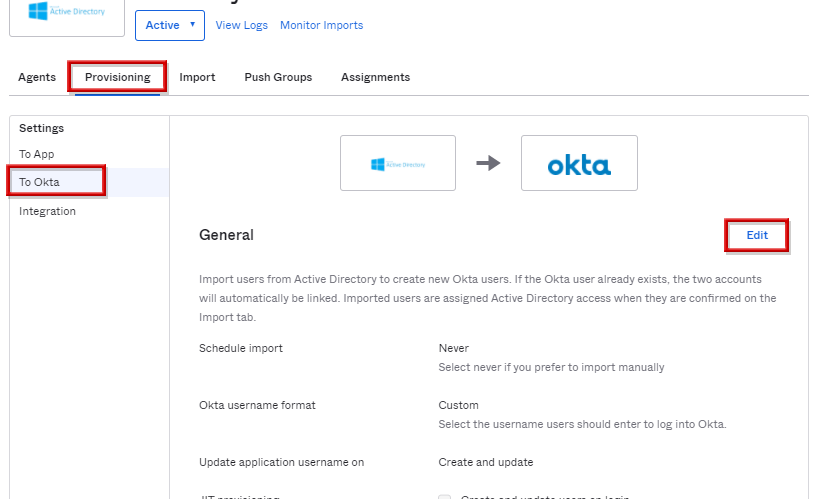
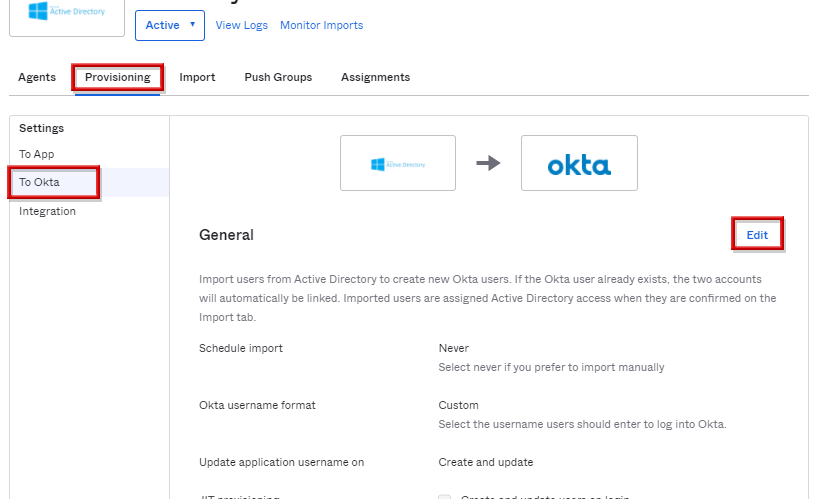
- ProvisioningタブのTo Oktaを選択し、Editをクリックします。
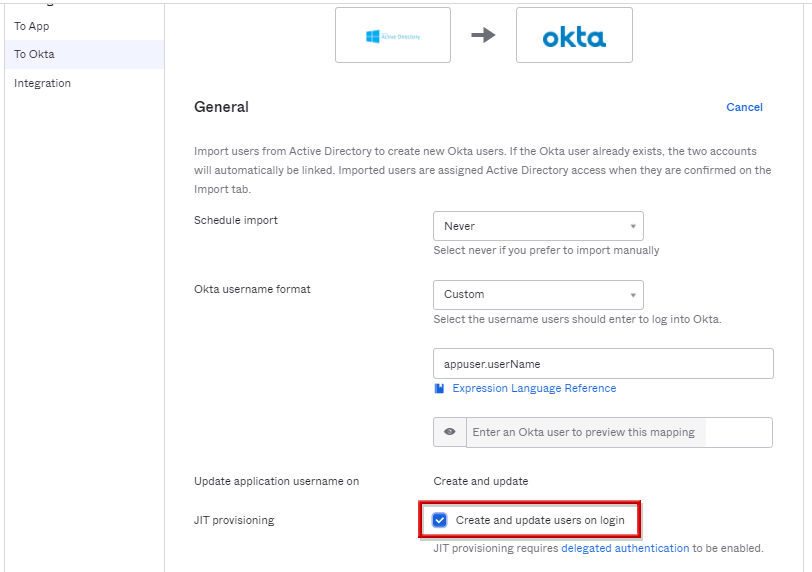
- Create and Update users on loginにチェックを入れ、JITプロビジョニングを有効化します。
- Saveをクリック
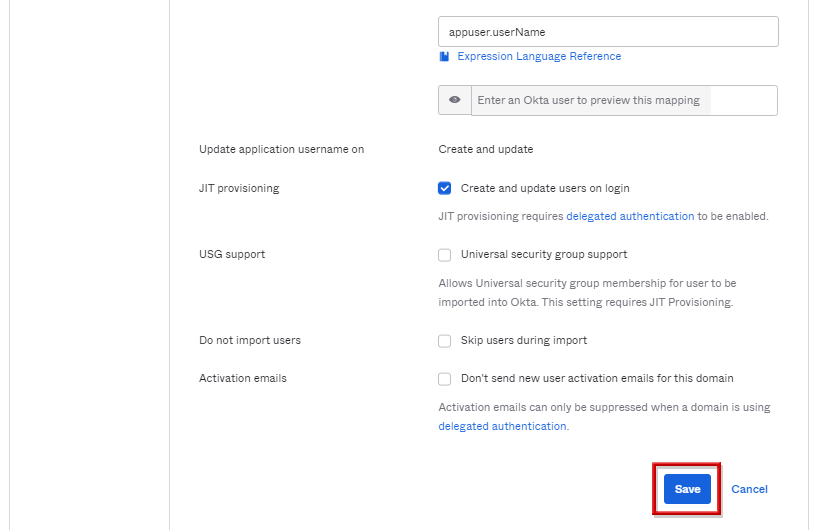
※Do not import usersのSkip users during importにチェックを入れることで手動インポートをしないように設定可能
- AD上のユーザーにてOkta portalへログイン実施します。
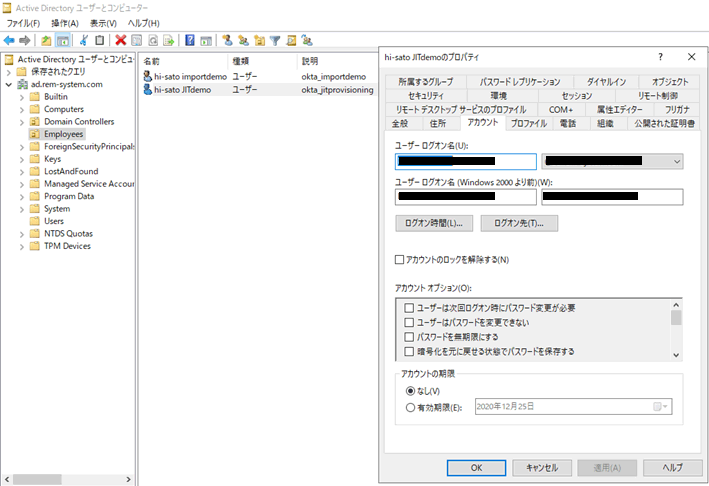
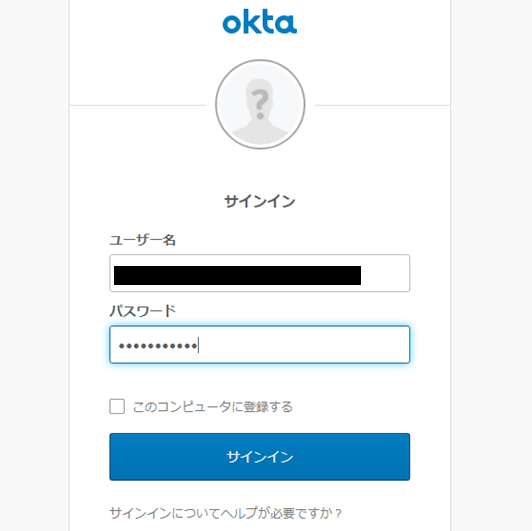
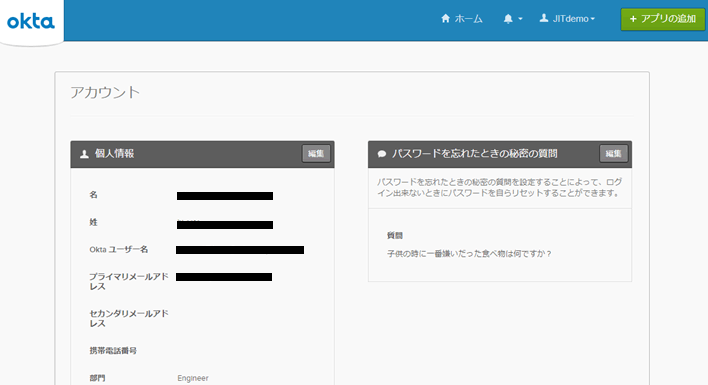
- ログインできること、ユーザ情報がAD上と同様であることを確認します。
- 管理者画面でも新規ユーザが追加されたことを確認します。
定期的なユーザインポート
- 対象ADの設定画面に遷移し、ProvisioningタブのTo Oktaにて、Editをクリックします。
※手動orJITにてADからOktaへ新規作成されたユーザに限り、定期的にADユーザの情報をリンクすることが可能。なお、ユーザ手動もしくJITのタイミグでも更新される。
- Schedule import項目にて「Never」からインポートタイミングを選択し、Saveをクリックします。
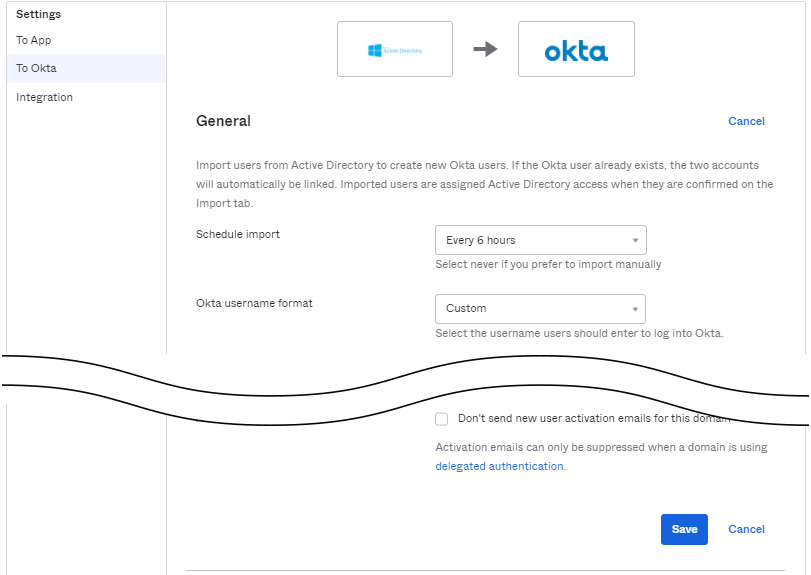
※上記例ではタイミングを「Every 6 hours」で選択
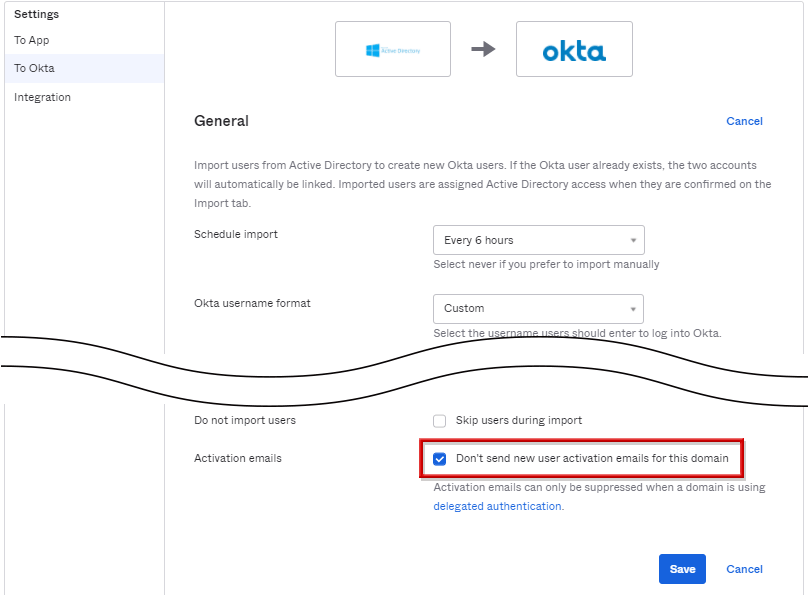
【補足】ADユーザー有効時のActivation Emailの送信有無
ADからOktaへ手動にてユーザーをインポートした際に、デフォルトで該当ユーザーへ作成されたことを示すアクティベーションメールが送付される。ADの設定画面のProvisioningタブのTo OktaのActivation emailsの項目にて送付有無を設定でき、チェックを入れることでメール送付無しに設定可能です。
【補足】ADユーザーとOktaユーザーのマッチング条件
ADからOktaへ手動にてユーザーをインポートする際に、デフォルトではADとOktaユーザーでUsernameもしくはEmailが異なっていても、firstとLast nameが合致の場合は同一とみなされ、ADユーザーとOktaユーザーが意図せず紐づいてしまう可能性がある。
その為、ADの設定画面のProvisioningタブのTo OktaのAllow partial matches項目にてチェックを外すことが推奨されています。
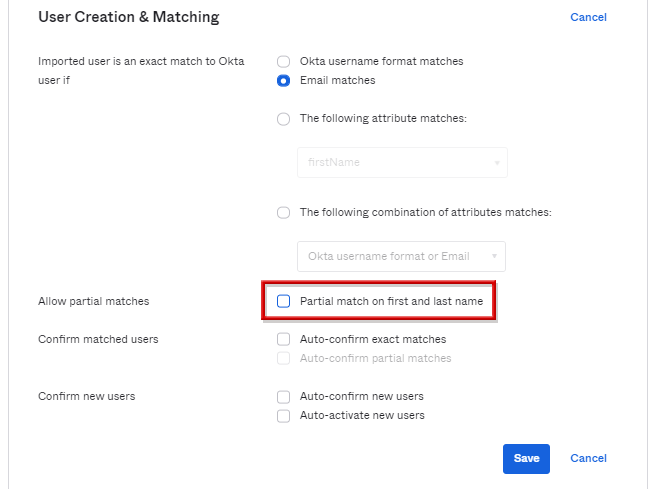
Allow partial matchesへチェックを入れることで、該当のADユーザがOktaユーザへ紐づくのではなく、新規で作成させることが可能になる。
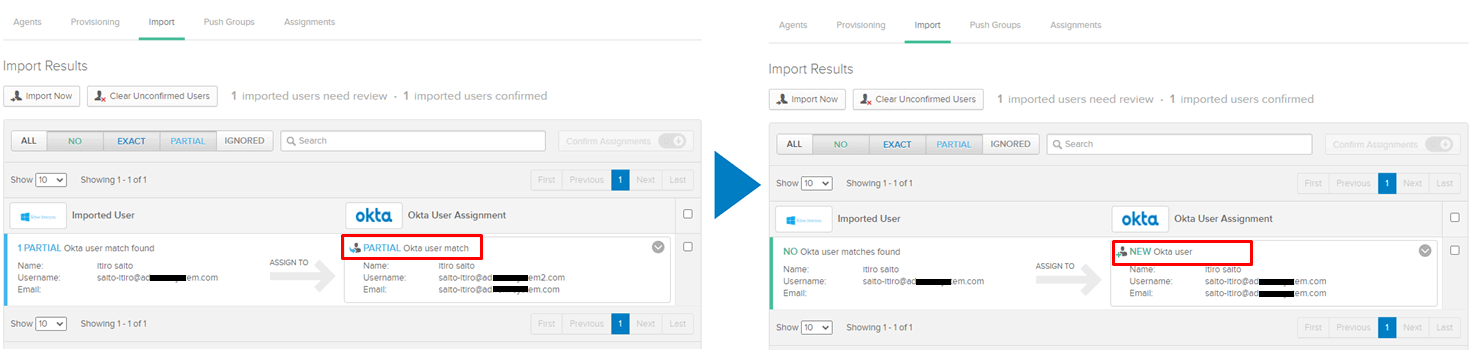
※AD側:<名前>@ad**.com, Okta側:<名前>@ad**2.comとUsernameが異なっていても、firstとLast nameが合致としているのでADとOktaユーザーは紐づけされる。
※他ユーザマッチング条件については以下に記載
https://help.okta.com/en/prod/Content/Topics/Directory/ad-agent-configure-import.htm
ADの属性をOktaへマッピング
Active Directoryの属性をOktaのユーザ属性へマッピングする方法について説明します。
まずOkta上でカスタム属性を追加する方法について説明し、次に追加したカスタム属性へADの属性をマッピングする方法について説明します。
最後に、実際にマッピングが正常に行われたかを動作検証を行います。
Oktaユーザプロファイルにカスタム属性を追加
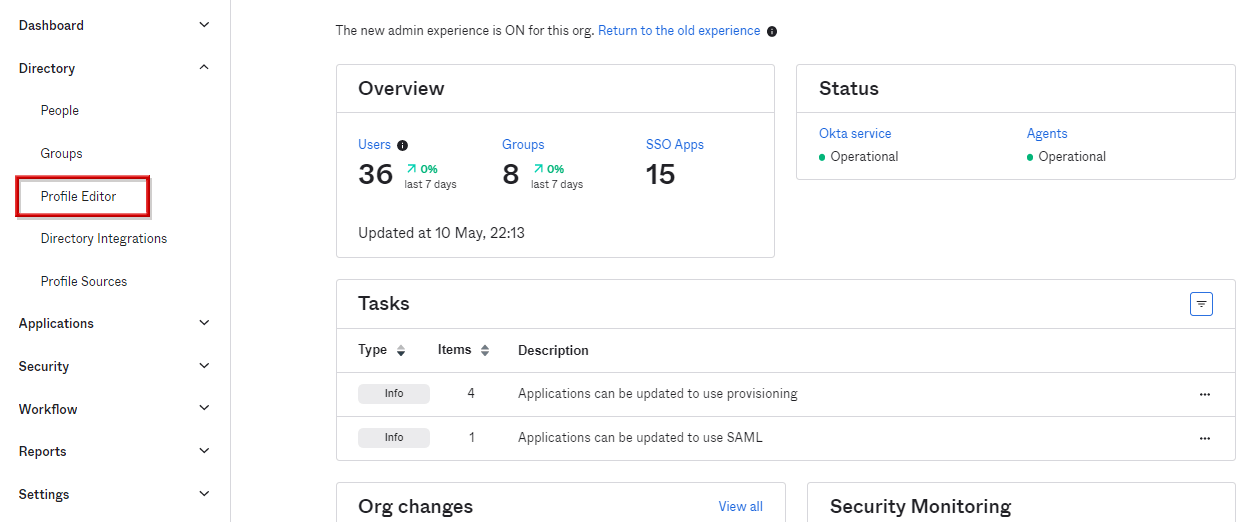
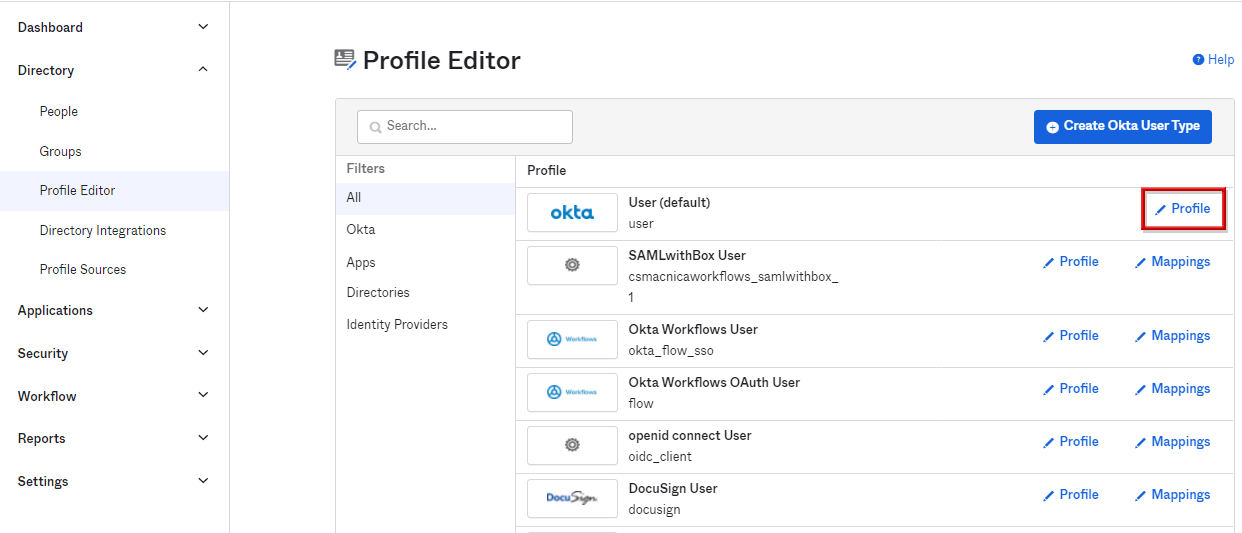
- Directory > Profile Editor画面へ遷移します。
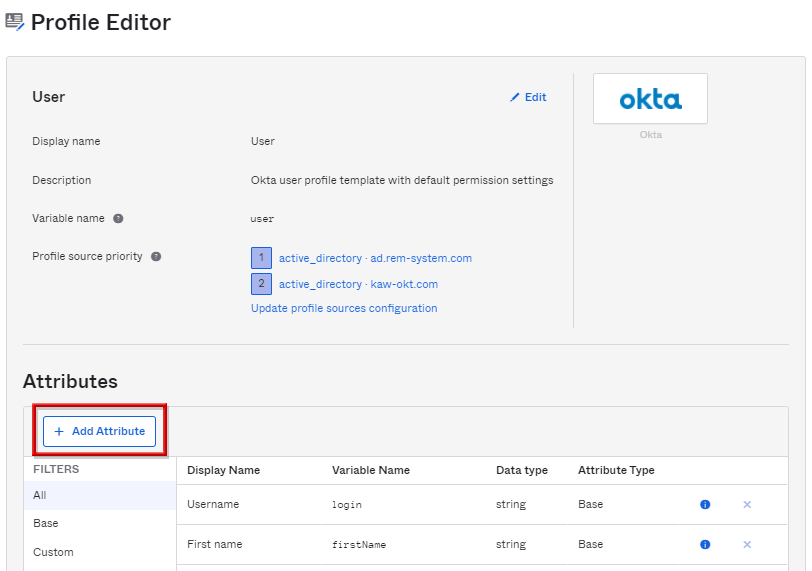
- Oktaユーザのプロファイルの属性を追加するため、OktaのProfileをクリックします。
- Attribute項目の+Add Attributeをクリックします。
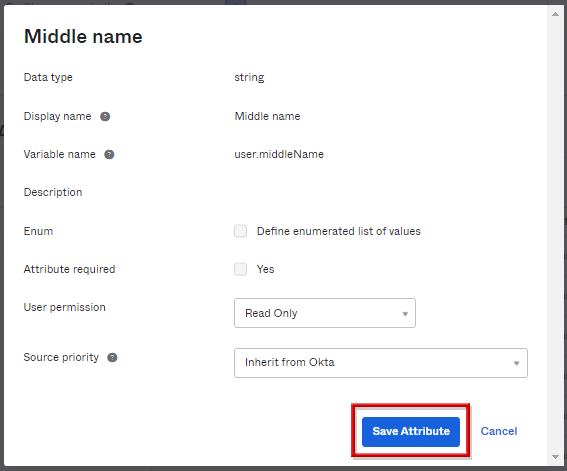
- 以下項目を入力し、Saveをクリックします。(Data typeにstringを選択時)
- Display name
- Variable name

※Descriptionは任意で入力可能他項目は属性情報の条件に応じて設定可能
- OktaのProfile情報画面に戻るので、追加した属性を確認するため、Attributes項目のCustomをクリックします。
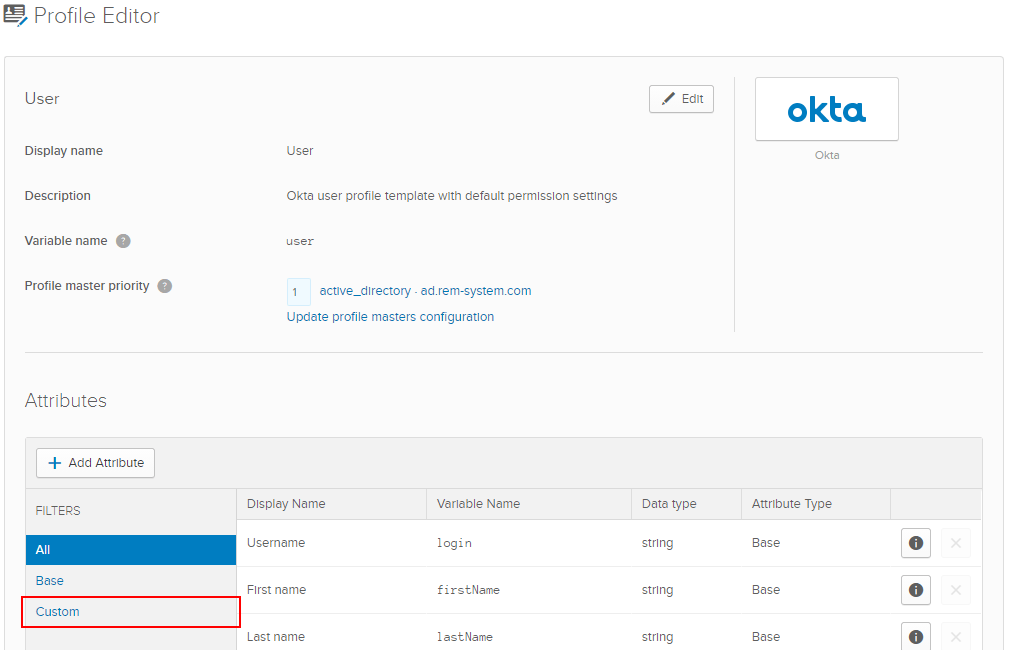
- 追加した属性の内容を確認し、属性追加設定完了です。

※追加した属性に関しては🖊をクリックすることで編集可能
ADの属性をOktaにマッピング
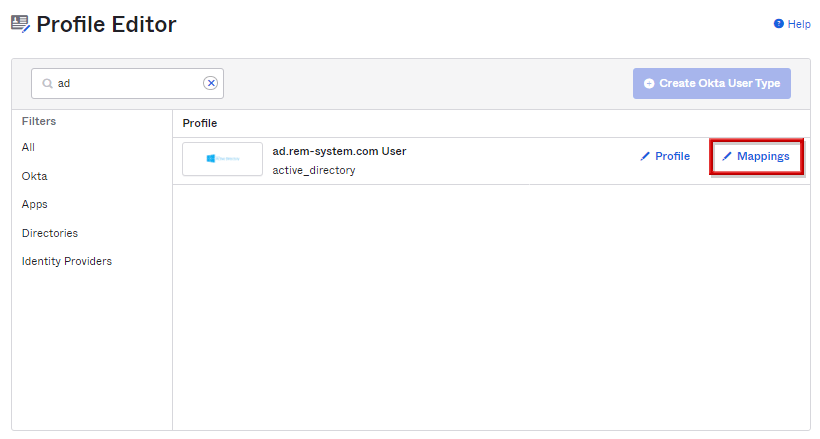
- Directory > Profile Editor画面へ遷移し、対象のADのMappingsをクリックします。
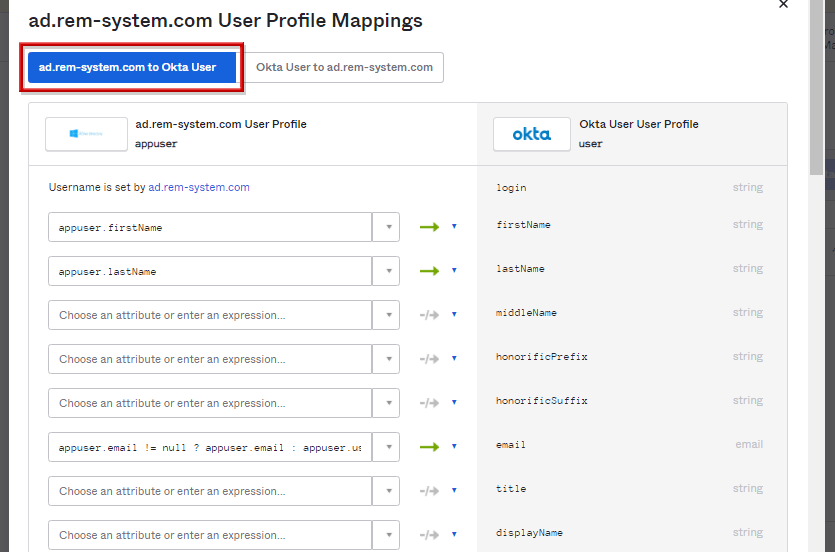
- ADとOkta間でのマッピング内容を設定可能であり、AD to Okta Userタブにて、追加した属性部分まで下方向へスクロールします。
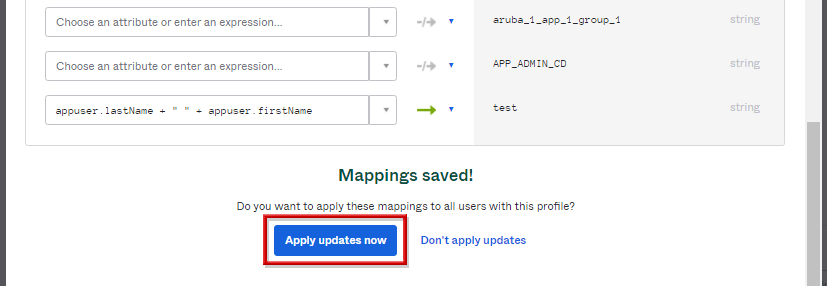
- 該当のOktaの属性に対応するADの属性内容を設定し、Save Mappingsをクリックします。
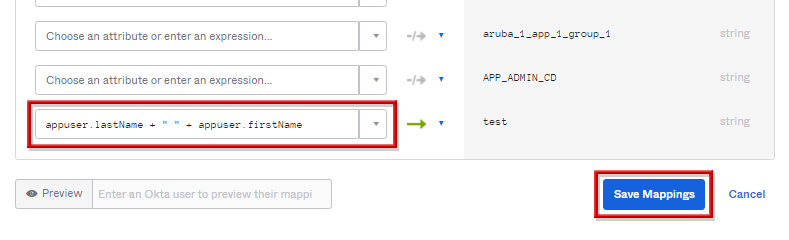
※上記例では追加したOkta側の属性「test」へAD側の「lastName + firstName」がマッピングされるよう設定(AD側 lastName:sato, firstName:taro→Okta側 test:sato taro)
- マッピングが設定された旨が表示され、内容の更新有無について求められるので、Apply updates nowをクリックします。
マッピングの検証
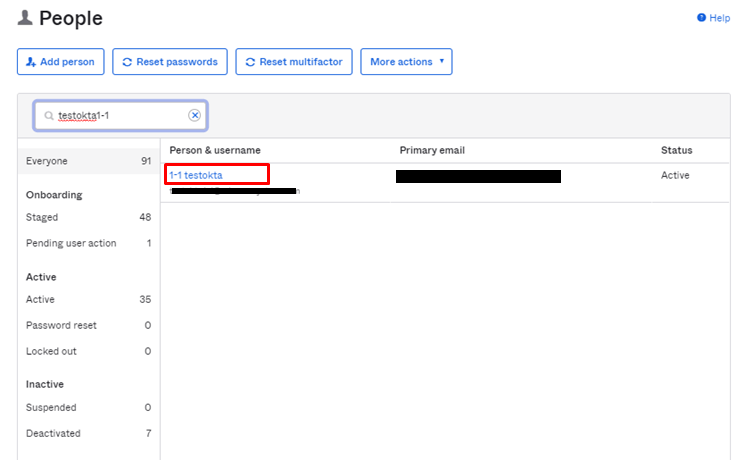
- Directory>People画面へ遷移し、ADマスターのユーザをクリックします。
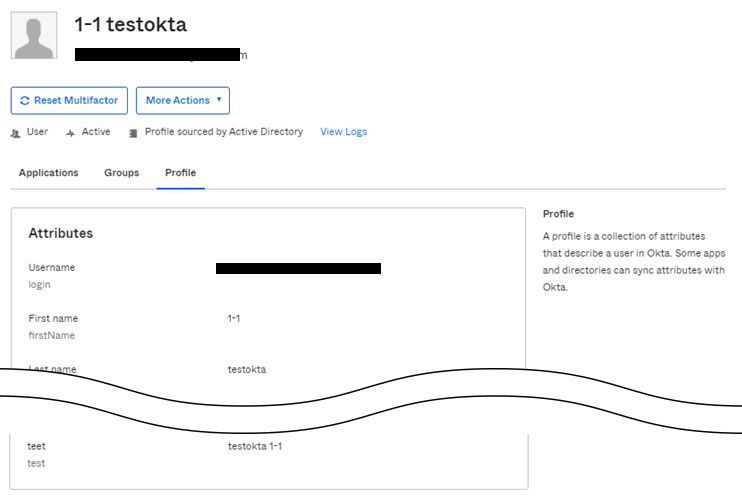
- 対象ユーザのProfileタブにて該当属性値が反映されていることを確認し、設定完了です。
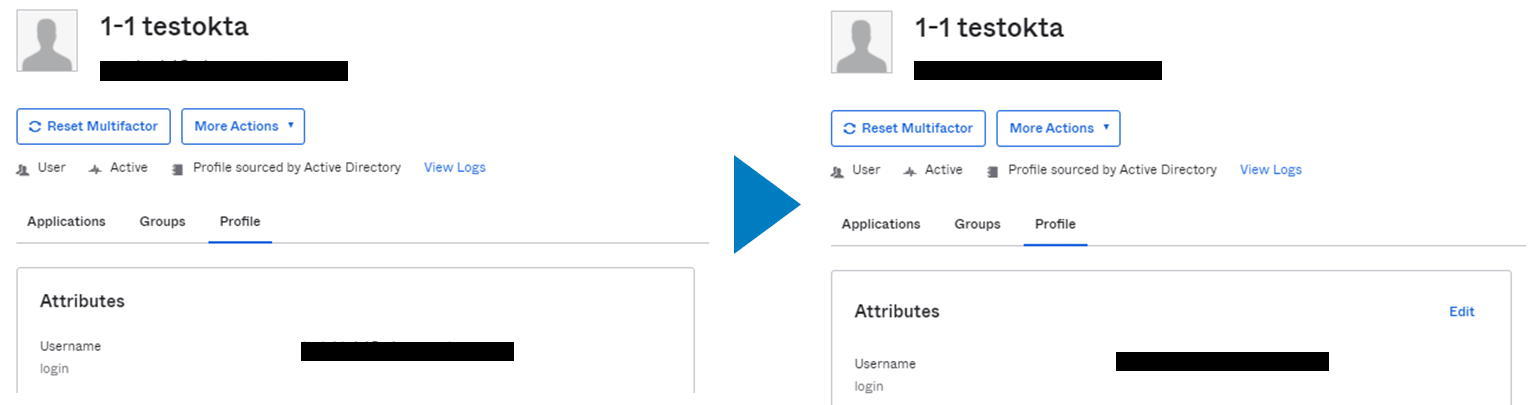
【補足】Okta上からADユーザマスターのプロファイル変更方法
ADマスターユーザのプロファイルは、デフォルトではOkta管理者画面から変更不可。Directory>Profile Editorにて、Okta ProfileのAttributesタブから対象属性値の編集ボタンクリックし、Master priorityにて「Inherit from profile master」から「Inherit from Okta」へ変更することで編集可能です。
「Inherit from profile master」から「Inherit from Okta」へ変更することでOkta上からADマスターのユーザのProfile情報を変更することが可能(Editボタンをクリックすることで変更した属性だけ変更可能)
Delegated Authentication(委託認証)
Active Directory Masteredユーザについては、デフォルトのままではOkta管理画面やOkta portal画面からパスワードのリセット、変更及びアカウントのアンロックを実施することができません。
ADのパスワードポリシーにてルールを追加することで、Oktaからもパスワードリセットなどが可能となり、AD側の管理タスクを削減することができます。
ADのパスワードポリシーにルールを追加
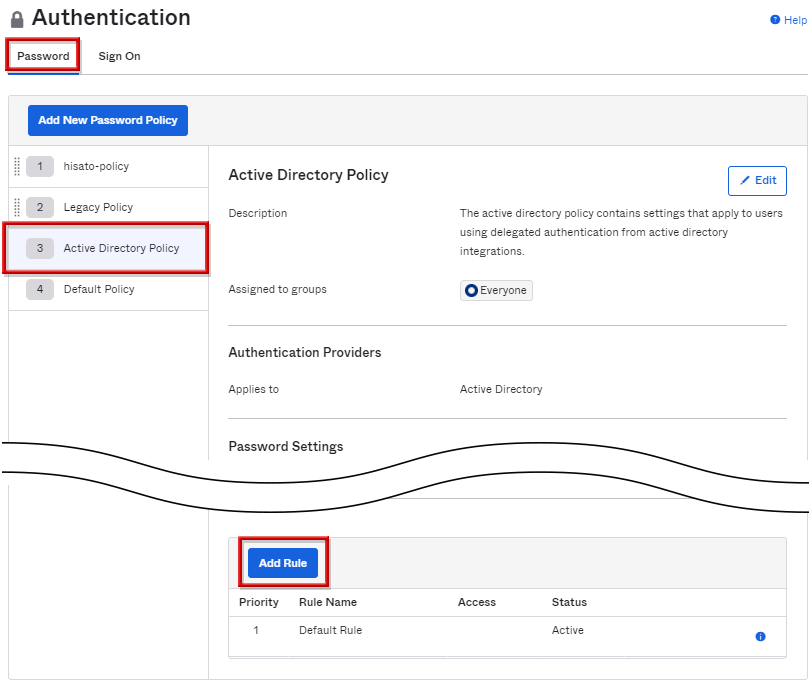
- Security > Authenticationに遷移します。

- PasswordタブのActive Directory Policyを選択し、最下部のAdd Ruleをクリックします。
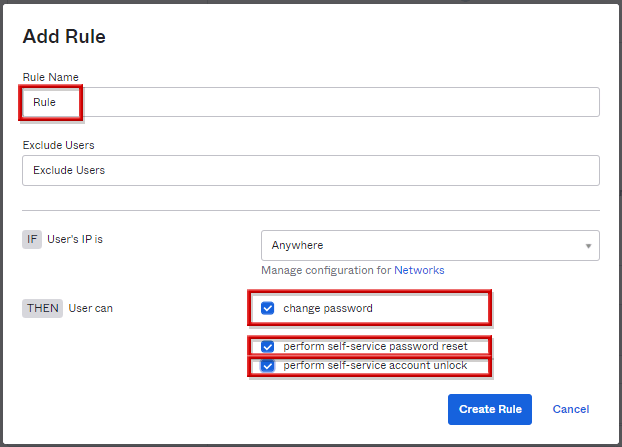
- Rule Nameを記載し、Okta側で実施したい項目にチェックを入れて、Create Ruleをクリックします。
- change password
- perform self-service password reset
- perform self-service account unlock
- 作成した新規ルールが追加されれば、設定完了です。
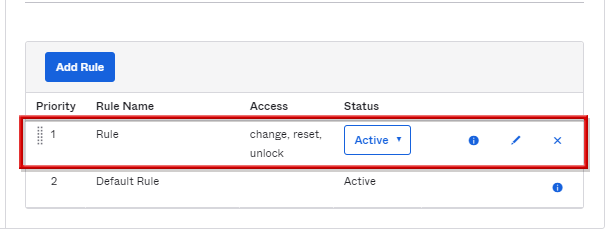
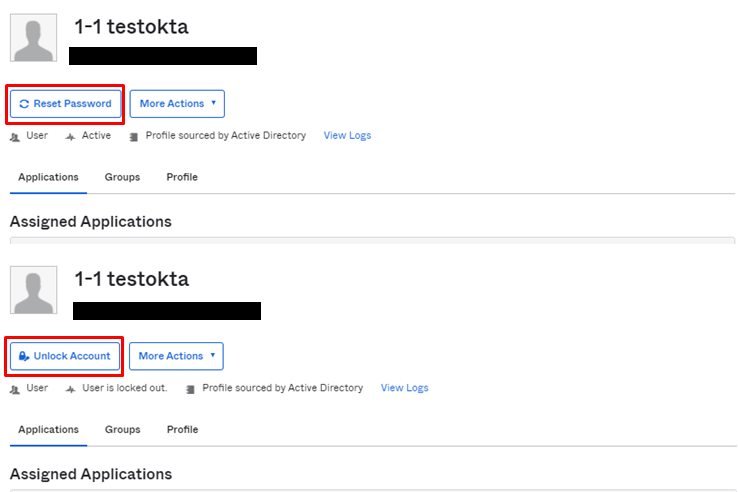
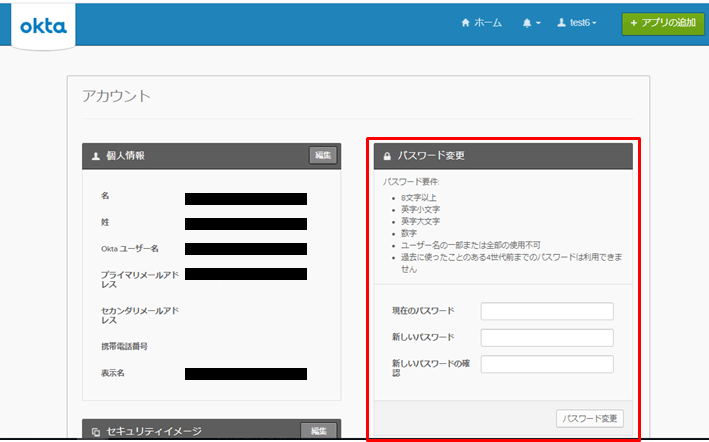
- Okta管理者画面から、AD masteredユーザーのパスワードリセットやアカウントロック解除が可能であること、該当ユーザーのOkta portalの設定画面からパスワード変更が可能であることを確認します。
お問い合わせ・資料請求
株式会社マクニカ Okta 担当
- TEL:045-476-2010
- E-mail:okta@macnica.co.jp
平日 9:00~17:00