- Semiconductor BusinessHOME
- Products and Services of Macnica,Inc.
-
technical information

-
Events and Seminars
- Handling Manufacturer
- Support
- Inquiry
- Click here to purchase products
- Semiconductor business e-mail magazine registration
![]()
![]() Narrow down by specifying conditions
Narrow down by specifying conditions
現在2004件がヒットしています。check

Starting with v17.1 of the Intel® Quartus® Prime software, a high-level synthesis tool, the Intel® HLS Compiler, has been released. This HLS compiler is free to use.
When using the Intel HLS Compiler on a Windows ® OS, you need to install Microsoft Visual Studio as your GCC environment. The Microsoft Visual Studio version to be used differs depending on the version of the Intel® HLS Compiler to be used, so please check here in advance.
This content introduces how to build an environment for using the Intel® HLS Compiler on Windows® 10.
Contents of this article
1. Required tools in Windows® environment
2. How to install Intel® FPGA Development Tools
3. How to install Microsoft Visual Studio 2017 Community
4. Compile confirmation with sample program
1. Required tools in Windows® environment
The following tools are required to use the Intel HLS Compiler.
・Intel® Quartus® Prime software
・Intel® HLS Compiler
・Logic simulator
- Questa® Intel® FPGA Edition (including Starter Edition)
- ModelSim® SE (Siemens EDA product)
- Questa® Advanced Simulator (Siemens EDA product)
* Please use a simulator supported by the Quartus Prime version you are using.
・C++ compiler (one of the following)
- Microsoft Visual Studio 2017 Professional (paid)
- Microsoft Visual Studio 2017 Community (Free)
Tool version used in this article
・Quartus® Prime Development Software Pro Edition ver.22.2
This content was created for ver.22.2, but it can also be applied to ver.19.3~22.1. It cannot be applied to versions prior to ver.19.2.
Support for HLS Compiler in Quartus® Prime Standard Edition ended in ver.19.1. Intel HLS Compiler Pro Edition is available for Cyclone® V from ver.20.4.
Please refer to Intel® High Level Synthesis Compiler Pro Edition: Getting Started Guide for the setting method.
2. How to install Intel® FPGA Development Tools
Please refer to the link below for instructions on how to install the Intel® Quartus® Prime software, Intel® HLS Compiler, and Questa® Intel® FPGA Edition.
How to Install Intel® Quartus® Prime Software and Questa* - Intel® FPGA Edition
Quartus® Prime, a development tool for Intel® FPGAs, has three editions. The available versions of the Intel HLS Compiler are listed below.
| Quartus® Prime Edition | Supported versions of the Intel HLS Compiler |
| pro edition | ver.17.1 or later |
| Standard edition | ver.17.1 ~ 19.1 |
| light edition | ver.17.1 ~ 19.1 |
*As of July 2022
3. How to install Microsoft Visual Studio 2017 Community
3-1. Download Visual Studio Installer
First, download the installation data for Visual Studio 2017 Community from the Microsoft® web page.
To download the installation data for the free version of Microsoft® Visual Studio, you need to create a Microsoft account. Create an account if you don't have one.
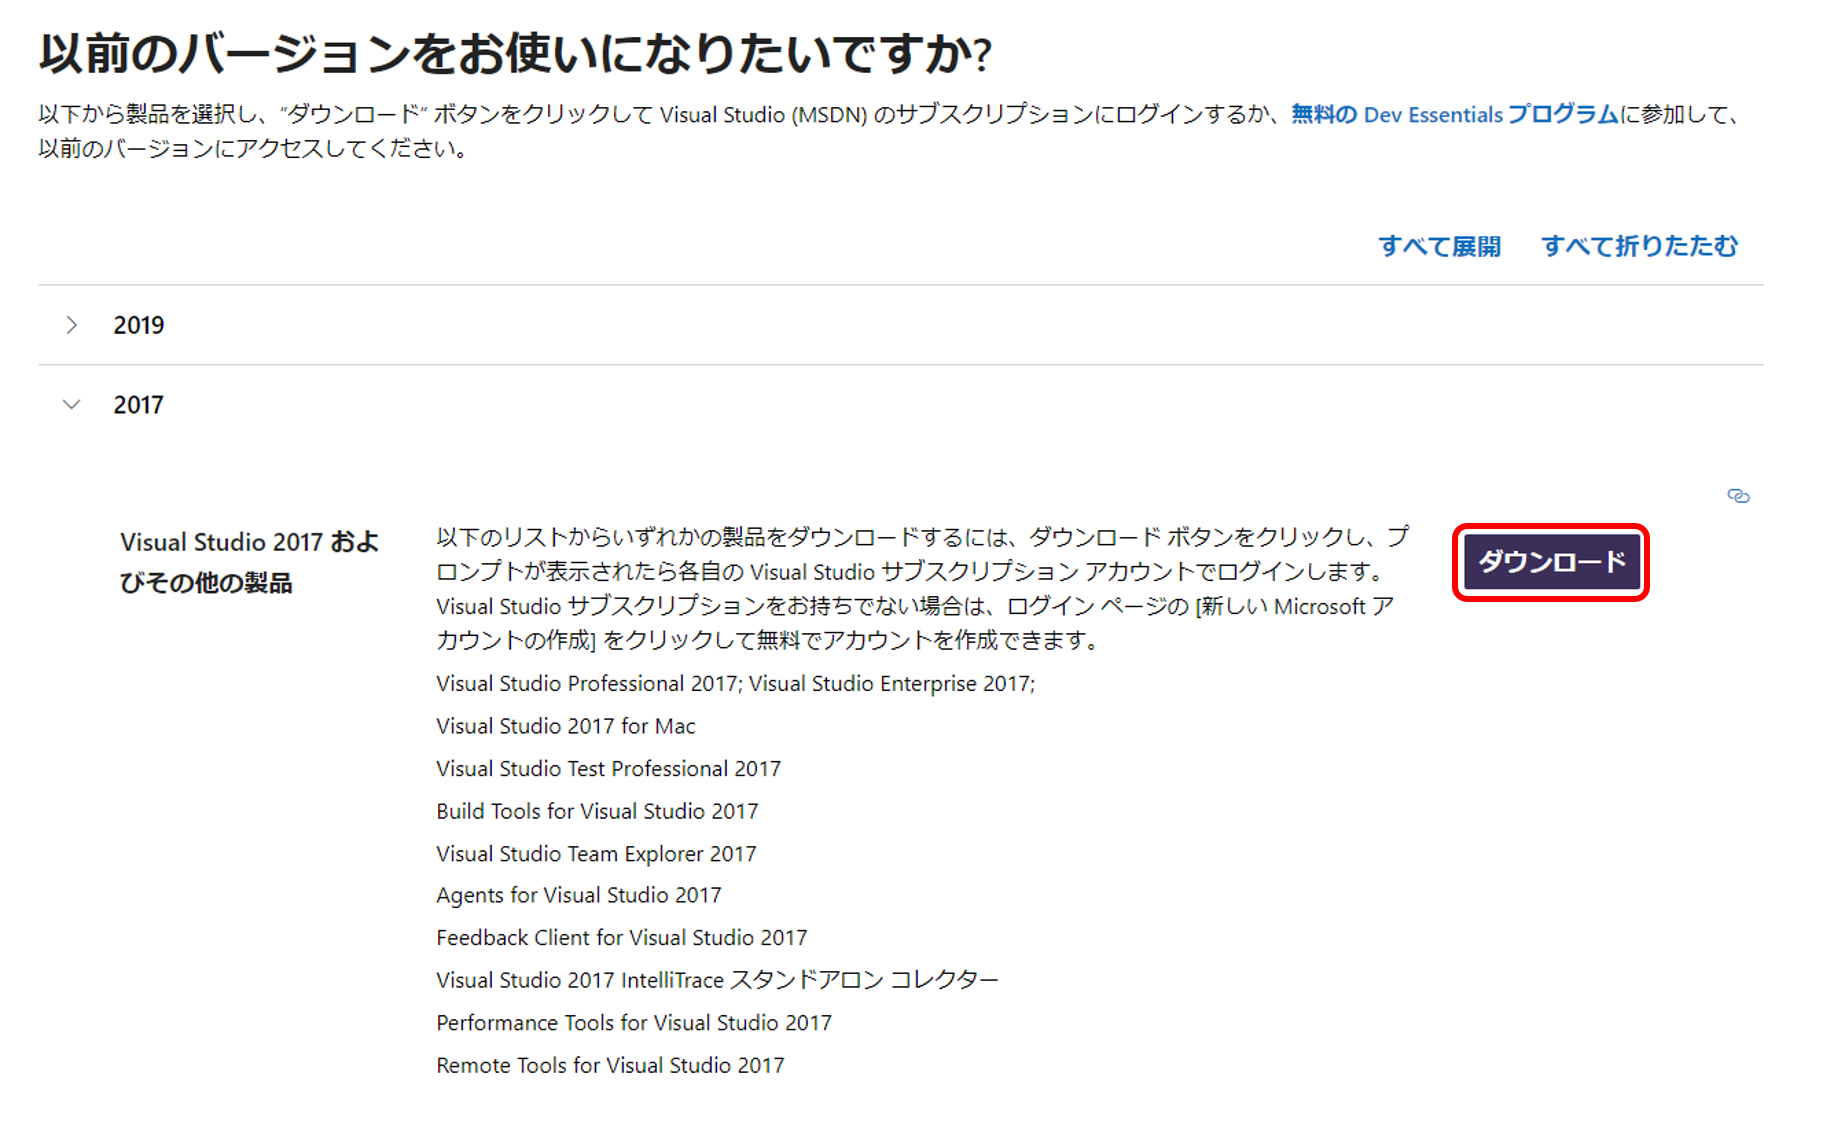
https://visualstudio.microsoft.com/en/vs/older-downloads/
Open the [2017] tab and click [Download].
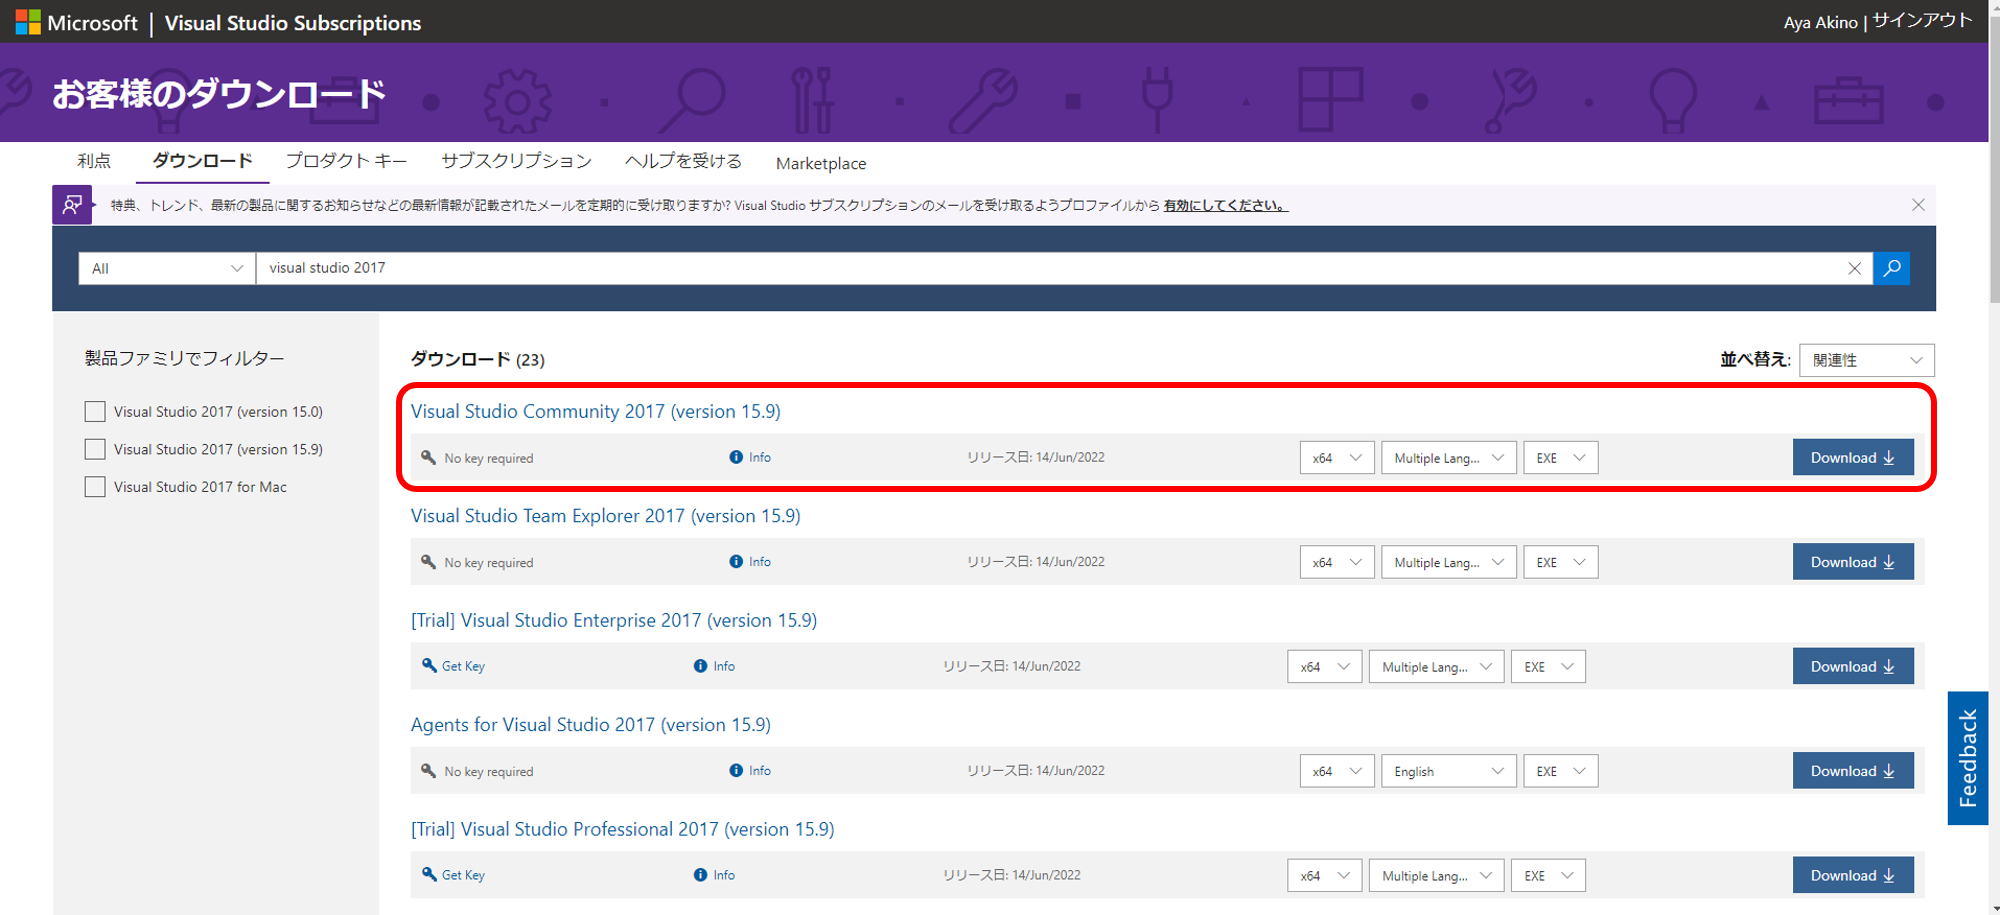
Sign in with your Microsoft account when the sign-in screen appears. Visual Studio 2017 download list will appear.
Select Visual Studio Community 2017 and click Download. The vs_Community.exe file will download.
3-2. Run installer
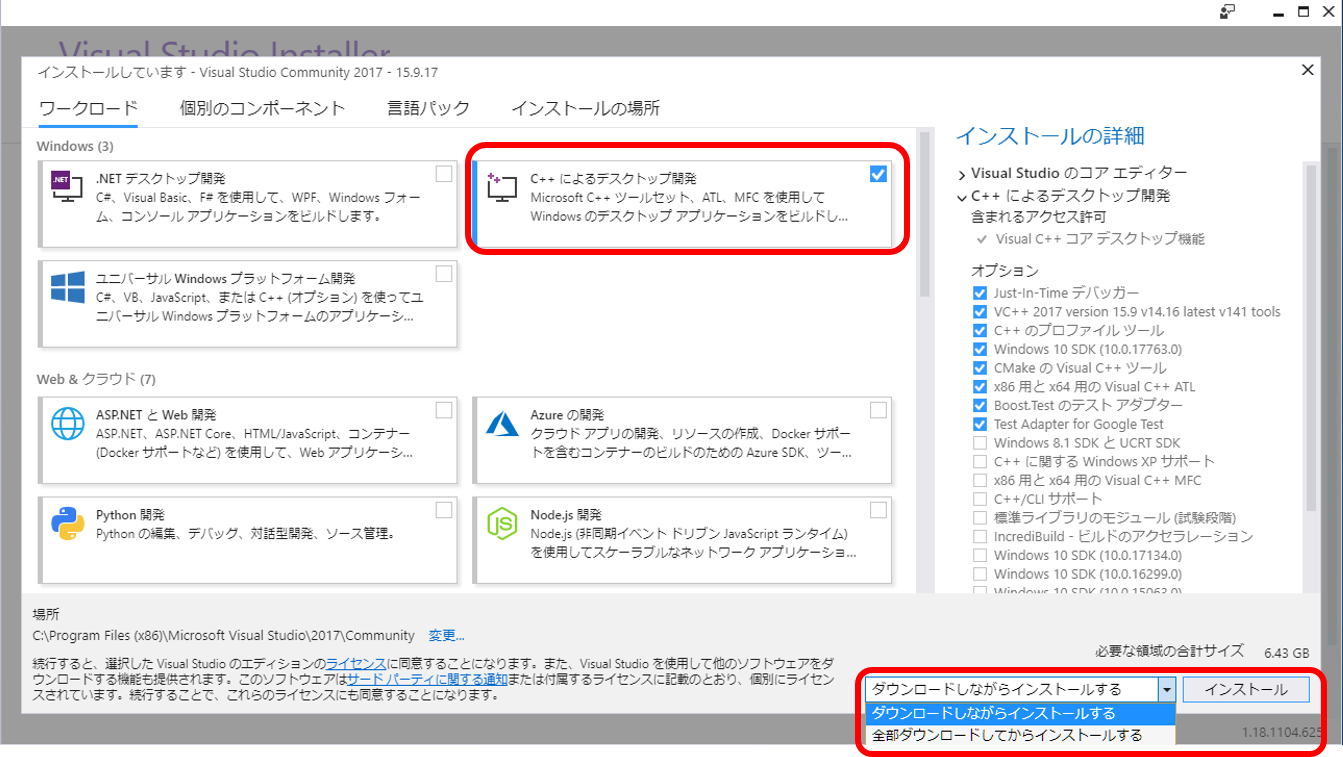
Run vs_community.exe.
The following installation screen will start, so check the tools to be installed. At a minimum, select Desktop Development with C++ to use the Intel HLS Compiler.
Select either [Install while downloading] or [Install after downloading all] from the pull-down menu at the bottom right and click [Install].
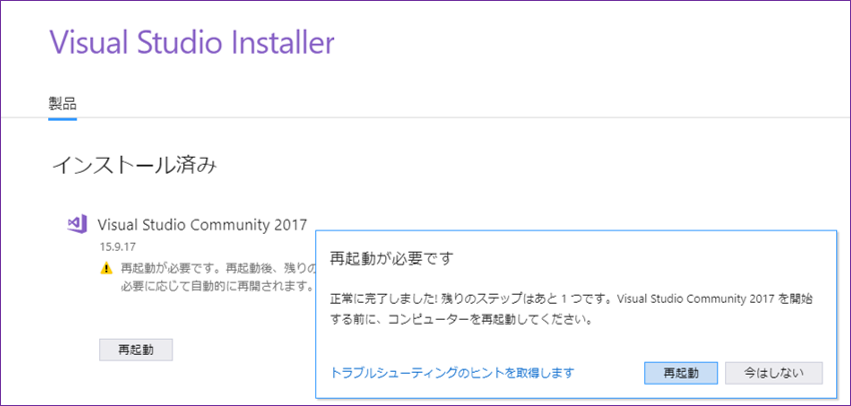
Download and installation will proceed, and when completed, you will be prompted to restart, so restart. If the Visual Studio tool starts after installation is complete, just close it.
4. Compilation check with sample program
4-1. Setting up Visual Studio
Launch Command Prompt and setup. First, go to the directory where Visual Studio is installed.
コマンド例)>cd "C:\Program Files (x86)\Microsoft Visual Studio\2017\Community\VC\Auxiliary\Build"Run vcvars64.bat.
コマンド例)>vcvars64.bat* The settings in this batch file will be disabled when you close the command prompt, so you need to run it every time you start the command prompt to use the HLS compiler.
4-2. HLS compiler setup
Continue working in Command Prompt. Navigate to the Intel HLS Compiler installation directory.
コマンド例)>cd C:\intelFPGA_pro\22.2\hlsRun the init_hls.bat file.
コマンド例)>init_hls.batThe setup is completed if it is executed without error as shown below. We will continue to use this command prompt when compiling the sample in the next chapter, so do not close it.
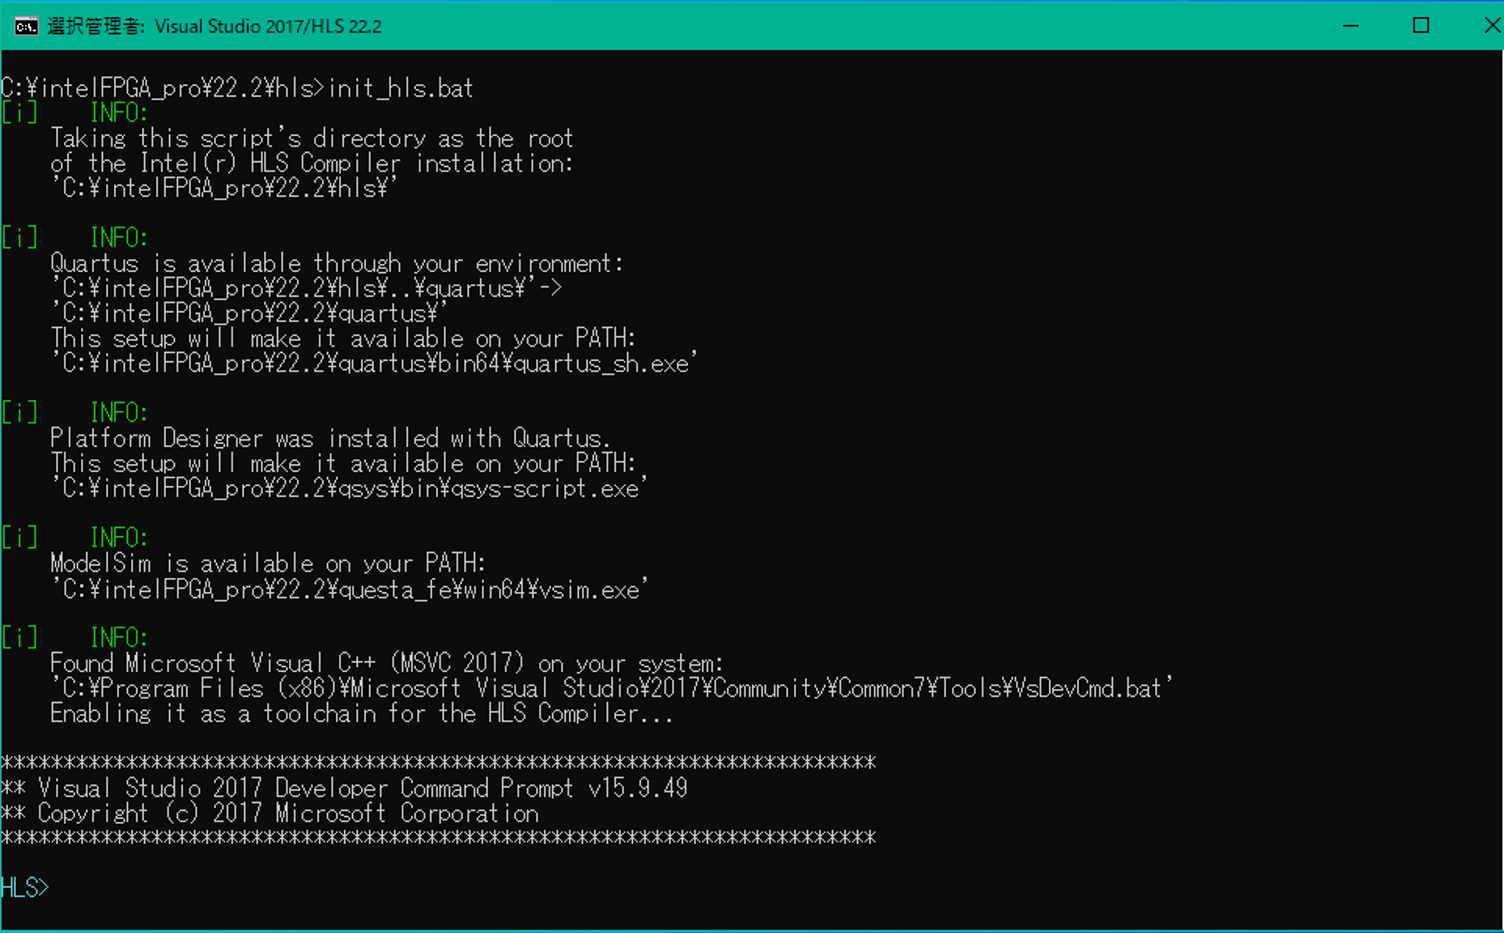
* The settings in this batch file will be disabled when you close the command prompt, so you need to run it every time you start the command prompt to use the HLS compiler.
Follow the steps below to test the compilation using the sample programs in the installation directory.
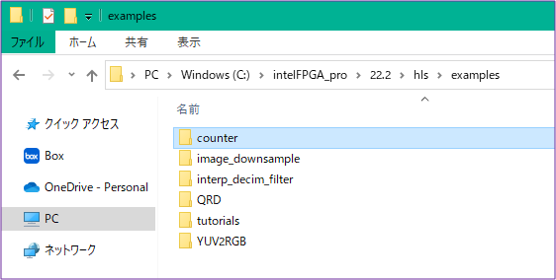
4-3. Copy of sample program
Copy the counter folder in the installation directory (eg C:\intelFPGA_pro\22.2\hls\examples) to your working directory.
4-4. Run compilation
At the command prompt where you ran init_hls.bat earlier, change to the working directory where you copied the counter folder.
コマンド例)>cd C:\work\counterRun build.bat. This time, for GCC testing, specify the test-x86-64 option.
コマンド例)>build.bat test-x86-64Run the generated test-x86_64.exe when it completes without errors.
コマンド例)>test-x86-64.exeIf PASSED is displayed as shown below, the compilation test has completed successfully.
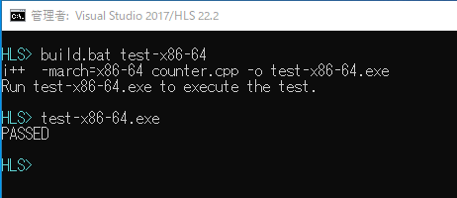
You have now confirmed that you can use GCC installed with the Intel HLS Compiler in a Windows® environment.
Click here for recommended articles/materials
HLS Compiler for Intel® FPGAs
HLS simple tutorial
Articles and resources related to High Level Synthesis
Intel® FPGA Development Flow/FPGA Top Page