Okta
オクタ
はじめに
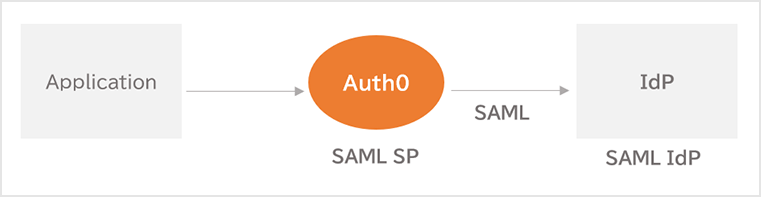
Auth0は、Service Provider(SP)とIdentity Provider(IdP)の両方でSAML連携できます。
SPでは、外部IdPで管理されているユーザアカウントを利用し、Auth0連携アプリケーションへのログインを実現します。
Auth0 Enterprise Connection機能による外部IdP連携(SAML)
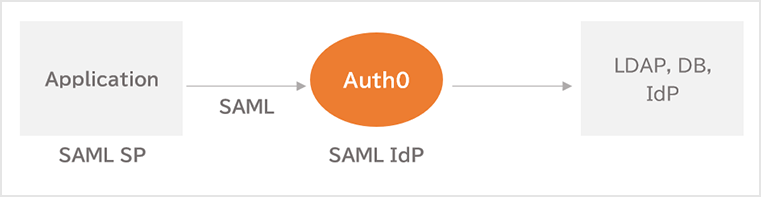
IdPでは、Auth0が管理しているユーザアカウントを利用し、アプリケーションにおける認証を実現します。
本ページでは、Auth0を利用したSplunk CloudのSAML認証(SP-initiated)について、実現方法と動作例をご紹介します。
前提
本ページ記載の機能及び設定に関する内容は、2023年6月現在の情報となります。
また、Splunk Cloudは、Splunk Cloudトライアルより発行可能なトライアル環境(Ver.9.0.2209.2)を利用します。
設定概要
Auth0によるSplunk CloudのSAML認証実現に必要な設定は、以下の通りとなります。
- Auth0をIdPとして設定するためのSPメタデータ取得
- Splunk CloudをSPとして設定するためのApplication作成
- Auth0ユーザへのAuth0ロール付与
- SAMLレスポンスをカスタマイズするためのRule作成
- SAML設定
- SAMLグループ作成及びSplunkロール付与
設定例におけるユーザ、ロール及びグループの定義は、以下とします。
| Auth0設定 | Splunk Cloud設定 | ||
| ユーザ | Auth0ロール | SAMLグループ | Splunkロール |
| Auth0ユーザ | admin | admin | sc_admin |
- Auth0ロールとSAMLグループ
SAML認証時、Auth0ユーザに紐づくAuth0ロールに基づき、Auth0ユーザをSplunk CloudのSAMLグループに割り当てます。Auth0ロール情報は、SAMLレスポンスを介してSplunk Cloud側に受け渡します。SAMLレスポンスにAuth0ロール情報を含める処理は、Auth0のRules機能で実現します。
補足
Auth0では、Rules機能の後継として、Actions機能が提供されています。ただし、Actions機能によるSAMLレスポンスのカスタマイズは、現時点でサポートされていません。
Migrate from Rules to Actions - Auth0 docs
- SAMLグループとSplunkロール
SAMLグループにSplunkロールを割り当てることで、Auth0ユーザが所属するSAMLグループに応じて、Splunk Cloud上で利用できる機能を定義します。
設定例
- Auth0をIdPとして設定するためのSPメタデータ取得
- Splunk Cloudダッシュボードで、[設定] > [Authentication methods]をクリック
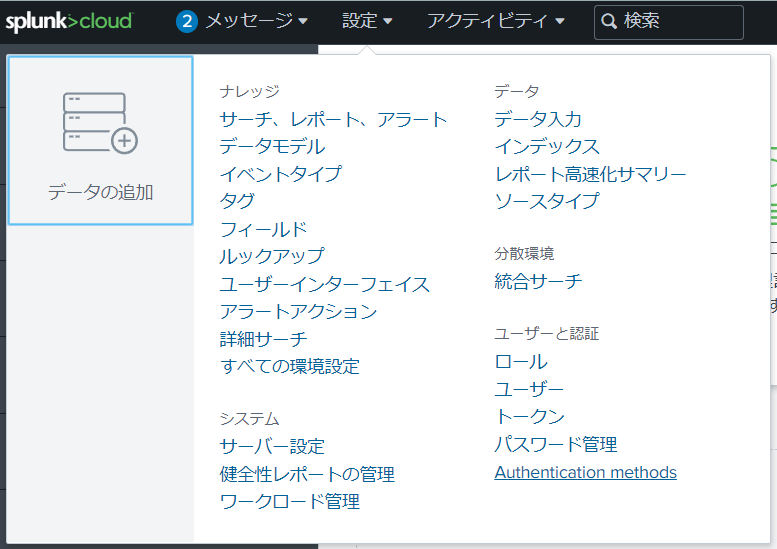
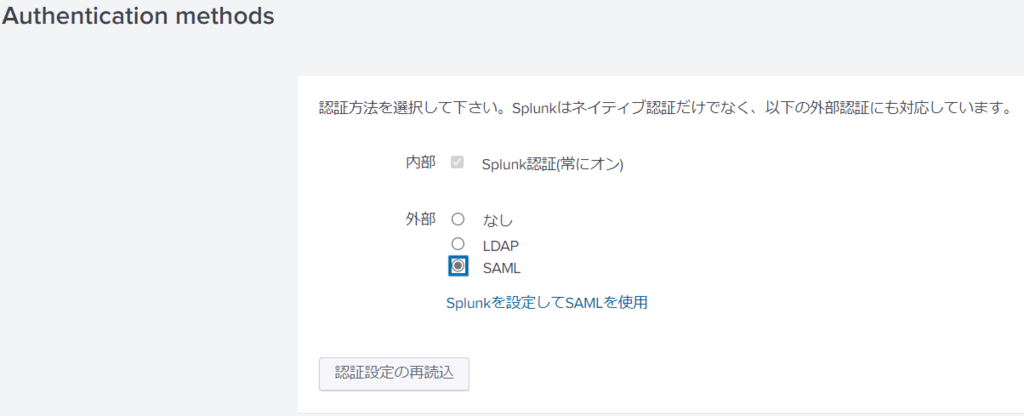
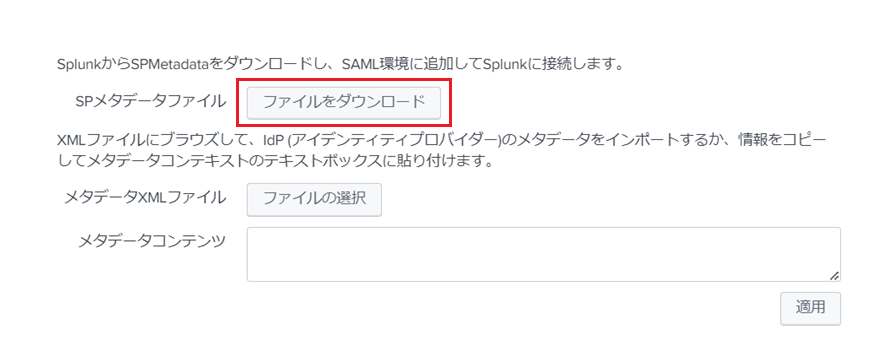
- [SAML]を選択し、[Splunkを設定してSAMLを使用]をクリック
- [ファイルをダウンロード]をクリックし、SPメタデータファイルをダウンロード
- Splunk CloudをSPとして設定するためのApplication作成
- Auth0管理画面で、[Applications] > [Applications]をクリック
- [+ Create Application]をクリック
![[+ Create Application]をクリック](/business/security/okta/image/okta_auth0_saml_splunk_dr03.png)
- 以下を設定し、[Create]をクリック
- Name:任意の名前を設定
- Choose an application type:「Regular Web Applications」を選択
![以下を設定し、[Create]をクリック](/business/security/okta/image/okta_auth0_saml_splunk_dr04.png)
- [Addons]タブで、[SAML2 WEB APP]をクリック
![[Addons]タブで、[SAML2 WEB APP]をクリック](/business/security/okta/image/okta_auth0_saml_splunk_dr05.png)
- [Usage]タブで、[Identity Provider Metadata]をダウンロード
![[Usage]タブで、[Identity Provider Metadata]をダウンロード](/business/security/okta/image/okta_auth0_saml_splunk_dr06.png)
- 「1. Splunk Cloud設定その①(SAML SP)」で取得したSPメタデータファイルの内容に従い、[Settings]タブで、Application Callback URLとSettingsを追加
- Application Callback URL:認証後にSPへSAMLアサーションを送る先のURL
- nameIdentifierFormat:NameIDフォーマット (Eメールアドレスを指定)
- nameIdentifierProbes:NameIDに使用する値 (Eメールアドレス値を指定)
- callback:Auth0がログアウトを要求する先のURL
- slo_enabled(true):IdP側でのログアウト時にSP側へログアウトを要求
- signatureAlgorithm:SAML Assertion/Responseに使用する署名アルゴリズム (RSA-256を指定)
- signingCert:SAML Requestの検証に使用する公開鍵証明書
{
  "nameIdentifierFormat":"urn:oasis:names:tc:SAML:1.1:nameid-format:emailAddress",
  "nameIdentifierProbes": [
    "http://schemas.xmlsoap.org/ws/2005/05/identity/claims/emailaddress"
  ],
  "logout": {
    "callback": "{SingleLogoutService > Location > URLにて取得した値}",
    "slo_enabled": true
  },
  "signatureAlgorithm": "rsa-sha256",
  "signingCert": "-----BEGIN CERTIFICATE-----\n{X509Certificateの中身}\n-----END CERTIFICATE-----\n"
}
![「1. Splunk Cloud設定その①(SAML SP)」で取得したSPメタデータファイルの内容に従い、[Settings]タブで、Application Callback URLとSettingsを追加](/business/security/okta/image/okta_auth0_saml_splunk_dr2_04.png)
- [Enable]をクリック
![[Enable]をクリック](/business/security/okta/image/okta_auth0_saml_splunk_dr2_05.png)
- 正しく設定が反映されたことを確認

- [SAML2 WEB APP]がONであることを確認
![[SAML2 WEB APP]がONであることを確認](/business/security/okta/image/okta_auth0_saml_splunk_dr10.png)
- Auth0ユーザへのAuth0ロール付与
- Auth0ユーザへAuth0ロール:adminを付与

- SAMLレスポンスをカスタマイズするためのRule作成
- Auth0管理画面で、[Auth Pipeline] > [Rules]をクリック
- [+ Create]をクリック
![[+ Create]をクリック](/business/security/okta/image/okta_auth0_saml_splunk_dr12.png)
- [<> Empty rule]をクリック
![[<> Empty rule]をクリック](/business/security/okta/image/okta_auth0_saml_splunk_dr13.png)
- 以下を設定し、[Save Changes]をクリック
- Name:任意の名前を設定
- Script:ログインユーザのロール情報をSAMLレスポンスに埋め込む処理を記述
function (user, context, callback) {
	// Get the user roles from the Authorization context
	const assignedRoles = (context.authorization || {}).roles;
	// Update the user object.
	user.rolez = assignedRoles;
	callback(null, user, context);
}
![以下を設定し、[Save Changes]をクリック](/business/security/okta/image/okta_auth0_saml_splunk_dr14.png)
- 正しく反映されたことを確認

- SAML設定
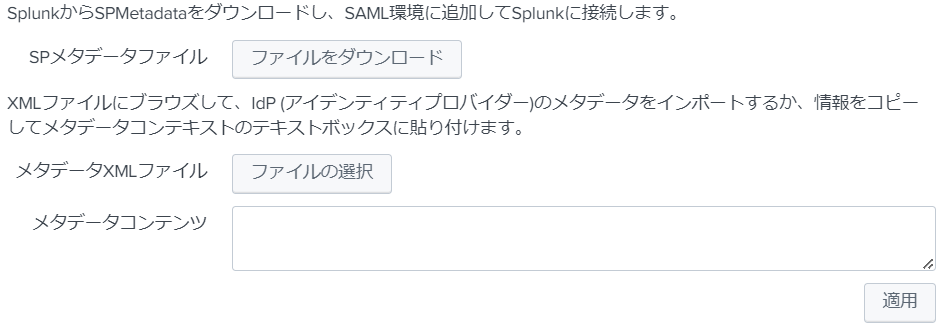
- [ファイルの選択]をクリックし、「2. Auth0設定 (SAML IdP)」で取得したIdentity Provider Metadataファイルをアップロード
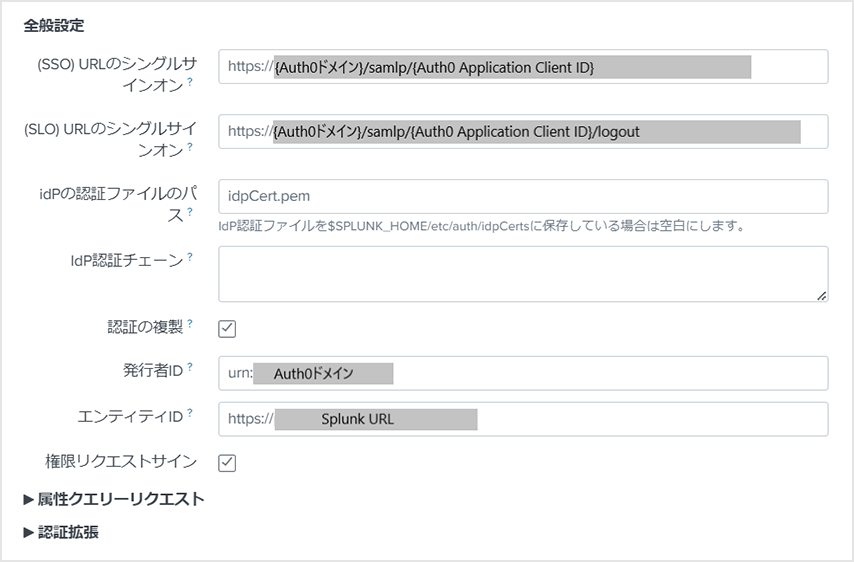
- 以下を設定し、[保存]をクリック
- エンティティIDを設定
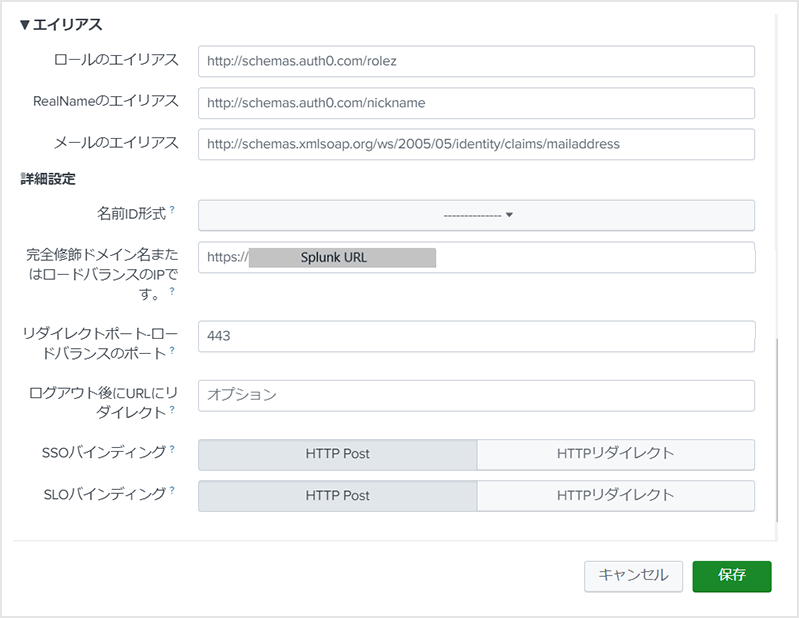
※「1. Splunk Cloud設定その① (SAML SP)」にて取得したSPメタデータ内記載のEntity IDの値を設定 - ロールのエイリアス:http://schemas.auth0.com/rolez
※「2. Auth0設定 (SAML IdP)」におけるAuth0のRules機能にて定義したロールのエイリアス - RealNameのエイリアス:http://schemas.auth0.com/nickname
- メールのエイリアス:http://schemas.xmlsoap.org/ws/2005/05/identity/claims/emailaddress
- SAMLグループ作成及びSplunkロール付与
- [新しいグループ]をクリック
![[新しいグループ]をクリック](/business/security/okta/image/okta_auth0_saml_splunk_dr21.png)
- 以下を設定し、[保存]をクリック
- グループ名:対応するAuth0ロールと同じ名前
- Splunkロール:割り当てるSplunkロールを選択
![以下を設定し、[保存]をクリック](/business/security/okta/image/okta_auth0_saml_splunk_dr22.png)
動作例
![Splunk Cloudダッシュボードで、[設定] > [Authentication methods]をクリック](/business/security/okta/image/okta_auth0_saml_splunk_dr23.png)
![[設定] > [ユーザ]をクリックし、Auth0ユーザが表示されていること、意図したSplunkロールが付与されていることを確認](/business/security/okta/image/okta_auth0_saml_splunk_dr24.png)
おわりに
本ページでは、Splunk Cloudを例として、Auth0を利用したSAML認証の実現例をご紹介しました。Auth0でSAML認証を実現することで、多要素認証やAuth0のログインセキュリティ機能を合わせて利用できます。
無償のAuth0トライアル環境においても、SAML認証機能をお試しいただけます。Auth0のSAML認証機能にご興味がある方は、弊社までお問い合わせください。
参考
お問い合わせ・資料請求
株式会社マクニカ Okta 担当
- TEL:045-476-2010
- E-mail:okta@macnica.co.jp
平日 9:00~17:00