- Semiconductor BusinessHOME
- Products and Services of Macnica,Inc.
-
technical information

-
Events and Seminars
- Handling Manufacturer
- Support
- Inquiry
- Click here to purchase products
- Semiconductor business e-mail magazine registration
![]()
![]() Narrow down by specifying conditions
Narrow down by specifying conditions
現在2189件がヒットしています。check
The content introduced in this article is how to update the firmware using the programming tool SmartRF Flash Programmer 2 and the debugger board CC-DEVPACK-DEBUG provided by Texas Instruments.
By using SmartRF Flash Programmer 2, hex files can be written as they are. This is a convenient method for those who simply want to update the firmware.
If you are planning to develop software using an integrated development environment, please see here.
Let's update SensorTag to the latest F/W -CCS edition-
Advance preparation
In order to update the SensorTag firmware, you need to prepare the following in addition to the computer on which you will install the development environment.
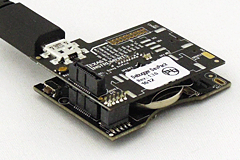
- SensorTag (SimpleLink SensorTag IoT評価キット CC2650STK)
- CC-DEVPACK-DEBUG (SimpleLink SensorTag デバッガ DevPack)
- Micro USBケーブル
- myTIアカウント ※ソフトウェア・ダウンロード時必要です。
TI社のmyTIアカウント登録ページはこちら
※ご注意
USB接続時であっても、予めボタン電池は挿入してご使用ください。未挿入でUSBを接続すると製品の故障、破壊につながります。
バージョン変更前にこちらのFAQをご参照ください。
SensorTag側のソフトウェア、ハードウェアバージョンごとにスマートフォンアプリ、MP001Cと接続した際の動作確認結果はありませんか?
開発環境のインストール
SensorTagのファームウェアをアップデートするためには、TI社が提供する書込みツール SmartRF Flash Programmer 2と、ソフトウェア開発キット SDK(BLE Stack)をインストールする必要があります。
書込みツール SmartRF Flash Programmer 2のインストール
- FLASH-PROGRAMMER-2のダウンロード
SmartRF Flash Programmer(TI社WEBサイト) から、"FLASH-PROGRAMMER-2" をダウンロードします。
- FLASH-PROGRAMMER-2のインストール
ダウンロードしたzipを解凍してしてインストールを行います。
ソフトウェア開発キット (BLE Stack)のインストール
- BLE Stackのダウンロード
BLE Stack(TI社WEBサイト)から "BLE-STACK Vx.x.x (Support for CC2640/CC2650)" のファイルをダウンロードします。
※ダウンロード時myTIアカウント情報入力ページが表示されますので、登録した情報を入力します。
- BLE Stackのインストール
ダウンロードしたble_sdk_[バージョン版数]_setup.exeを起動してインストールします。
※インストール・パスについては "Installing the SDK" の章に記載されています。
インストール・パス記載例:C:\ti\simplelink\ble_sdk_x_xx_xx_xx
F/Wの書込み
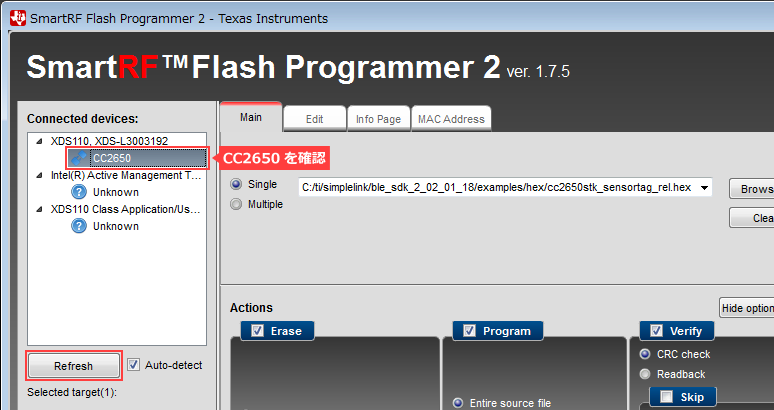
1. Flash Programmer 2の起動とCC2650デバイス認識確認
ボードとPCがUSBケーブルで接続されていることを確認した後、Flash Programmer 2を起動しConnecteddevicesにCC2650の表示があることを確認します。
※USB給電を行う際は必ずSensorTagにボタン電池を入れて下さい。
表示されない場合は、ボードとPCがUSBケーブルで接続されていることを確認した後、 "Refresh" を押して接続を確認します。
2. 書込みファイルの指定
次に、Flash image(s)を設定します。
"single" を選択し、Browseから "C:\ti\simplelink\ble_sdk_[版数名]\examples\hex" の "cc2650stk_sensortag_rel.hex" を選択します。

Connected devicesの "CC2650" を選択し、矢印アイコンが青に変わっていることを確認します。
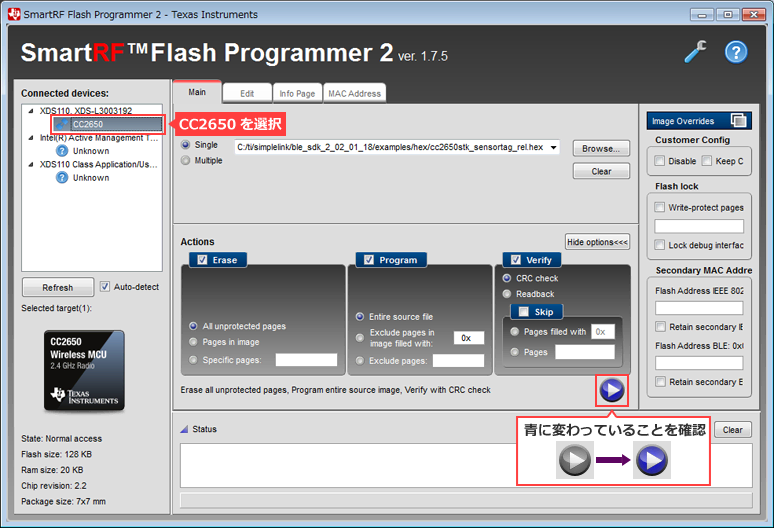
3. F/Wの書込み
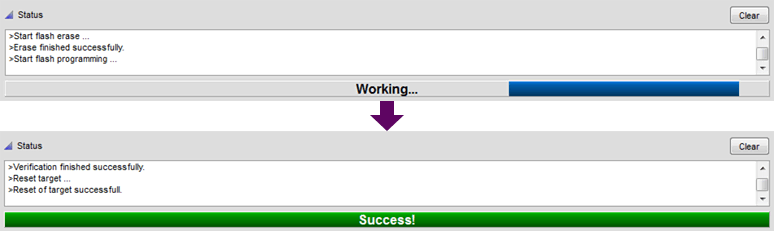
下記のようにActionsのErase、Program、Verifyすべてをチェックをし、青に変わった矢印アイコンを押せば書込みがスタートします。
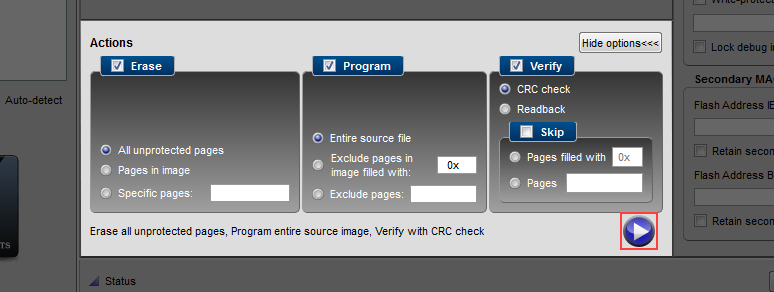
正常に終了するとSuccessと表示されます。
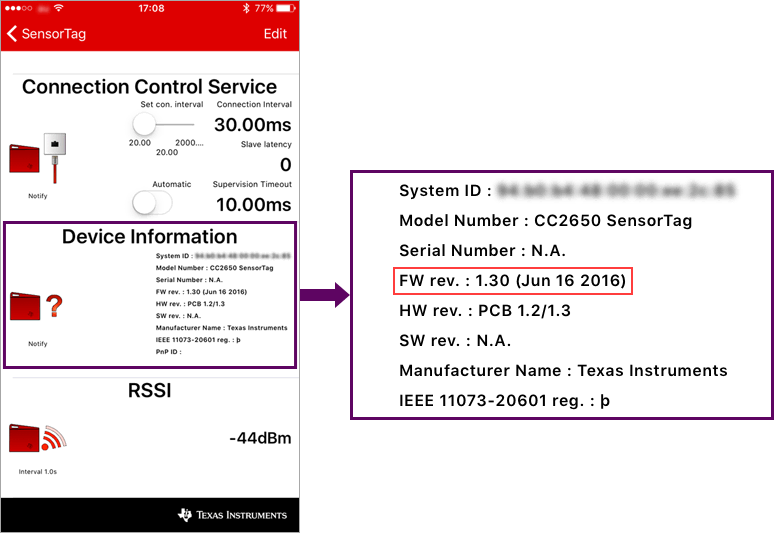
4. バージョンが更新されたかチェック
以上でFlash Programmer 2を使ったアップデートの実施が完了です。
なお、書き込んだFWの確認は、スマートフォン(ios/andrioidどちらでも可)があればSensorTagアプリの「Device Information」 から確認が可能です。
おすすめ記事/資料はこちら
商品の購入はこちら
SimpleLink SensorTag IoT評価キット CC2650STK
SimpleLink SensorTag デバッガ DevPack CC-DEVPACK-DEBUG
お問い合わせはこちら

