- Semiconductor BusinessHOME
- Products and Services of Macnica,Inc.
-
technical information

-
Events and Seminars
- Handling Manufacturer
- Support
- Inquiry
- Click here to purchase products
- Semiconductor business e-mail magazine registration


 Narrow down by specifying conditions
現在2213件がヒットしています。check
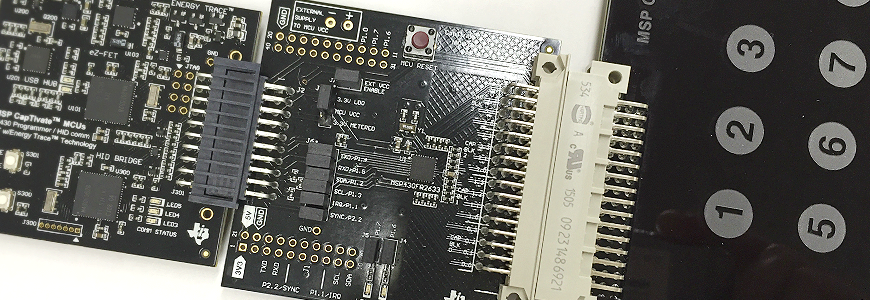
CapTIvate's rich development environment
CapTIvate capacitive touch solutions provide a rich development environment so that you can focus on your application development.
One of the rich development environments is a design support tool called "MSP CapTIvate Design Center GUI". By using this tool, everything from connecting the touch sensor electrode and microcomputer to creating the source code can be automated as much as possible, and the design environment can be set up in a very short time.
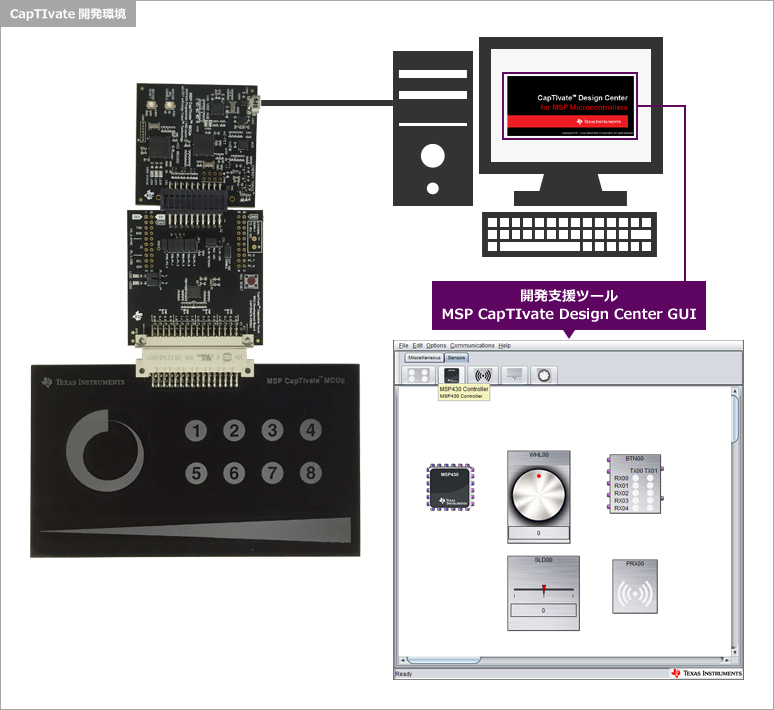
What can you do with the MSP CapTIvate Design Center GUI?
In the MSP CapTIvate Design Center GUI,
- Create and configure a touch sensor
- Easily tune the sensitivity of buttons, sliders, wheels, and proximity sensors.
- Real-time tuning
- Automatically generate source code, entire project
The intuitive user interface makes it easy to operate.
Set up your design environment using the CapTIvate Design Center GUI
The automatic code generation function of the CapTIvate Design Center GUI allows you to check the operation on the microcomputer in a short time, so it takes only a few minutes to tune the sensor.

* For details on how to install CapTIvate, refer to the Quick Start Guide.
Step1: Create a touch sensor canvas
Launch CapTIvate Design Center GUI, prepare a new canvas by going to File->Project New:Project Name,
- icon placement
Drag and drop icons onto the canvas to place buttons, sliders, wheels and proximity sensors. - Attribute setting
Self-capacitance method (Self) Set sensor attributes such as mutual capacitance method (Mutual).
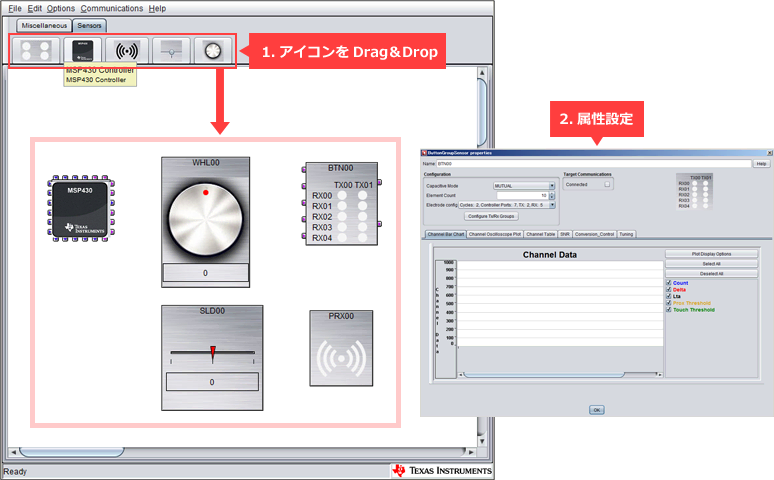
* For details, refer to CapTIvate: Quick Start Guide (4. Let's create a new project).
Step2: Connection design with microcomputer
After setting the microcomputer and sensor attributes, connect the microcomputer I/O and the sensor.
By opening the properties of the microcomputer and clicking the AutoAssign button, the sensor electrode is automatically assigned to the IO port of the microcomputer. If the connection is correct, the Errors display will change to OK.
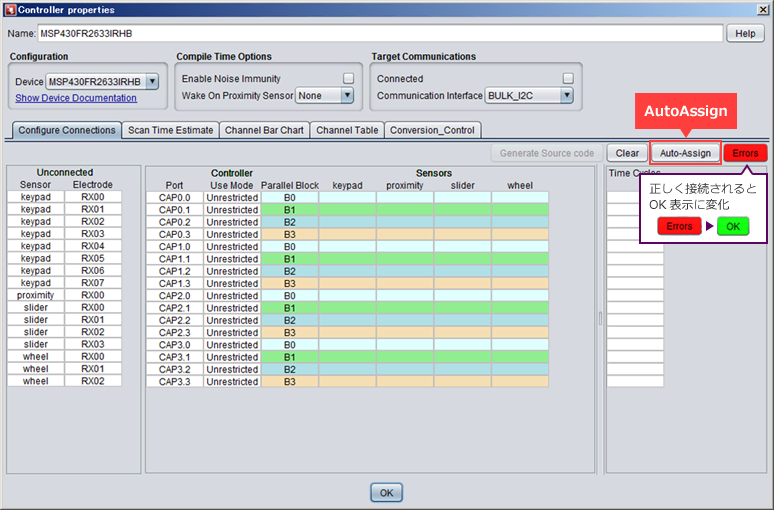
* For details, please refer to the Quick Start Guide (4. Let's create a new project).
Step3:Creating a program
When the microcomputer I/O and the sensor are properly connected, the GenerateSourceCode button can be selected. By clicking this button, the source code (project) will be automatically generated.
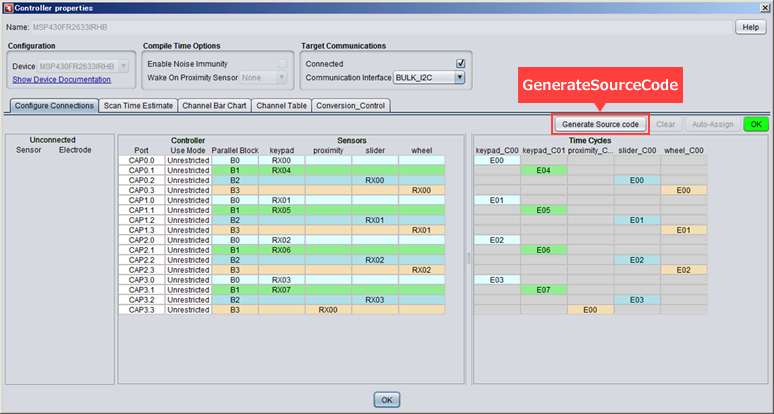
* For details, please refer to the Quick Start Guide (5. Let's create a program).
Step4: Write to microcomputer
Next, the automatically generated source code (project) is written to the microcontroller. The integrated development environment Code Composer Studio™ IDE is used for writing.
- Load project into Code Composer Studio™ IDE
- Click the Debug button
Now, writing to the microcomputer is complete.
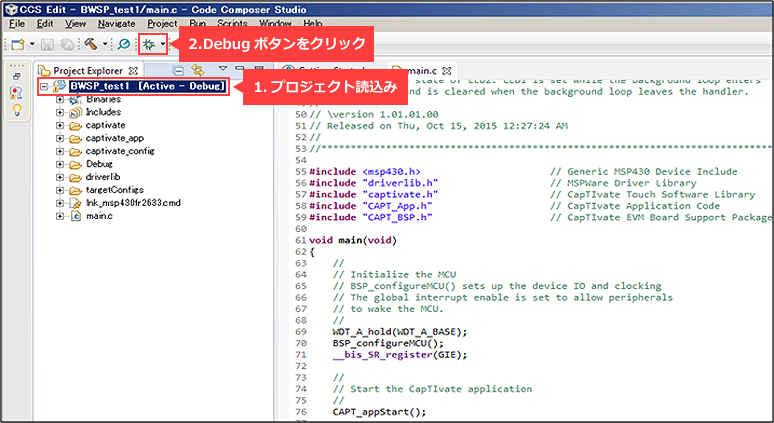
* For details, please refer to the Quick Start Guide (5. Let's create a program).
Step5: Sensor tuning
After writing to the microcomputer, use the CapTIvate Design Center GUI tool again. If you open the properties of the sensor, you can see a screen where you can visually check the response.
By bringing the conductor (hand or finger) close to the sensor electrode, the bar graph changes in real time, so adjust the parameters to obtain the desired response.
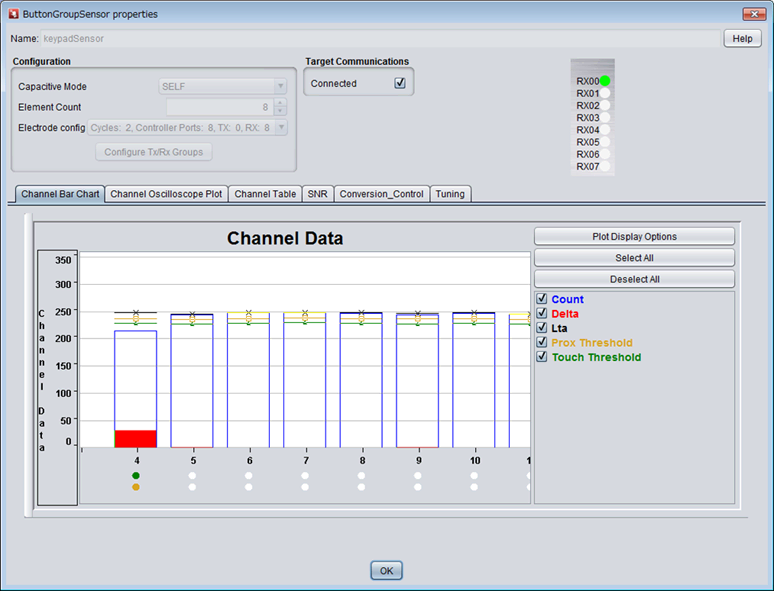
* For details, please refer to the Quick Start Guide (3. Let's try it out).
how was it? The CapTIvate Design Center GUI makes it easy to build a touch sensor evaluation environment.
CapTIvate: Please refer to the Quick Start Guide for more detailed setup instructions. In addition, the quick start guide also describes an additional example of control processing "5.7 Creating a program", so please refer to it as well.
Click here for recommended articles/materials
CapTIvate: Quick Start Guide
Capacitive touch sensing can be realized only with a microcomputer! What is CapTIvate Technology?
Set up your design environment in minutes with the CapTIvate Design Center GUI
Touch detection is possible even with water droplets! What are the two capacitive methods?
Ultra low power consumption with CapTIvate wake-on-touch
Easy tuning of CapTIvate touch sensitivity with GUI
Easy tuning with CapTIvate even if there is moisture Part 1
Easy tuning with CapTIvate even if there is water Part 2
Texas Instruments Manufacturer Service Introduction
What is a sensor? Basic knowledge for digitization and IoT
Click here to purchase products
Click here for questions
Contact Us

