
Okta
オクタ
はじめに
Auth0では、Auth0自体のユーザデータベースだけではなく、外部のIdPで管理されているユーザアカウントを利用して、Auth0連携アプリケーションへログインできます。既存のIdPに登録済のユーザアカウント情報を継続して利用でき、最小限の対応作業でAuth0への認証統合を実現できます。
Auth0における外部IdP連携では、Enterprise Connection機能を利用します。本ページでは、外部IdPとしてOkta Workforce(以下、Okta)を対象とし、必要となる設定と実際のログイン動作をご紹介します。
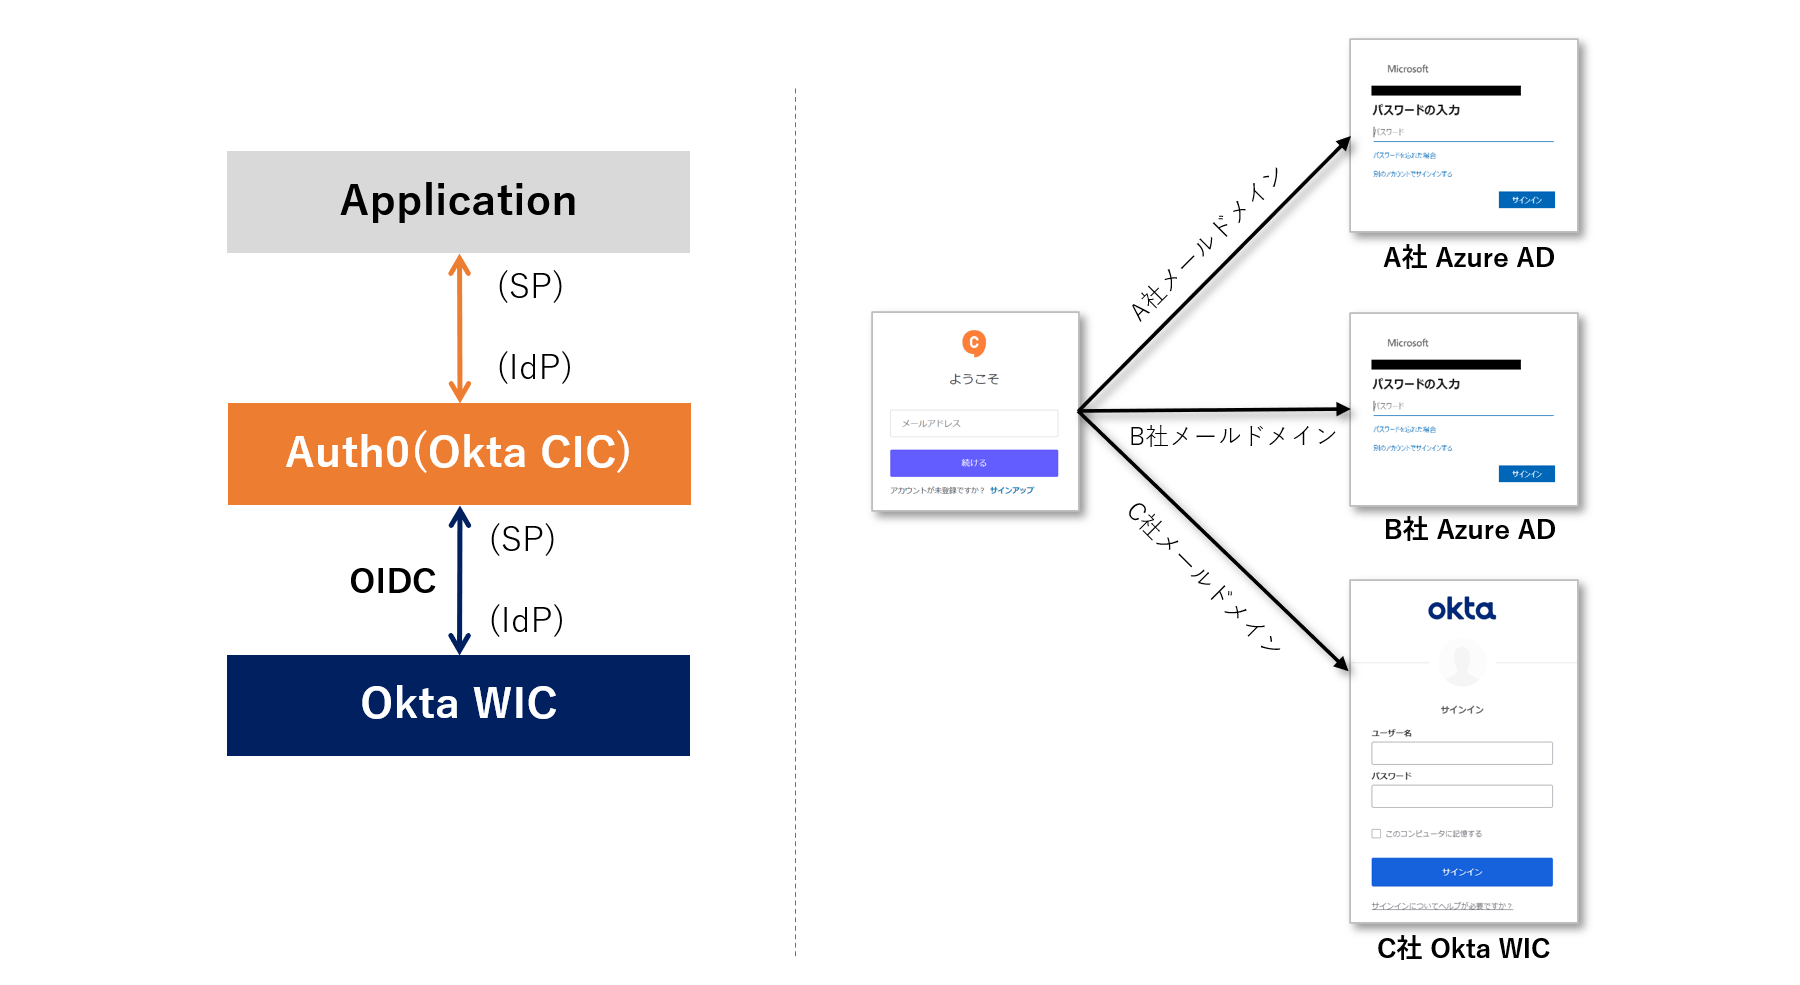
Auth0がサポート対応する外部IdP
Auth0がサポート対応している外部IdPは、以下より確認できます。Okta Workforce Identity、Azure AD等、主要なIdPに対応しています。
https://auth0.com/docs/authenticate/identity-providers/enterprise-identity-providers
前提
本ページ内の設定及び動作例では、以下が準備済の状態を前提とします。
- Auth0連携済のWebアプリケーション
- Okta Workforceテナント作成
Auth0によるログイン画面機能については、New Universal Loginを利用します。
※後述のConnection Button設定はClassic版非対応
また、本ページに記載する機能及び設定に関する内容は、2022年11月現在の情報となります。
設定概要
Auth0連携済のWebアプリケーションで、Oktaを外部IdPとする認証統合を実現するために、Auth0・Oktaそれぞれで必要となる設定は、以下の通りです。
※Auth0とOktaの連携には、OpenID Connectを用います
- アプリケーション登録
- クライアントシークレット作成
- Okta向けEnterprise Connection設定
- ApplicationにおけるEnterprise Connectionの有効化
ここから、具体的な設定方法とログイン時の動作例をご紹介します。
設定例
- 1. Okta設定に必要となるAuth0側情報の整理
Okta側の設定で必要となる以下の情報を確認
- Auth0テナントドメイン名:xxxxxx.xx.auth0.com
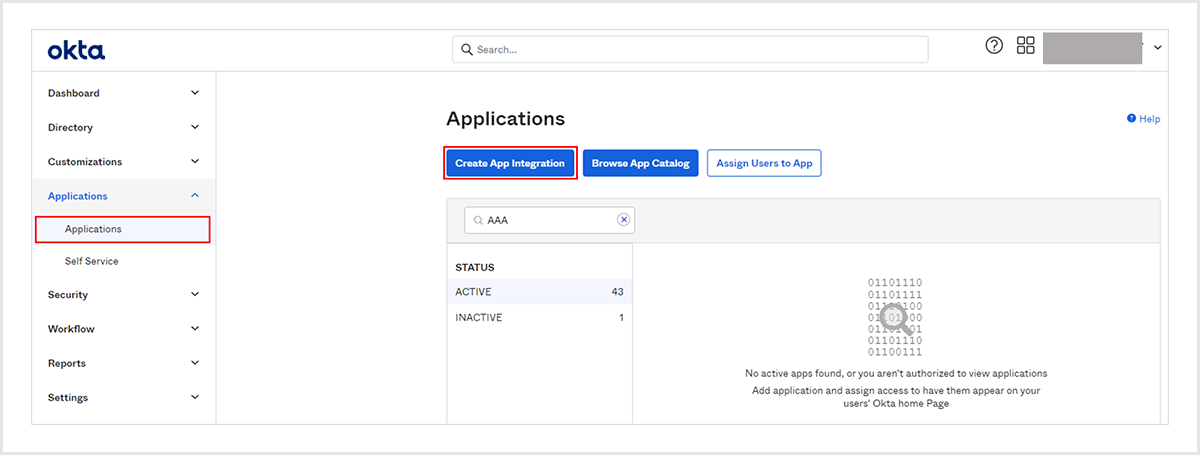
- Okta管理者画面へログインし、Applications > Applications画面へ遷移後、「Create App Integration」をクリック
- Sign-in methodにて[OIDC - OpenID Connect]、Application typeにて[Web Application]をそれぞれ選択し、[Next]をクリック
![Sign-in methodにて[OIDC - OpenID Connect]、Application typeにて[Web Application]をそれぞれ選択し、[Next]をクリック](/business/security/okta/image/okta_tech_auth0_workforce_dr02.png)
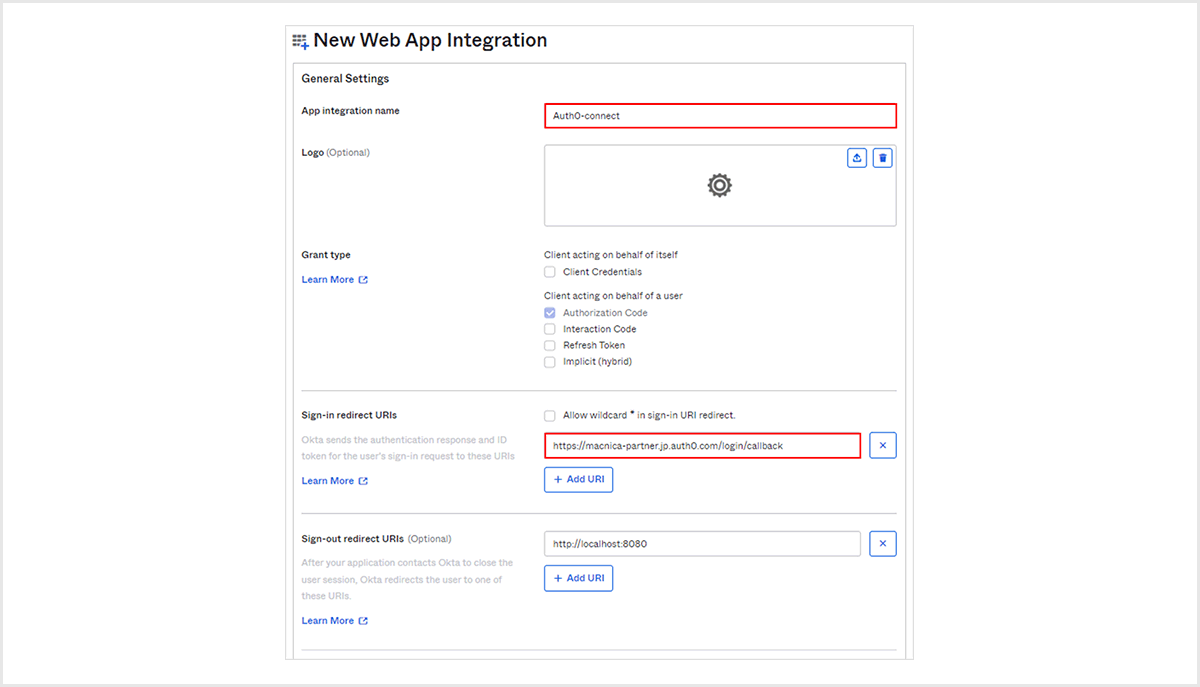
- アプリケーションの登録で各項目の設定を行い、画面下部へ移動
- App integration name: 任意の設定名
- Sign-in redirect URIs: https://(Auth0テナントドメイン名)/login/callback
- Assignmentsで任意のアサイン方法を選択し、[Save]をクリック
※下記画面キャプチャでは[Allow everyone in your organization to access(テナントへアクセスが許可された全ユーザ)]を選択
※任意のグループへアサインされたユーザのみとする場合は、[Limit access to selected groups]を選択
![Assignmentsで任意のアサイン方法を選択し、[Save]をクリック](/business/security/okta/image/okta_tech_auth0_workforce_dr04.png)
- 登録されたアプリケーションの[Client ID]と[Client Secret]の値をコピー(3.Auth0設定で利用)
![Assignmentsで任意のアサイン方法を選択し、[Save]をクリック](/business/security/okta/image/okta_tech_auth0_workforce_dr05.png)
- Auth0管理画面で、Authentication > Enterprise をクリック
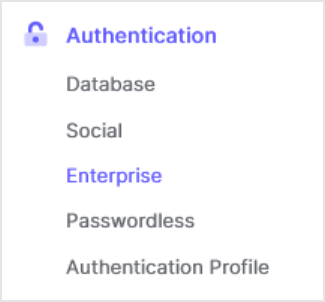
- [Okta Workforce]をクリック
![[Okta Workforce]をクリック](/business/security/okta/image/okta_tech_auth0_workforce_dr07.png)
- [Create Connection]をクリック
![[Okta Connection]をクリック](/business/security/okta/image/okta_tech_auth0_workforce_dr08.png)
- 各項目の設定を行い、ページ末尾の[Create]をクリック
- Connection name:任意の設定名
- Okta Domain:連携対象のOktaテナントのドメイン名
- Client ID:Oktaへ登録したアプリケーションのClient ID
- Client Secret:Oktaへ登録したアプリケーションのClient Secret
![各項目の設定を行い、ページ末尾の[Create]をクリック](/business/security/okta/image/okta_tech_auth0_workforce_dr09.png)
- Login Experienceタブで、Connection Button設定を実施し、ページ末尾の[Save]をクリック
- Display connection as a button:チェック(ログイン画面上にOktaによるログインボタンを表示)
- Button display name:ボタン表示名称を指定
![Login Experienceタブで、Connection Button設定を実施し、ページ末尾の[Save]をクリック](/business/security/okta/image/okta_tech_auth0_workforce_dr10.png)
- 連携するApplication設定で、作成したEnterprise Connectionを有効化
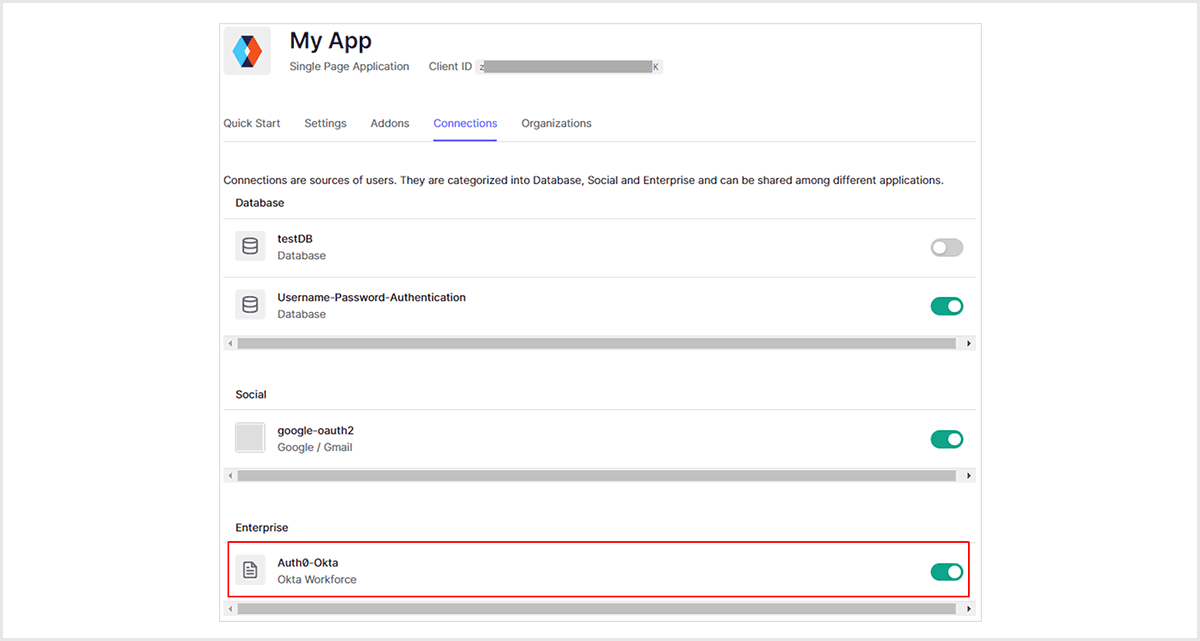
ログイン時の動作例: Oktaに登録済のユーザによるログイン
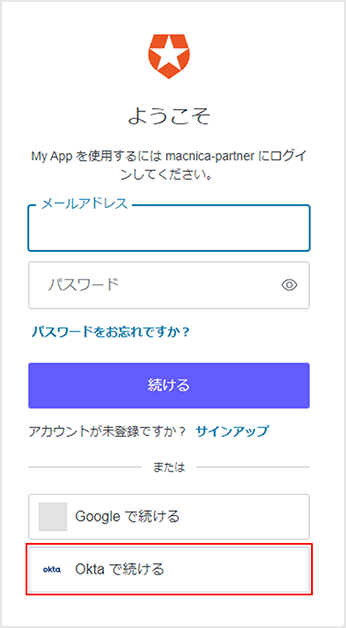
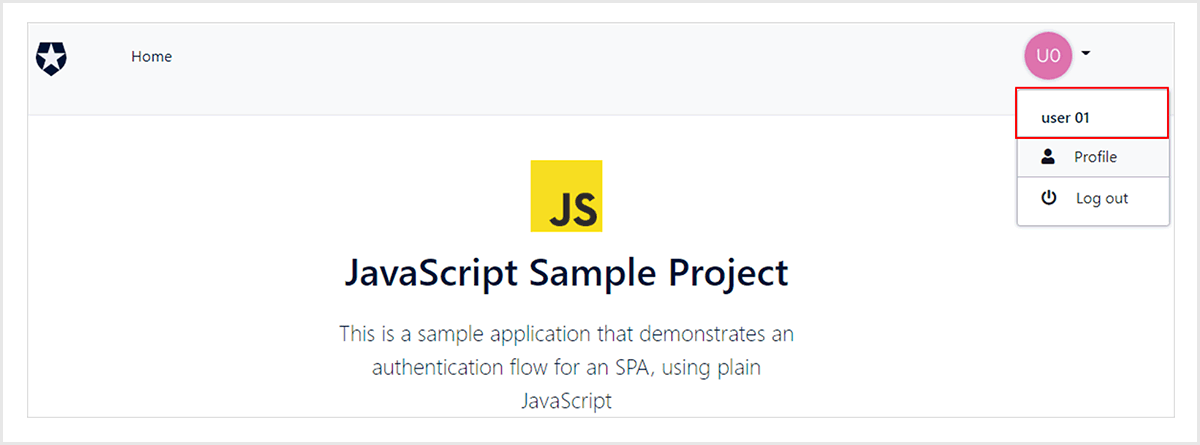
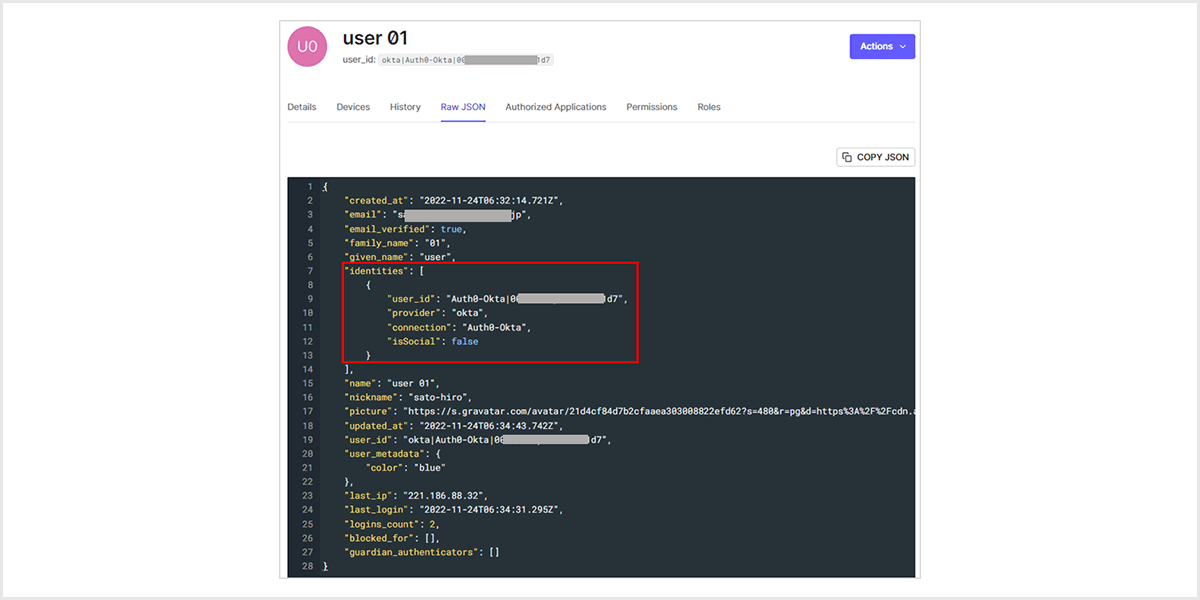
- Auth0連携済のWebアプリケーション画面でログイン操作を行い、Auth0が提供するログイン画面に遷移
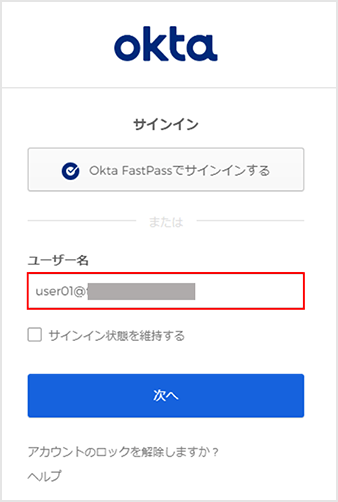
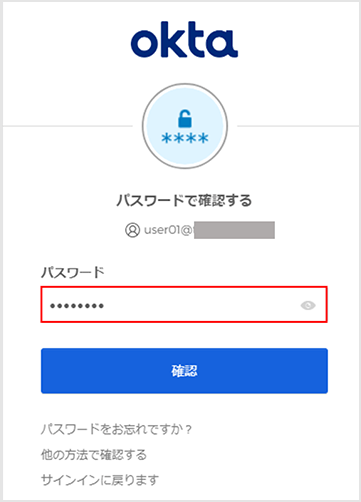
- [Oktaで続ける]ボタンが表示されていることを確認し、[Oktaで続ける]ボタンをクリック
まとめ
Auth0では、Enterprise Connection機能を利用することで、外部IdPを用いた認証処理を簡単に実現できます。無償のAuth0トライアル環境においてもEnterprise Connection機能をお試しいただけますので、ぜひ実感してください。
既存のIdPを活用したAuth0への認証統合についてご興味がある方は、是非弊社までお問い合わせください。
参考
お問い合わせ・資料請求
株式会社マクニカ Okta 担当
- TEL:045-476-2010
- E-mail:okta@macnica.co.jp
平日 9:00~17:00