Okta
Octa
Introduction
Auth0 allows you to add arbitrary claims to tokens (token customization) in the authentication and authorization process by using a function called Actions. As a result, the information required by the resource server can be passed at once via the token.
For example, you can implement the process of adding the profile information of the logged-in user to the ID token as a custom claim, or the process of adding the role information to the access token as a custom claim.
In this page, we will introduce the settings and actual operations using examples of the process of adding the logged-in user's profile information to the ID token and the process of adding role information to the access token.
premise
The information on functions and settings described on this page is current as of January 2023.
Setting overview
The settings required for token customization using the Actions function are as follows.
- Definition of custom logic by code editing (JavaScript writing)
- Specify the trigger that activates the created Action
- Triggers are selected from pre-defined ones on the Auth0 side
From here, we will introduce specific setting methods and operation examples.
Configuration example A: Add user profile information to the ID token as a custom claim
Add arbitrary profile information to user's [user_metadata]
![Add arbitrary profile information to user's [user_metadata]](/business/security/okta/image/okta_auth0_actions_dr01.png)
- On the Auth0 management screen, click [Actions] > [Library]

- Click [Create Action] > [Build from scratch].
![Click [Build Custom]](/business/security/okta/image/okta_auth0_actions_dr03_1.png)
- Select the name of the action to be created, the trigger of the action, and the execution environment, and click [Create].
This time, select [Login / Post Login] in [Trigger] to incorporate Action into the login flow.
![Select the name of the action to be created, the trigger of the action, and the execution environment, and click [Create].](/business/security/okta/image/okta_auth0_actions_dr04_1.png)
- Describe the logic to be implemented in the code editor (JavaScript description)
Use api.idToken.setCustomClaim() as a Function to set a custom claim to the ID token
exports.onExecutePostLogin = async (event, api) => {
  const { favorite_color, preferred_contact } = event.user.user_metadata;
  if (event.authorization) {
    //Set claims
    api.idToken.setCustomClaim(`https://myapp.example.com/favorite_color`, favorite_color);
    api.idToken.setCustomClaim(`https://myapp.example.com/preferred_contact`, preferred_contact);
  }
};

- Click Deploy
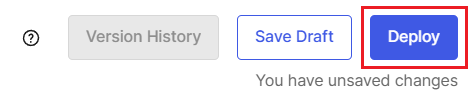
- Confirm that the created Action was successfully deployed

- ① In the Auth0 administration screen, click [Actions] > [Triggers] > [post-login].

- From the Action list displayed in the [Custom] tab on the right side of the screen, drag and drop the Action created in "1. Create a new Action" and apply it to the flow diagram on the left side of the screen.
![From the Action list displayed in the [Custom] tab on the right side of the screen, drag and drop the Action created in "1. Create a new Action" and apply it to the flow diagram on the left side of the screen.](/business/security/okta/image/okta_auth0_actions_dr09_1.png)
- Click [Apply]
![Click [Apply]](/business/security/okta/image/okta_auth0_actions_dr10_1.png)
- Confirm that it was reflected normally

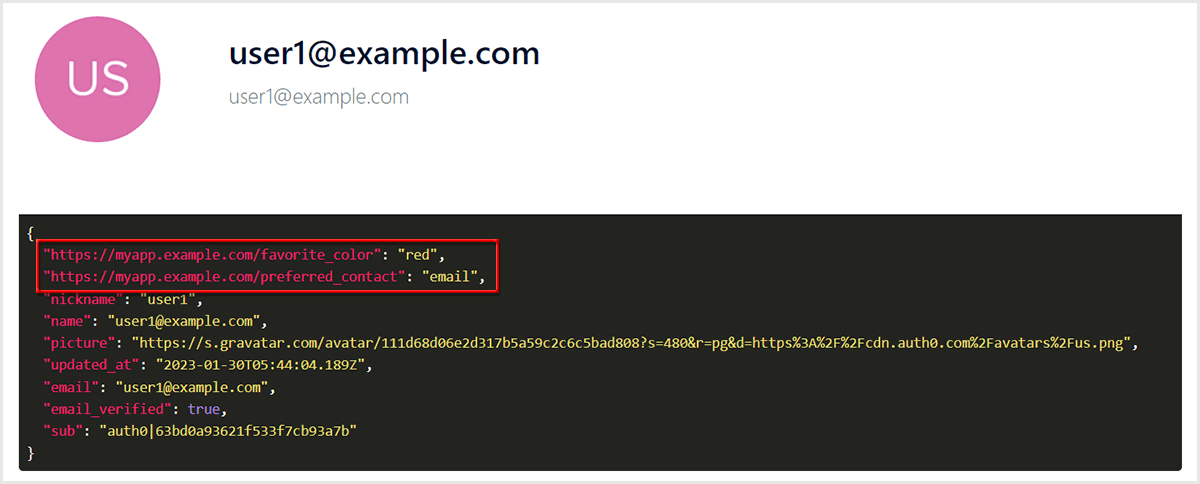
Operational example A: Add user profile information as a custom claim to the ID token
This time, we used a sample application (SPA/JavaScript) provided by Okta.
Setting example B: Add user role information to access token as custom claim
Assign roles to users

Perform 1) and 2) in the same way as "Setting example A: Add user profile information to ID token as a custom claim"
- Select the name of the action to be created, the trigger of the action, and the execution environment, and click [Create].
This time, select [Login / Post Login] for [Trigger] to incorporate Action into the login flow.
![Select the name of the action to be created, the trigger of the action, and the execution environment, and click [Create].](/business/security/okta/image/okta_auth0_actions_dr14_1.png)
- Describe the logic to be implemented in the code editor (JavaScript description)
Use api.accessToken.setCustomClaim() as Function to set custom claim to access token
exports.onExecutePostLogin = async (event, api) => {
  if (event.authorization) {
    api.accessToken.setCustomClaim(`https://my-app.example.com/roles`, event.authorization.roles);
  }
};
![Select the name of the action to be created, the trigger of the action, and the execution environment, and click [Create].](/business/security/okta/image/okta_auth0_actions_dr15_1.png)
Perform ①②③ in the same way as "Setting example A: Add user profile information to ID token as a custom claim"
![Select the name of the action to be created, the trigger of the action, and the execution environment, and click [Create].](/business/security/okta/image/okta_auth0_actions_dr16_1.png)
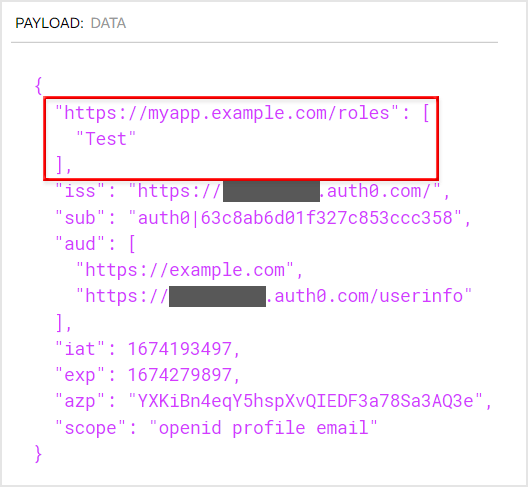
Operation example B: Add user role information to access token as custom claim
- Perform user authentication on the login screen provided by Auth0
- Get an access token using the issued authorization code
- Decode access token
- Confirm role information is added
Summary
Auth0's Actions feature allows you to add custom claims to your tokens during the authorization process. It also comes with version control, testing, and debugging functions that are necessary for coding. You can try the functions even in the free Auth0 trial environment, so please feel the high degree of customization.
In Auth0, in addition to the custom logic introduced this time, you can incorporate various custom logic using the Actions function. If you are interested in Auth0's Actions feature, please contact us.
reference
Inquiry/Document request
In charge of Macnica Okta Co., Ltd.
- TEL:045-476-2010
- E-mail:okta@macnica.co.jp
Weekdays: 9:00-17:00