Okta
Octa
Brief description
MFA from Okta
The method to ensure the certainty of authentication differs depending on the situation, so the same method may not be appropriate for every user or application. Okta offers various types of MFA, and it is possible to use MFA according to the requirements of users and applications.
example:
- SMS can't be delivered in areas with poor cell phone reception
- Security questions are vulnerable to social hacking and can be forgotten by users
- Physical tokens are at risk of being lost
- Biometric authentication cannot be used unless the device supports it in the first place

MFA usage settings (Okta side operation)
I will explain how to use multifactor authentication (MFA) when a user signs on in Okta.
There are three main setting methods.
- Enable the MFA factors you want to use in the Okta global settings
(MFA enabled) - Set which MFA factors apply to which groups
(Enable Factor Enrollment) - Enable MFA when user signs on
(MFA usage settings when signing on)
Enable MFA
- Transition to Security > Multifactor screen
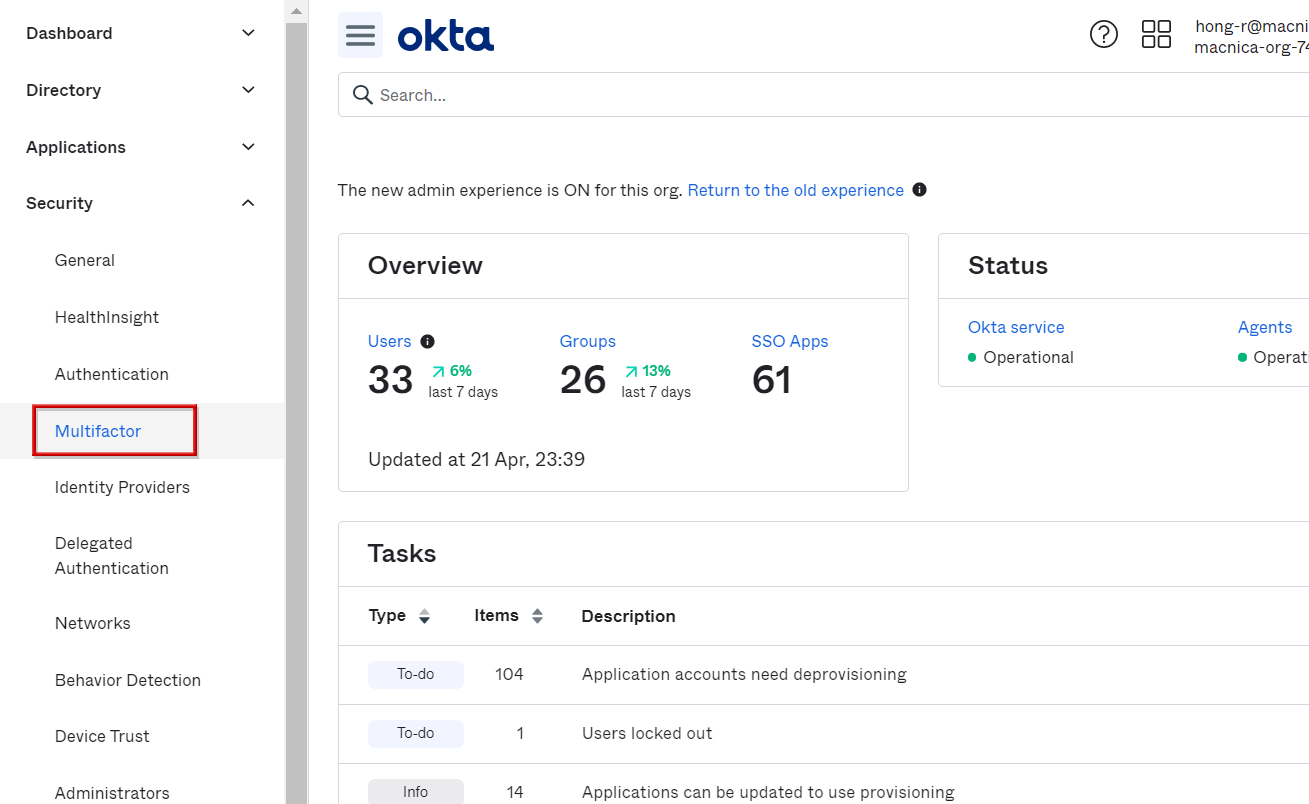
- Select the element you want to activate and change to Inactive → Activate
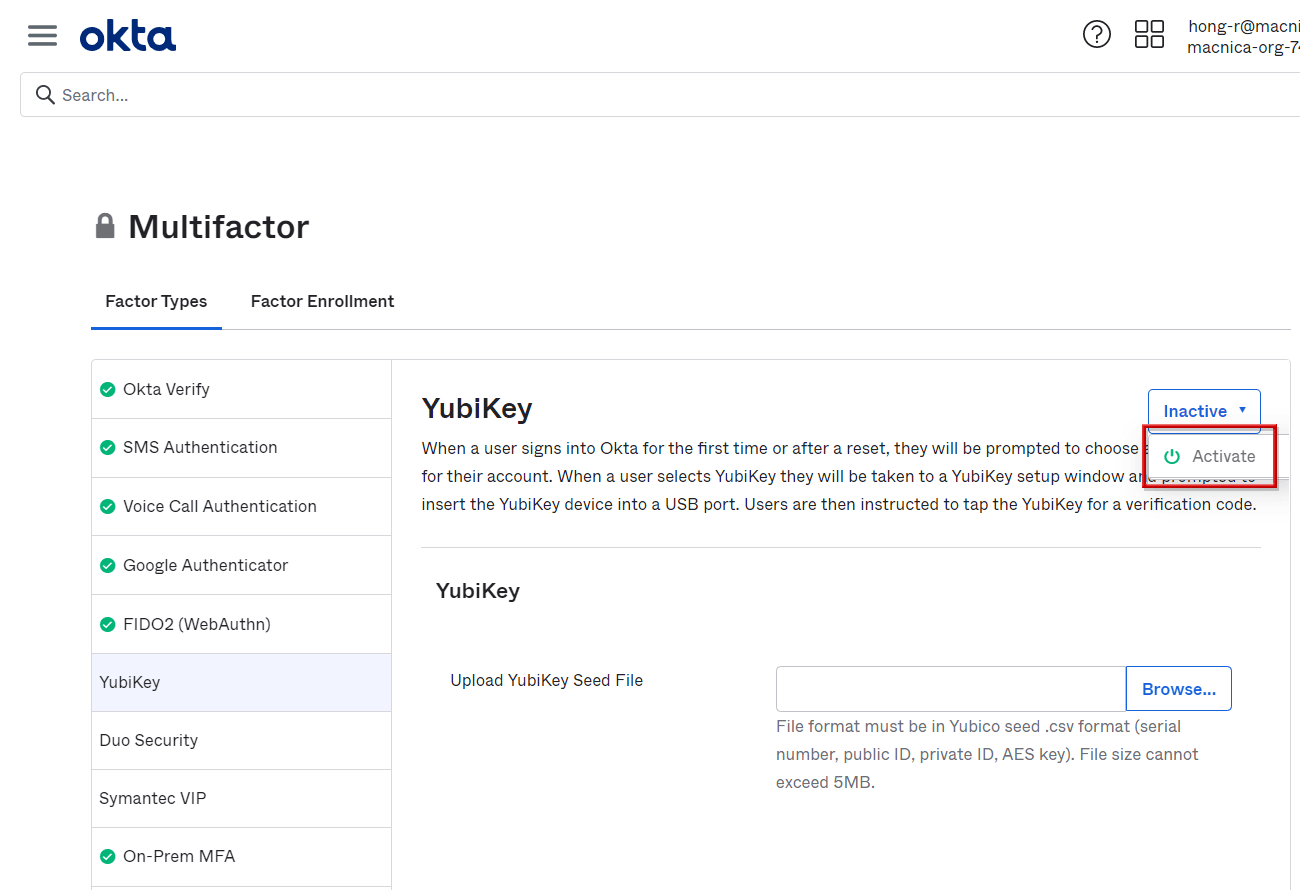
*The above is when Yubikey is enabled
Enable Factor Enrollment
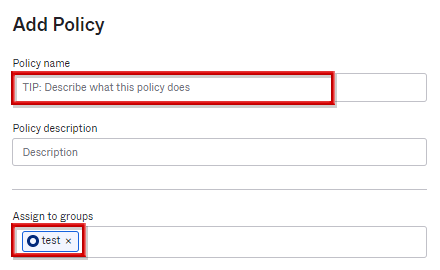
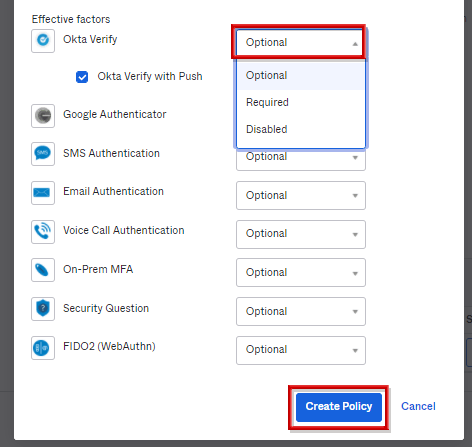
- Select the Factor Enrollment item and click Add Multifactor Policy
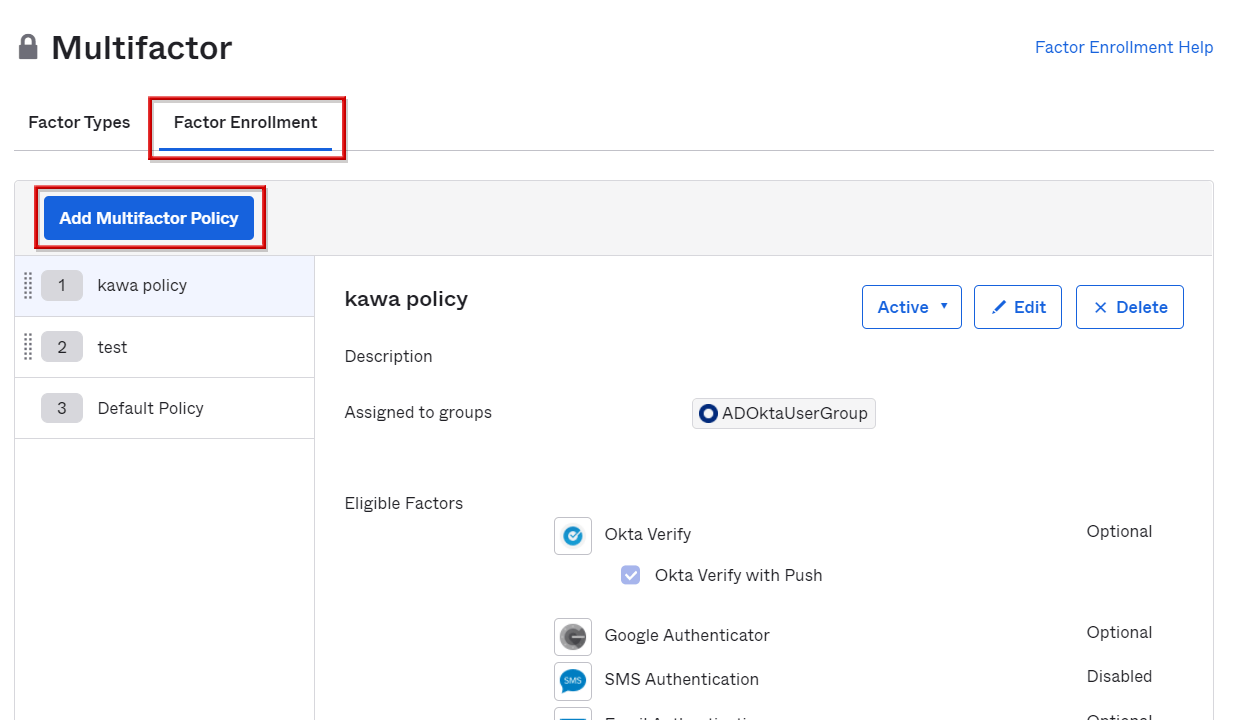
- Enter the policy name and select the applicable group in Assign to groups
- In the Effective factors section, select the conditions for applying the MFA factor from Optional, Required, and Disabled, and click Create Policy
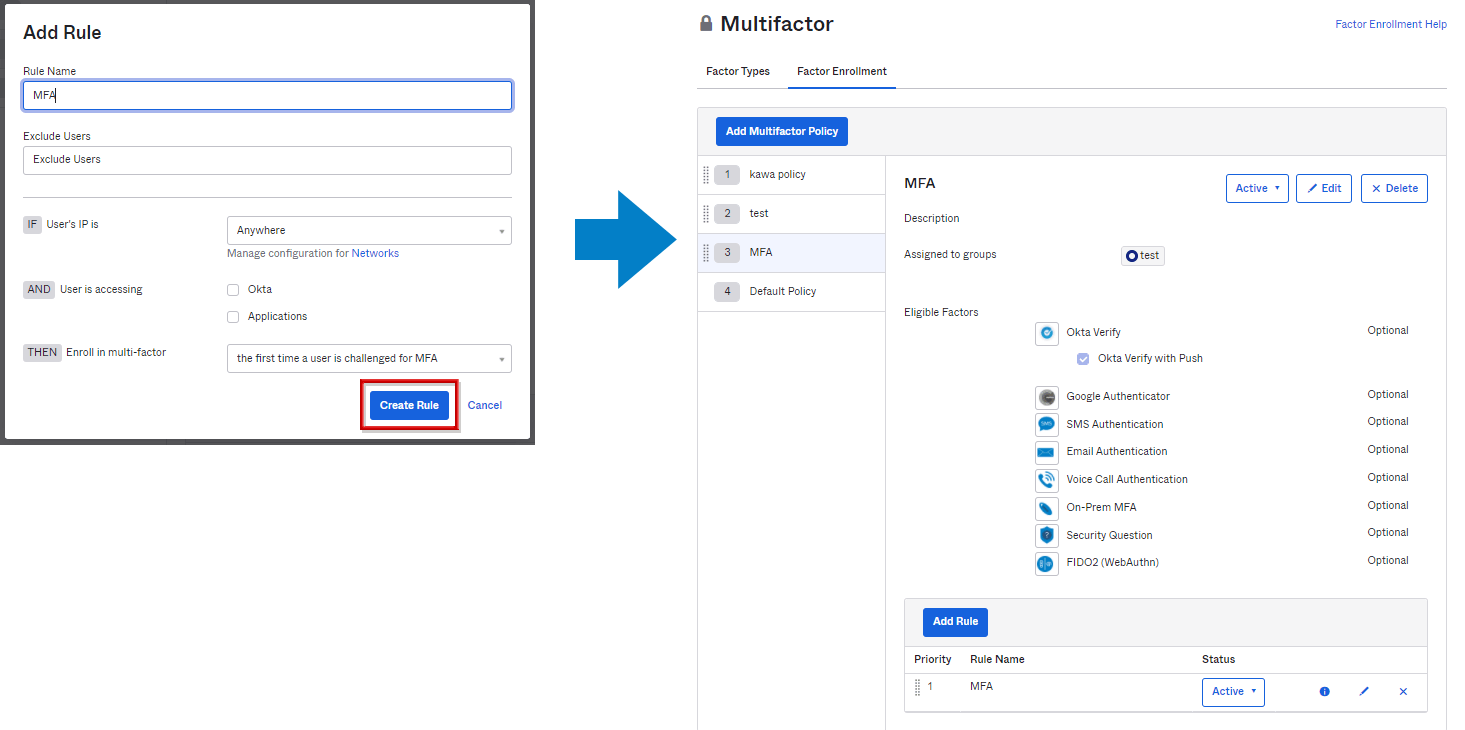
- Set the registration timing of the MFA factor. Since the Add Rule screen is displayed, enter the Rule Name and select the applicable conditions in Enroll in multi-factor
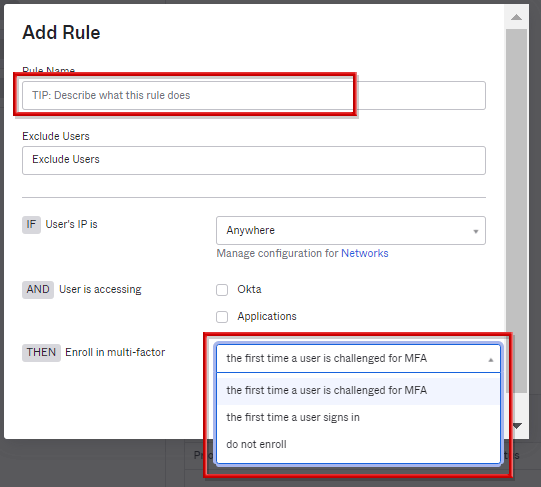
- Click Create Rule to finish adding the new policy rule
*The above is when selecting the first time a user is challenged for MFA to Enroll in multi-factor
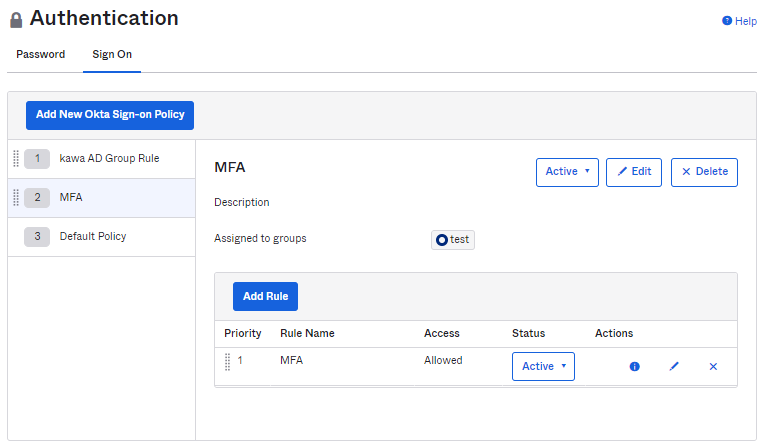
MFA usage settings at Sign On
- Transition to Security > Authentication screen. Select the Sign On item and click Add New Okta Sign-on Policy
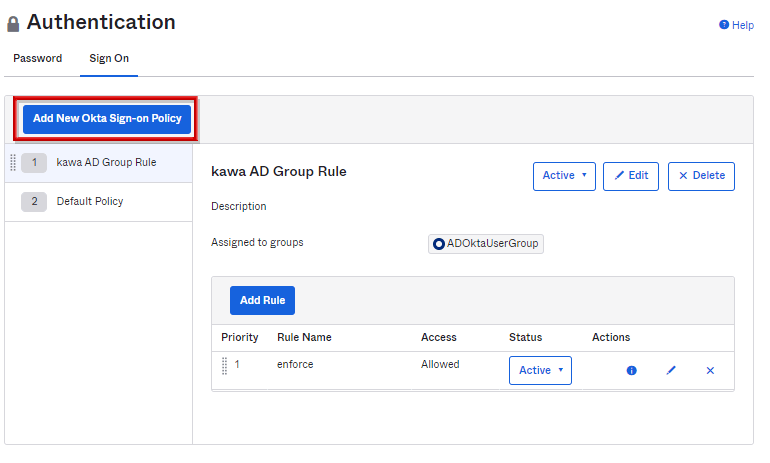
- Enter the Policy Name, select the applicable group in Assign to Groups, and click Create Policy and Add Rule
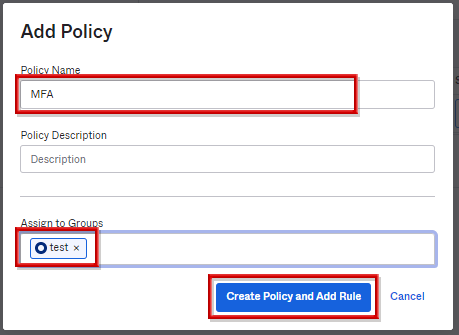
*The above is when test is selected for Assign to groups
- The Add Rule screen for setting MFA usage conditions at Sing On will be displayed. Select Password / Any IDP + Any factor and click Create Rule.
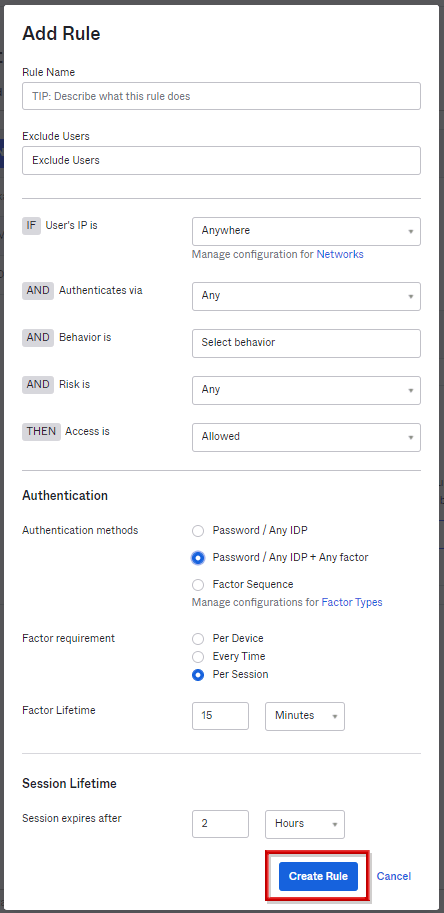
- New Policy Rule Added Complete
MFA usage settings (user side operation)
Now that Okta has completed MFA registration, multi-factor authentication such as Octa Verify will be performed when users log in.
From here, we will explain how to register for MFA on the user side and how to log in using MFA.
MFA registration
- Log in with an MFA-applied user. After password authentication, you will be asked to set up the MFA factor, so click the factor setting you want to use.
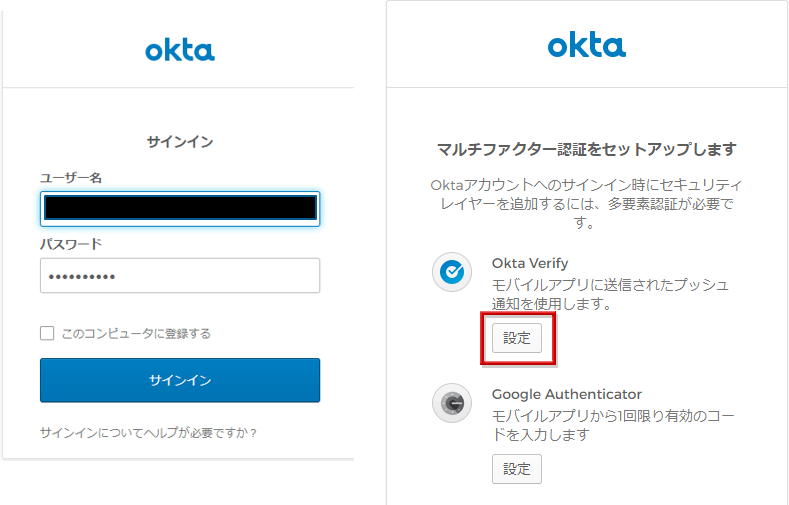
- Register MFA factors to use
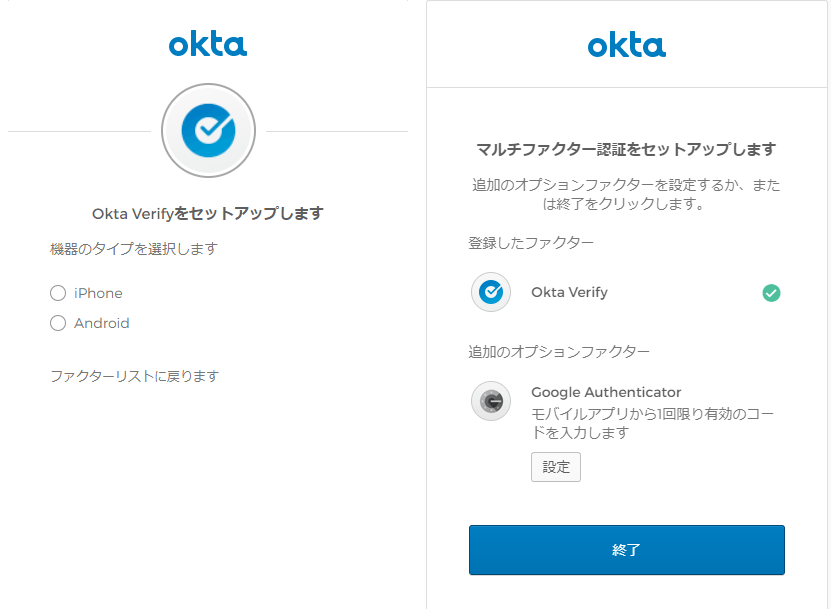
*The above is the Okta Verify registration screen
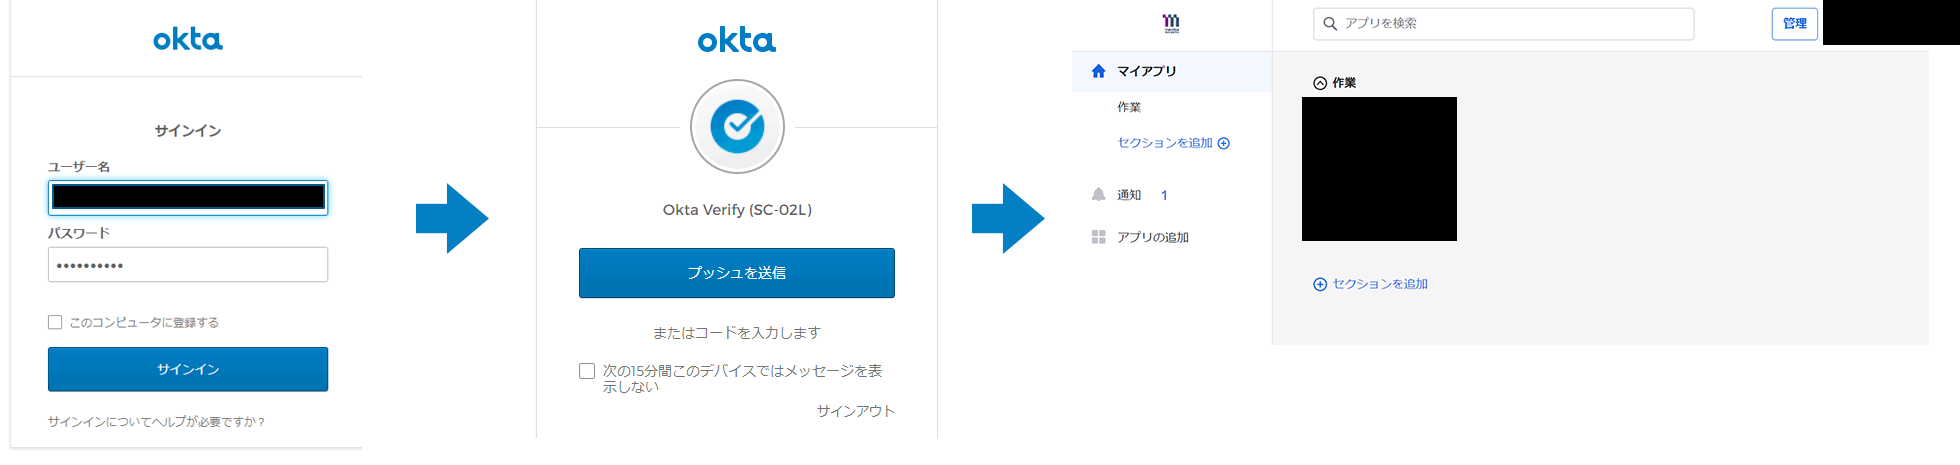
Login with MFA
- When you log in again, the registered element (Okta Verify) is displayed. When authentication is permitted, transition to the Okta portal screen
Operation details
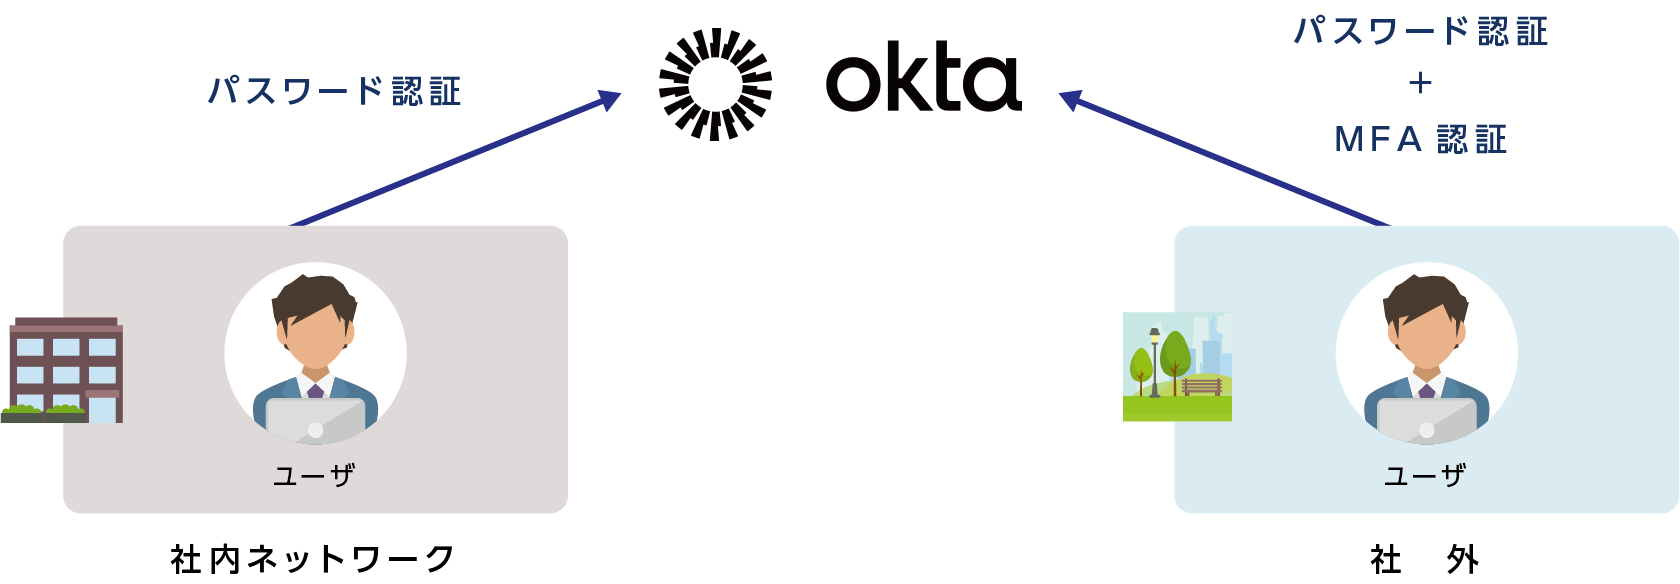
This section explains how to set only password authentication when accessing from the internal network, and require MFA authentication in addition to password authentication when accessing from outside the company.
The setting guide adds a rule to disable MFA when accessing from the set zone after setting the zone for a specific IP address.
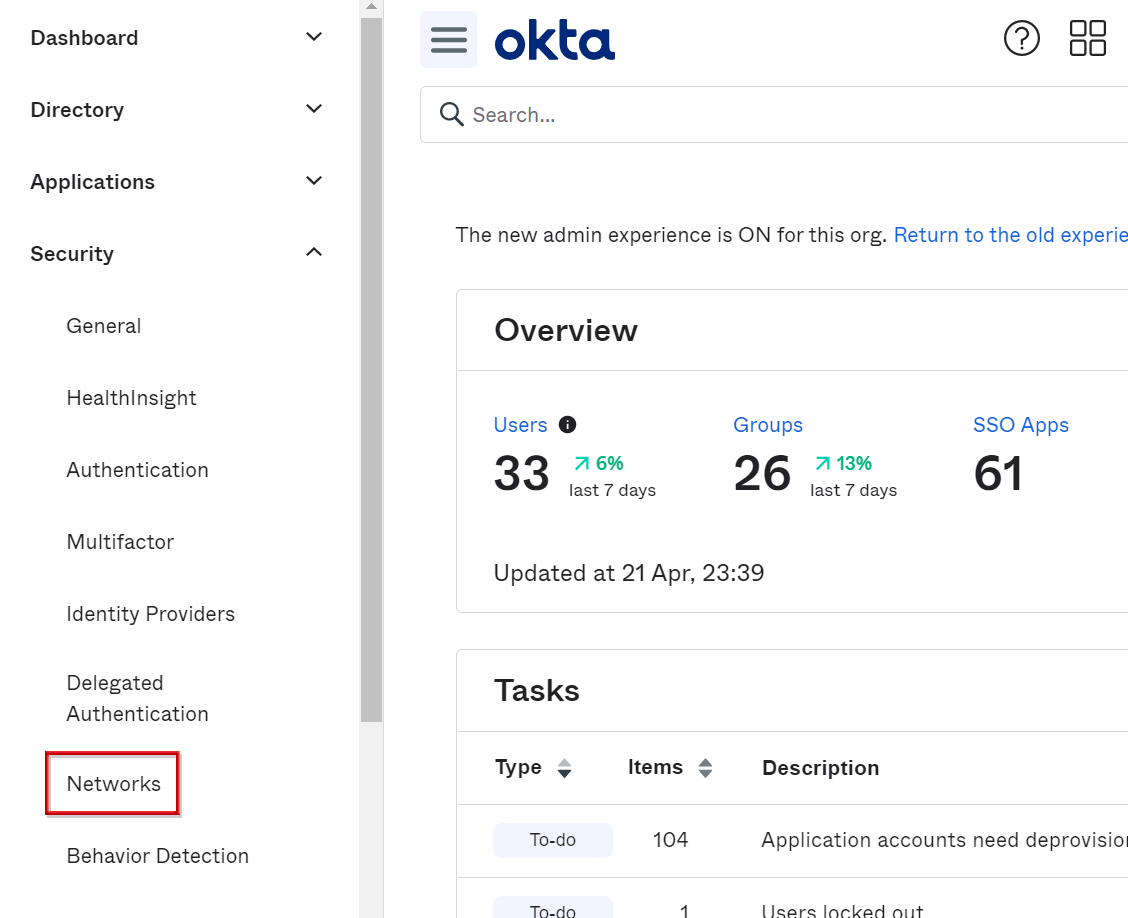
Configuring Network Zones
- Transition to Security > Networks screen
- After clicking Add Zone, click IP Zone
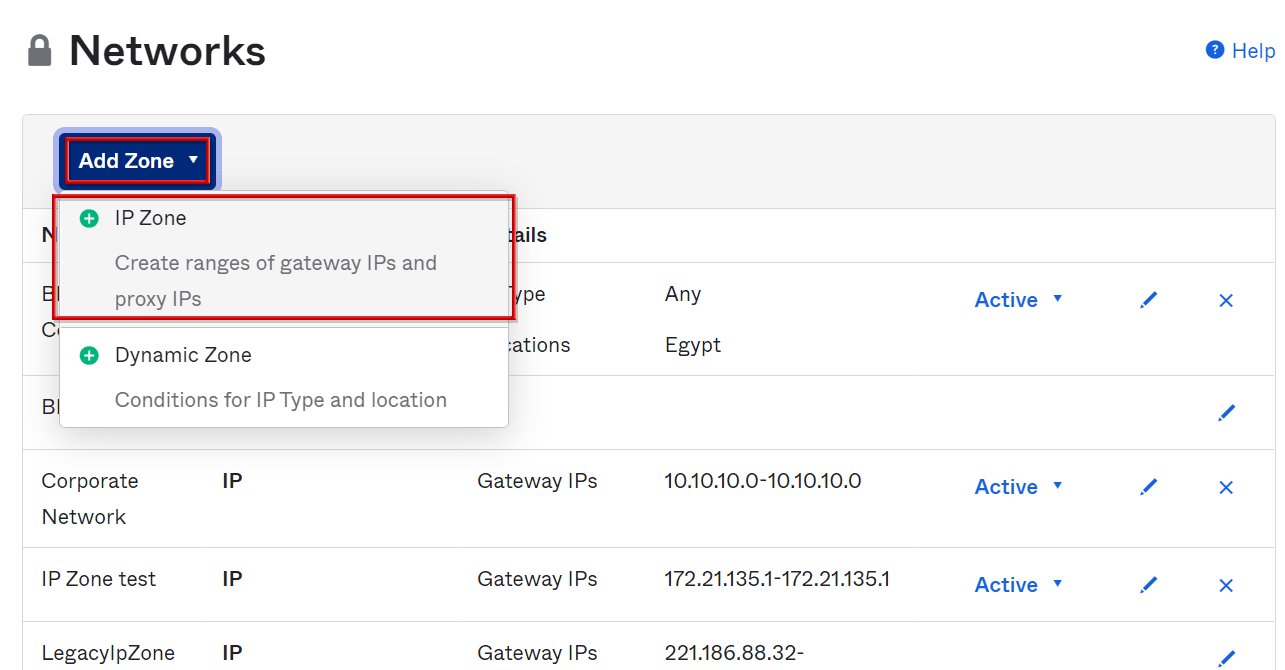
*This time, IP Zone is selected to specify the IP address, but it is also possible to specify the access location (Tokyo, etc.) by selecting Dynamic Zone.
- Enter the Zone Name, set the IP address to be specified in Gate IPs, and click Save
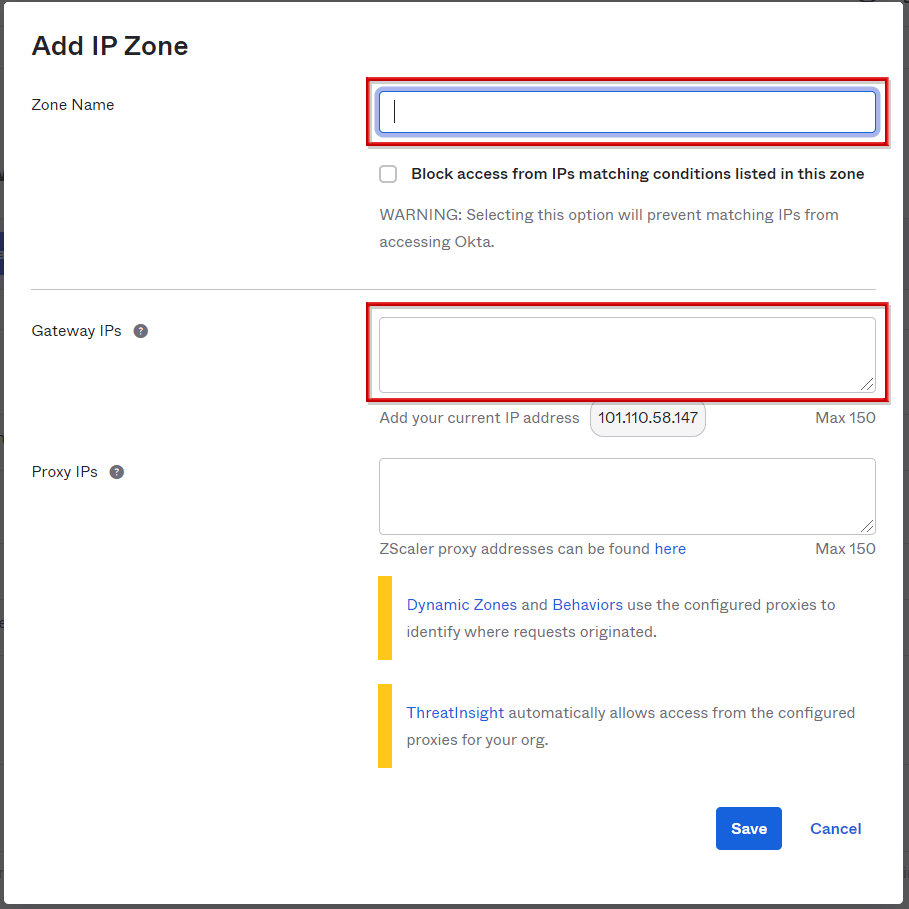
*The IP address can be set as shown in the example below.
・Fixed IP 10.0.0.1-10.0.0.1
・Range specification 10.0.0.1-10.0.0.10
・Subnet mask 10.0.0.0/24
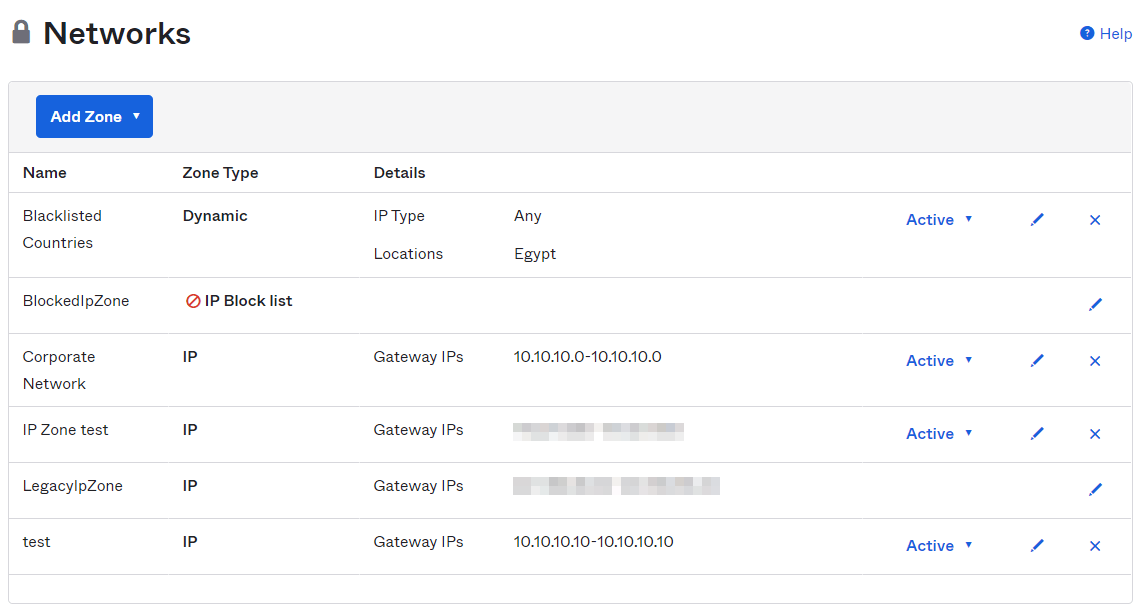
- Zone addition of specified IP address completed
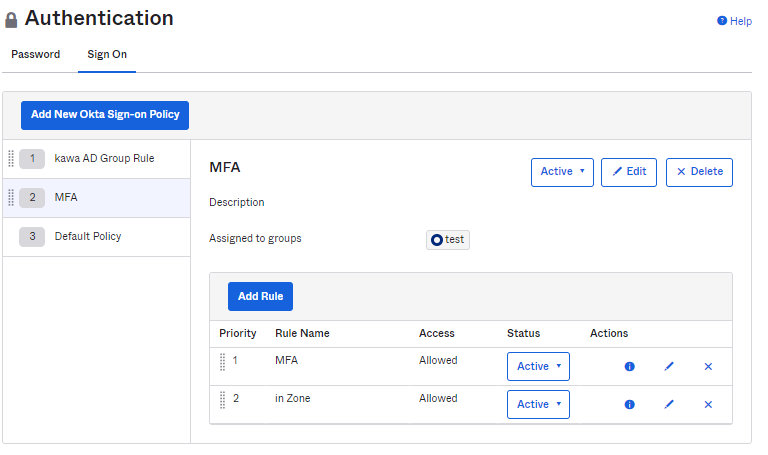
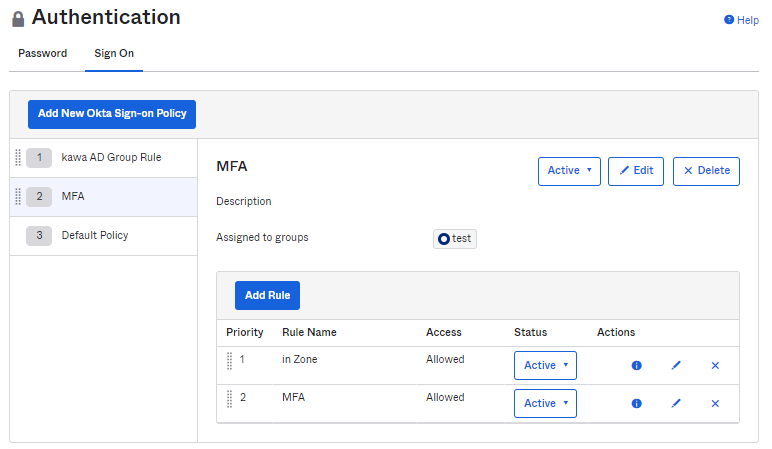
MFA usage settings at Sign On
- Move to the Security > Authentication screen, select the Sign On tab, and click Add Rule
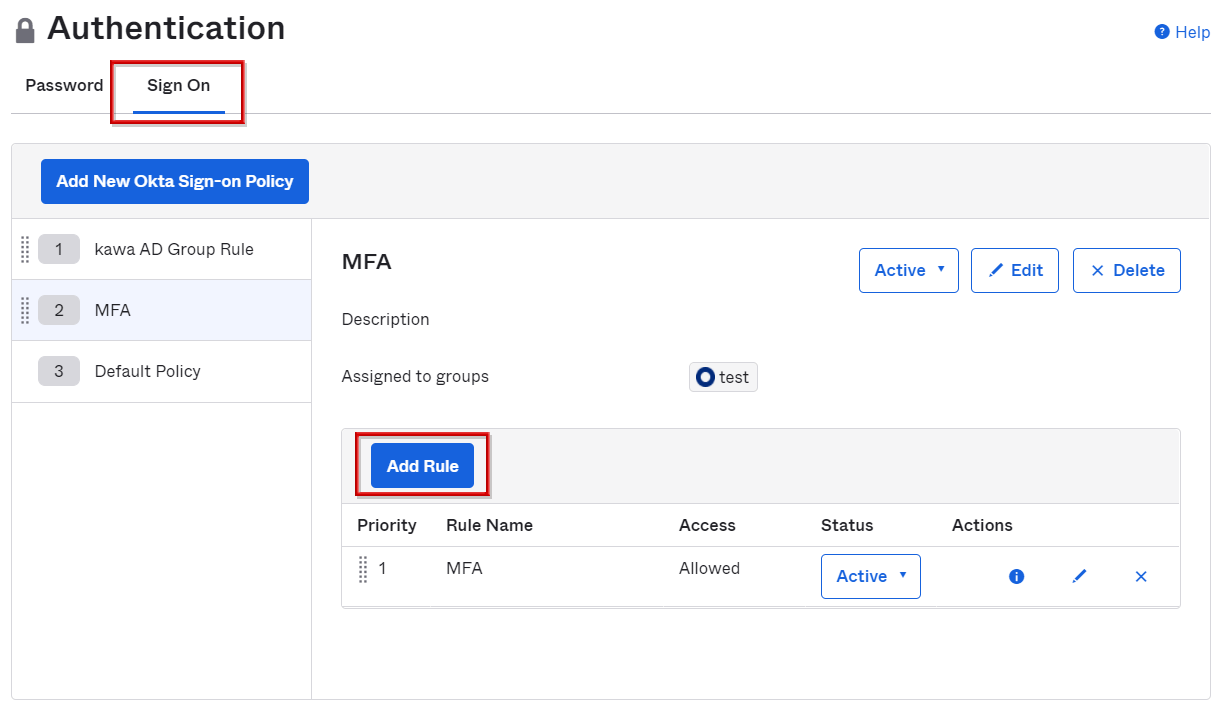
* Policies and rules requiring MFA authentication for all access have been created separately
- Enter the Rule Name, set the zone to apply, select Password/Any IDP, and click Create Rule
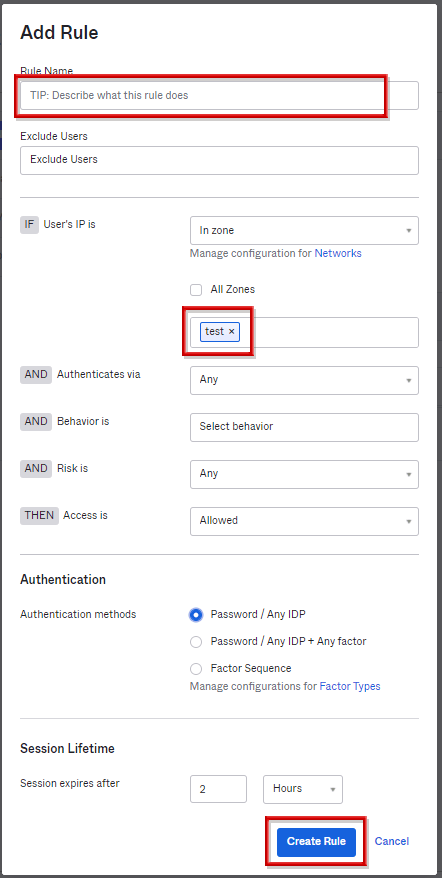
- Change the priority of the applied rule to the top
* Rules are implemented in order from the highest priority (lowest number), and the priority can be changed Drag and drop parts
- Password authentication for access from the specified IP address, password + MFA authentication for access from other addresses
Inquiry/Document request
In charge of Macnica Okta Co., Ltd.
- TEL:045-476-2010
- E-mail:okta@macnica.co.jp
Weekdays: 9:00-17:00