Okta
Octa
Introduction
Auth0 supports various authentication and authorization flows such as "Authorization Code Flow", "Implicit Flow" and "Client Credentials Flow" defined in OAuth2.0 (RFC6749) / OpenID Connect 1.0. Using Auth0 or the SDK provided by Auth0 makes it easy to implement each flow.
This page explains the sequence when using Auth0, using Client Credentials Flow (RFC6749 4.4) as an example. In order to explain, I will introduce the necessary Auth0 settings and the specific procedure for obtaining an access token.
premise
The information on functions and settings described on this page is current as of April 2023.
Client Credentials Flow in Auth0
The sequence of Client Credentials Flow in Auth0 is as follows.
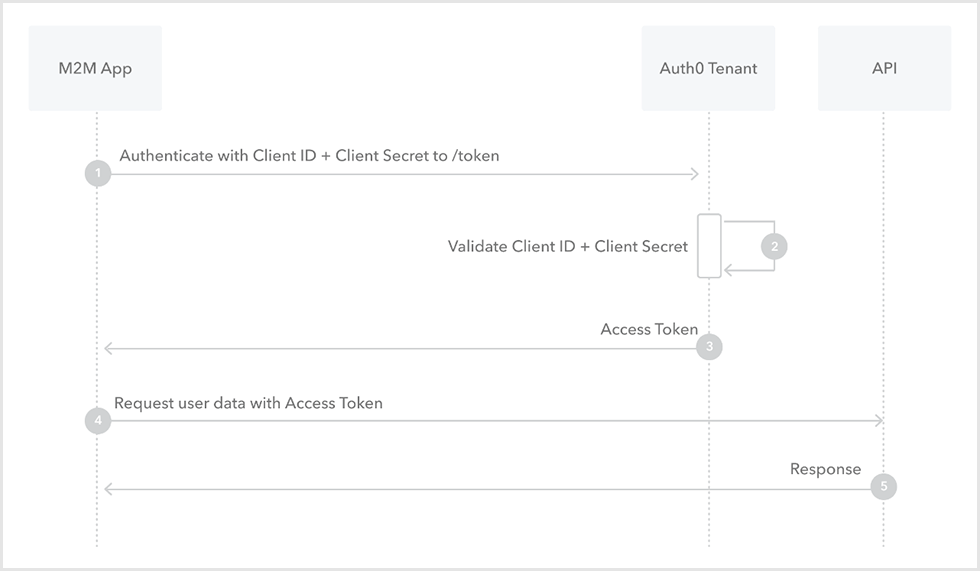
- M2M app: Send the client ID and client secret of the M2M app to Auth0 /oauth/token (endpoint for token acquisition)
- Auth0: Verifies the client ID and client secret of M2M apps
- Auth0: Respond with access token
- M2M app: request information from API server endpoint using access token
- API: Validate access token, respond with requested information
preset
To confirm the above sequence, perform the necessary pre-settings.
Implementing an API server using a sample
- On the Auth0 admin screen, click Applications > APIs
- Click [+Create API]
![Click [+Create API]](/business/security/okta/image/auth0_client_credentials_flow03.png)
- After setting each item, click [Create].
- Name: Arbitrary name Example) My API
- Identifier: API identifier Example) api://my-auth0-workshop-api
![After setting each item, click [Create].](/business/security/okta/image/auth0_client_credentials_flow04.png)
- Access the following URL and click [Node (Express) API] in Backend/API
- After transitioning to the Express.js API application page, click the [Log in] button
![After transitioning to the Express.js API application page, click the [Log in] button](/business/security/okta/image/auth0_client_credentials_flow05.png)
- After logging in, select the Auth0 tenant to be set, and click [Download Sample] under [①Define permissions] on the page.
![After logging in, select the Auth0 tenant to be set, and click [Download Sample] under [①Define permissions] on the page.](/business/security/okta/image/auth0_client_credentials_flow06.png)
- Select the API created in step ③ from the drop-down list and click [DOWNLOAD].
![Select the API created in step ③ from the drop-down list and click [DOWNLOAD].](/business/security/okta/image/auth0_client_credentials_flow07.png)
- Unzip the downloaded file in any folder
- Execute the following command in the unzipped folder to start Backend API
$ npm install $ npm start
[Supplement] Start API server with the following endpoints
| end point | explanation |
| /api/public |
|
| /api/private |
|
| /api/private-scoped |
|
Permission definition in API settings
- On the Auth0 admin screen, click Applications > APIs
- After selecting the API created in "Implementing an API server using a sample", move to the [Permissions] tab.
![After selecting the API created in "Implementing an API server using a sample", move to the [Permissions] tab.](/business/security/okta/image/auth0_client_credentials_flow08.png)
- After setting each item, click [+Add]
- Permission (Scope): e.g. read:messages
- Description: Arbitrary description e.g. read messages
![After setting each item, click [+Add]](/business/security/okta/image/auth0_client_credentials_flow09.png)
Application settings for M2M apps
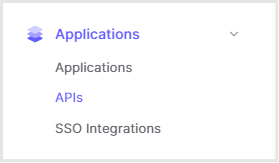
- On the Auth0 admin screen, click Applications > Applications
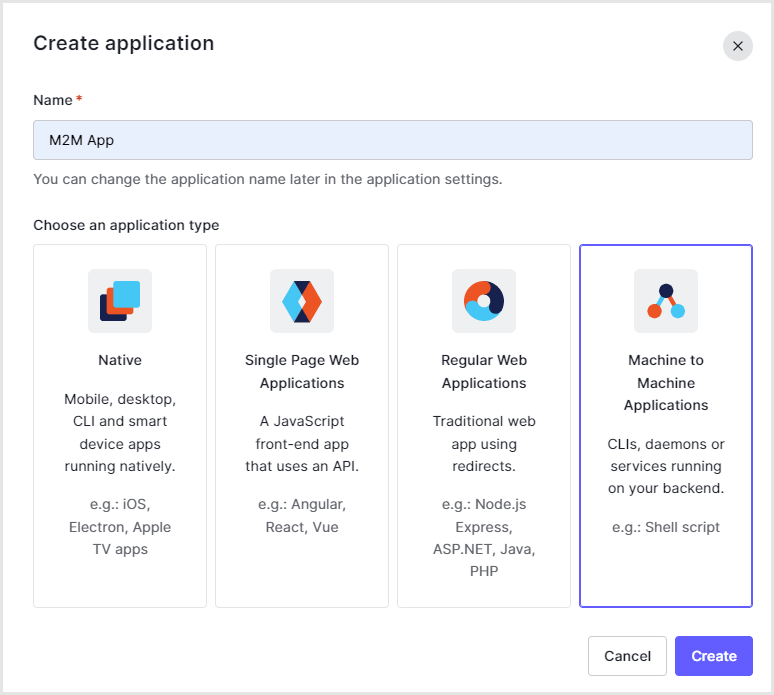
- Create a new Application
- Select [Machine to Machine Applications] and click [Create]
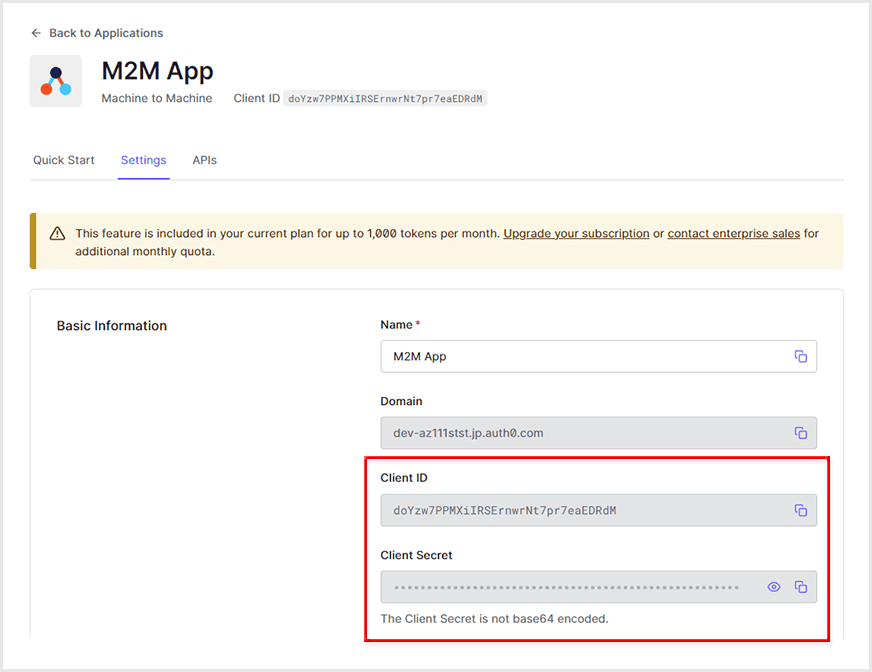
- After creation, check the issued Client ID and Client Secret values
- Select the API created in "Implementing an API server using a sample", check the Permission created in "Define Permission in API Settings", and click [Authorize].
![Select the API created in "Implementing an API server using a sample", check the Permission created in "Define Permission in API Settings", and click [Authorize].](/business/security/okta/image/auth0_client_credentials_flow12.png)
Confirmation procedure
Check the sequence of Client Credentials Flow in Auth0. The overview of the confirmation procedure is as follows.
- Access Auth0 /oauth/token endpoint and get access token
- Check the acquired access token
- Request to the endpoint of the API server using the obtained access token
Confirmation procedure details
supplement
- grant_type=client_credentials: Use Client Credentials Flow
- client_id: Client ID of Application settings in the preset
- client_secret: Client Secret of the Application setting in the pre-configuration
- audience: API server URL (Identifier in API settings)
{
	"access_token":"eyJhbGciOiJSUzI1NiIsInR5cCI6Ikp...(略)...Y41x_ubpdQw8dCD8AA",
	"scope":"read:messages",
	"expires_in":86400,
	"token_type":"Bearer“
}
Decode access token on jwt.io
{
	"iss": "https://..auth0.com/",
	"sub": "Ut1Qju59VdHiWDA8H0OPg6MUN2e6b6fK@clients",
	"aud": "api://my-auth0-workshop-api",
	"iat": 1677818643,
	"exp": 1677905043,
	"azp": "Ut1Qju59VdHiWDA8H0OPg6MUN2e6b6fK",
	"scope": "read:messages",
	"gty": "client-credentials"
}
Request to /api/private-scoped endpoint of API server
{
	"message":"Hello from a private endpoint! You need to be authenticated and have a scope of
	read:messages to see this."
}
in conclusion
I introduced the movement of Client Credentials Flow in Auth0, from issuing an access token to accessing the API server. I hope this helps you understand how Client Credentials Flow works and how Auth0 implements it.
reference
Inquiry/Document request
In charge of Macnica Okta Co., Ltd.
- TEL:045-476-2010
- E-mail:okta@macnica.co.jp
Weekdays: 9:00-17:00