- Semiconductor BusinessHOME
- Products and Services of Macnica,Inc.
-
technical information

-
Events and Seminars
- Handling Manufacturer
- Support
- Inquiry
- Click here to purchase products
- Semiconductor business e-mail magazine registration
![]()
![]() Narrow down by specifying conditions
Narrow down by specifying conditions
現在2186件がヒットしています。check
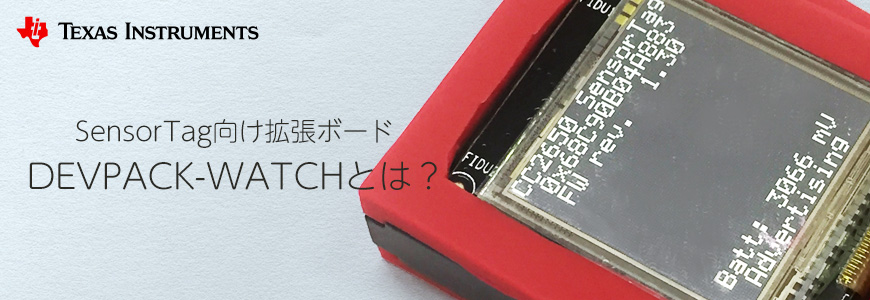
Previously, easy implementation of LED! Extension board for SensorTag DEVPACK-LED-AUDIO introduced the SensorTag extension board "DEVPACK-LED-AUDIO", but there is also an extension board called "DEVPACK-WATCH" that can display clocks and characters This time, we will introduce the features and how to use this product.
What you can do with the expansion board DEVPACK-WATCH for SensorTag
Display clock and text on LCD panel
DEVPACK-WATCH is an expansion board provided for SensorTag made by Texas Instruments (TI).
A 96x96 dot LCD panel is connected through the Sensor Tag's DevPack connector to display clocks and characters.
Please refer to this article for SensorTag.
Three features of SensorTag (CC2650STK)
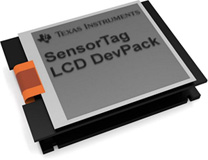
feature
- Evaluation kit that can be attached to the SensorTag (see diagram below)
- Character data can be displayed on a 96x96 dot LCD panel (LS013B4DN04 manufactured by Sharp)
See below for how to connect.
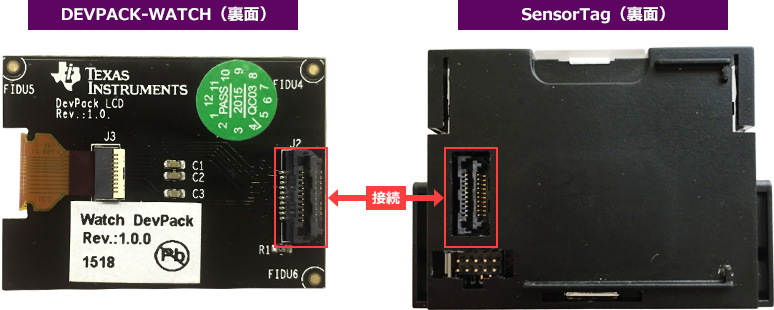
How to connect with SensorTag
Simply connect the DEVPACK-WATCH (back side) and the SensorTag (back side) and you're done.
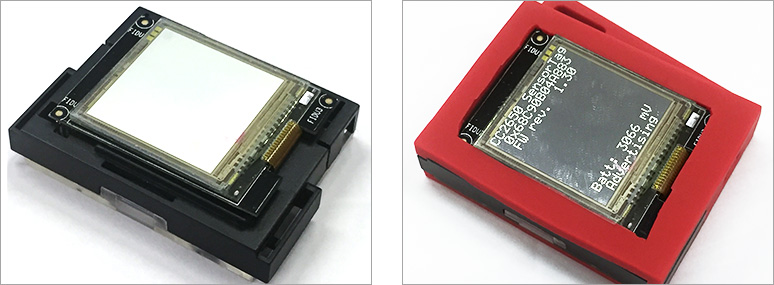
If you want to keep the DEVPACK-WATCH and SensorTag connected and still use the red SensorTag cover, cut the cover to fit your display.
How DEVPACK-WATCH works
Things to prepare
- Sensor Tag (CC2650STK)
- DEVPACK-WATCH
- Smartphone (I use iPhone this time)
- SensorTag app (This time we will use an iOS app as an example)
1. Firmware update
First, update the SensorTag's firmware.
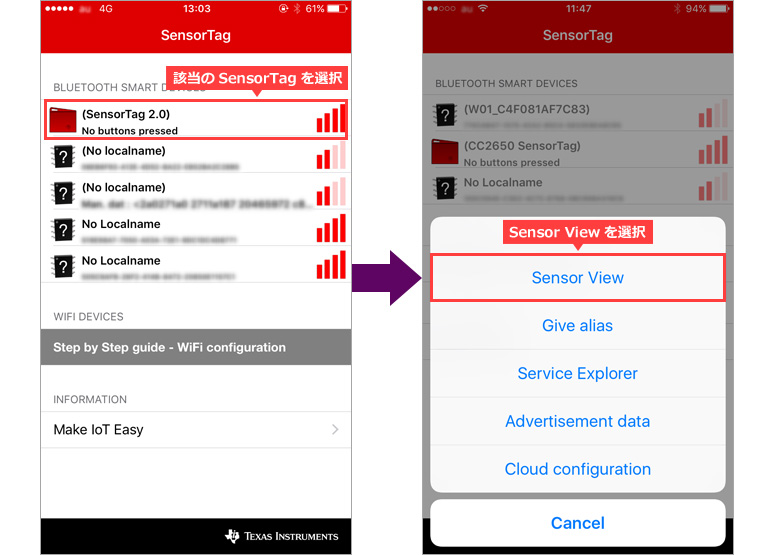
In order to update the firmware with OAD this time, launch the SensorTag app, confirm that the SensorTag to be updated is displayed, and select Sensor View.
Please refer to the following page for firmware update.
Let's update SensorTag to the latest F/W -OAD edition-
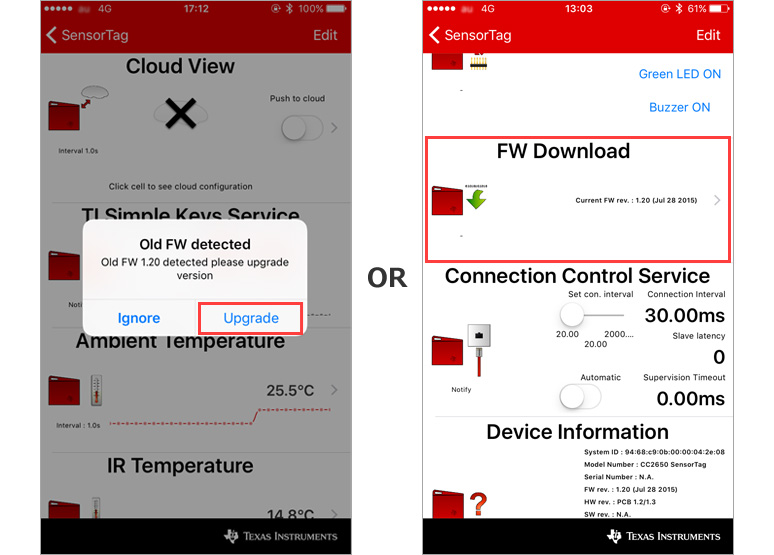
2. Transition to update screen
Select Upgrade for the display on the left, and select FW Download if the display does not appear.
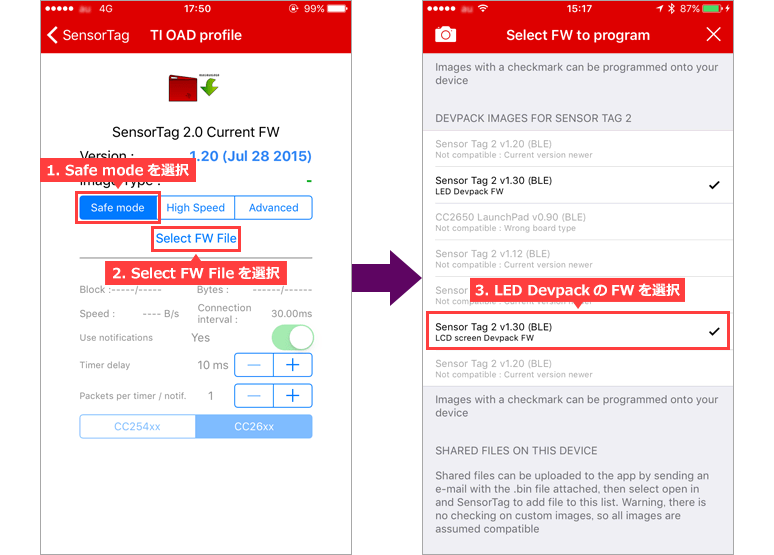
3. FW selection
Select the FW to update from Select FW File.
This time, we will update to v1.30 LED Devpack FW, so select the following.
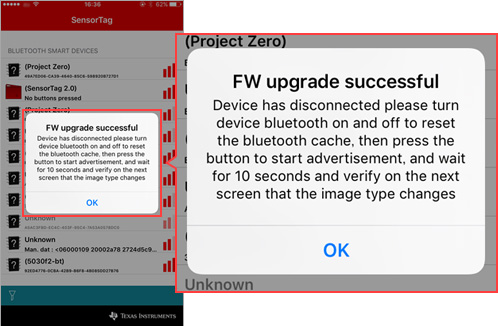
4. Run FW update
If FW upgrade successful is displayed, it is successful.
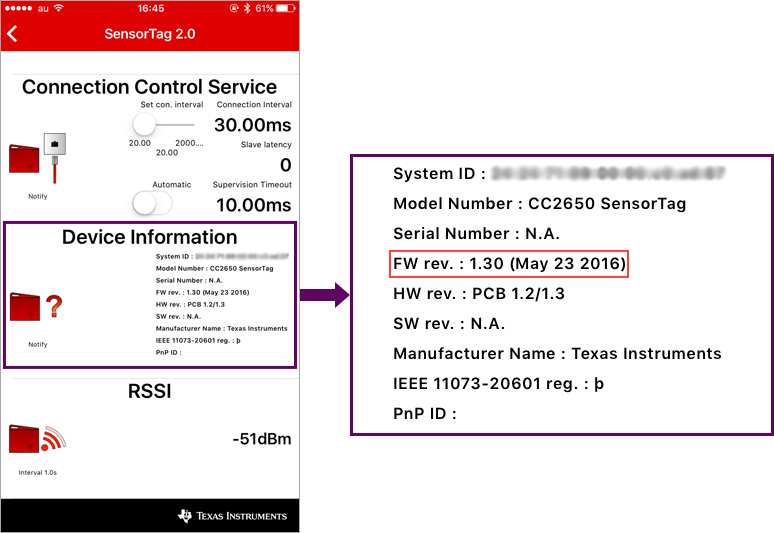
You can check the written FW from "Device Information" in the SensorTag app.
5. Access SensorTags
Once the FW is updated, access SensorTag from your smartphone. Similarly, confirm that the target SensorTag is displayed and select Sensor View.
In addition, since the information of the previous FW may remain in the smartphone app, it is recommended to completely quit the app and then start the app again. Also, update your smartphone app to the latest version.

6. Check display with DEVPACK-WATCH
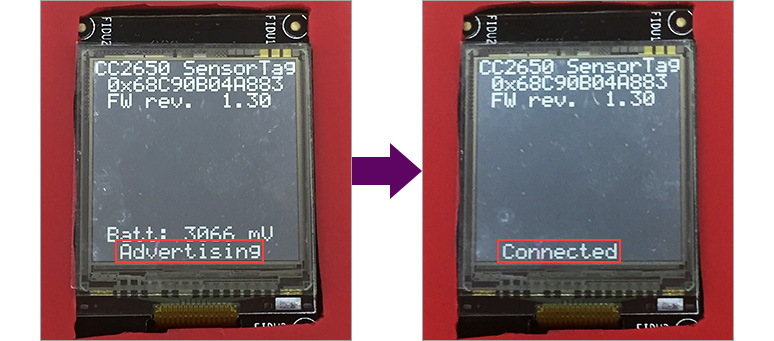
Before connection, the LCD on the Sensor Tag side displays Advertising at the bottom, and Connected when connected.
7. Display characters
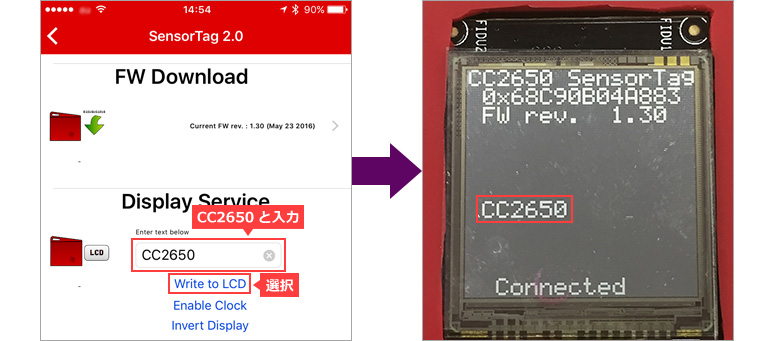
The updated FW adds a Display Service item.
If you enter a character in the text in this and select Write to LCD, the character will be displayed on the LCD of the Sensor Tag. Enter CC2650 as an example.
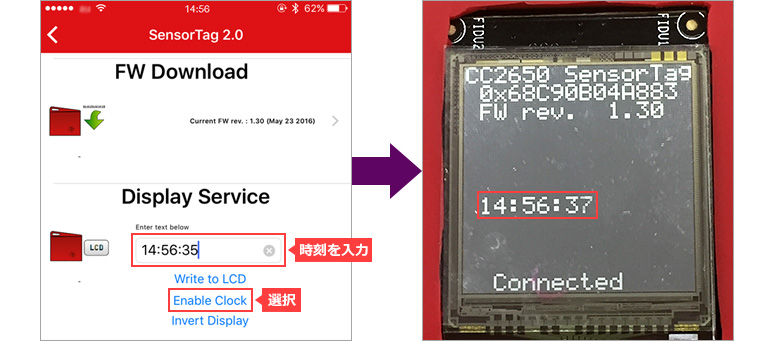
8. Display the clock
Next, let's select Enable Clock. As you can see in the picture, the clock is now displayed.
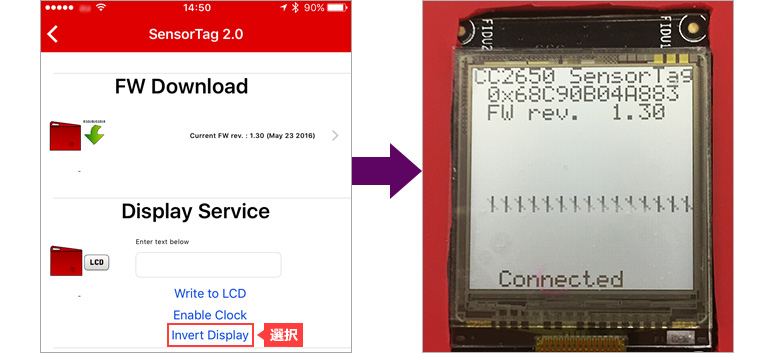
9. Invert LCD display
Finally, select Invert Display. Then, the white and black of the LCD display are reversed.
At the end
This concludes the explanation of DEVPACK WATCH.
By using DEVPACK WATCH in this way, it is possible to send the character string specified on the smartphone side to the Sensor Tag side using BLE and display the characters on the LCD connected to the Sensor Tag. Please refer to it.
Click here for recommended articles/materials
Easy LED mounting! Expansion board for SensorTag DEVPACK-LED-AUDIO
Perfect for IoT development! SensorTag that can detect 10 types of information
I changed the SensorTag to "Eddystone Beacon"
SensorTag: Top 3 Frequently Asked Questions
Click here to purchase products
SimpleLink SensorTag IoT Evaluation Kit CC2650STK
DEVPACK-WATCH
Click here for manufacturer site/other related links
DEVPACK-WATCH
SimpleLink SensorTag IoT Evaluation Kit CC2650STK
Overview of DEVPACK
Nine Reference Designs to Rapidly Design IoT-Enabled Devices
Contact Us

