- Semiconductor BusinessHOME
- Products and Services of Macnica,Inc.
-
technical information

-
Events and Seminars
- Handling Manufacturer
- Support
- Inquiry
- Click here to purchase products
- Semiconductor business e-mail magazine registration


 Narrow down by specifying conditions
現在2262件がヒットしています。check
Introduction
NVIDIA Metropolis Blueprint for Video Search and Summarization (VSS) is a GPU-accelerated video AI agent development platform that combines generative AI and video analysis AI to enable natural language searching, summarizing, question answering, and event notification of live and recorded video.
In this article, as LLM NVIDIA Nemotron-Nano-9B-v2-Japanese This document describes the steps to deploy a basic vision agent using [tool name].
In this case, we used both LLM (Natural Language Modeling) and VLM (Visual Language Modeling). It will be implemented as an NVIDIA NIM™ container on a standalone edge AI device (NVIDIA® Jetson AGX Thor™ Developer Kit).
Furthermore, this procedure is based on the information provided in NVIDIA VSS 3.2.1.
For more detailed information on the VSS system and other related topics, please refer to the following article.
0. Preparation
◆ Hardware Requirements
NVIDIA Jetson AGX Thor Developer Kit
·monitor
Keyboard & Mouse
• USB flash drive (16GB or larger)
• (Optional): Network cable (if connecting to a physical network)
• (Optional): PC (Windows / Mac / Linux OS with at least 25GB of free space)
*A PC is required when using the SDK Manager to install the Jetpack SDK.
◆Software Requirements
・ Jetson AGX Thor Developer Kit User Guide Follow these steps JetPack 7.1 (Jetson Linux 38.4) Install it.
*For installation instructions, see below. "Introduction to the Jetson AGX Thor Developer Kit: From Quick Setup to Verifying AI Inference Functionality" Please also refer to the article.
*After installation is complete, please connect the Jetson AGX Thor Developer Kit to the internet.
◆Installing a web browser (Chromium)
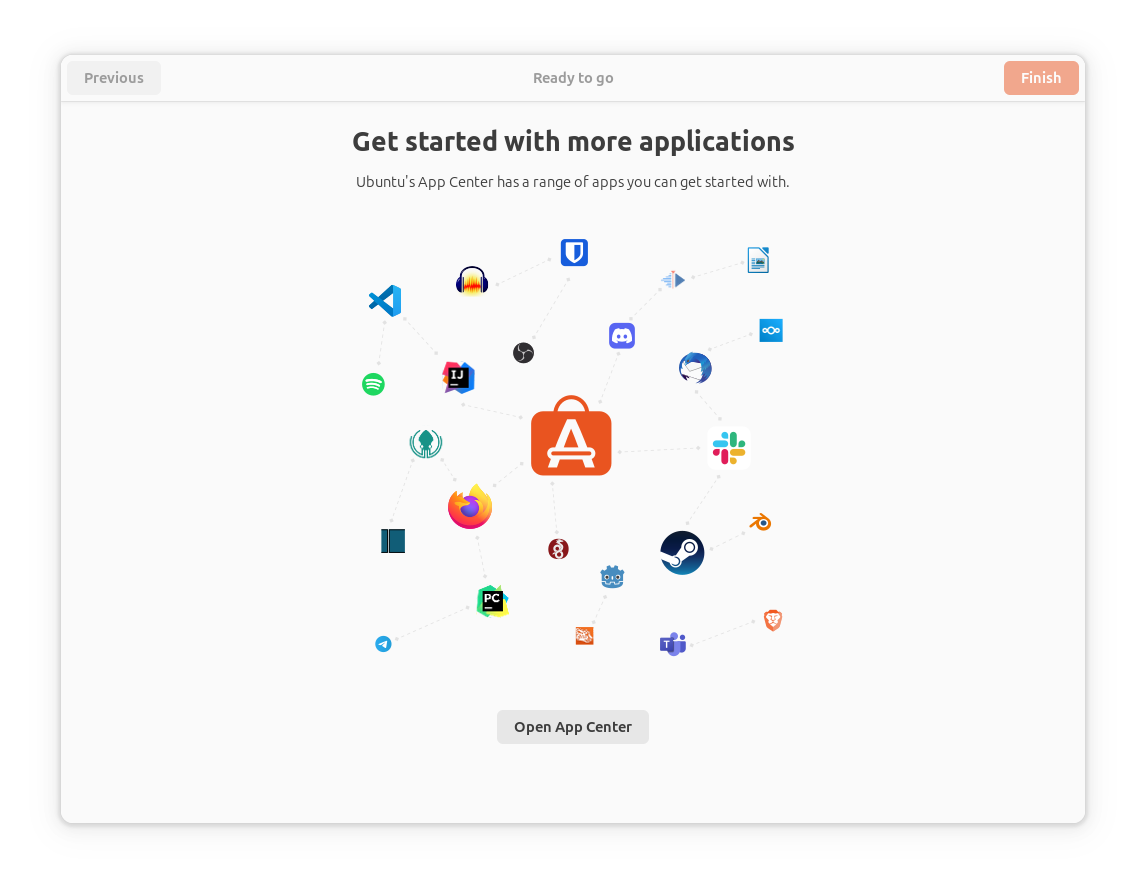
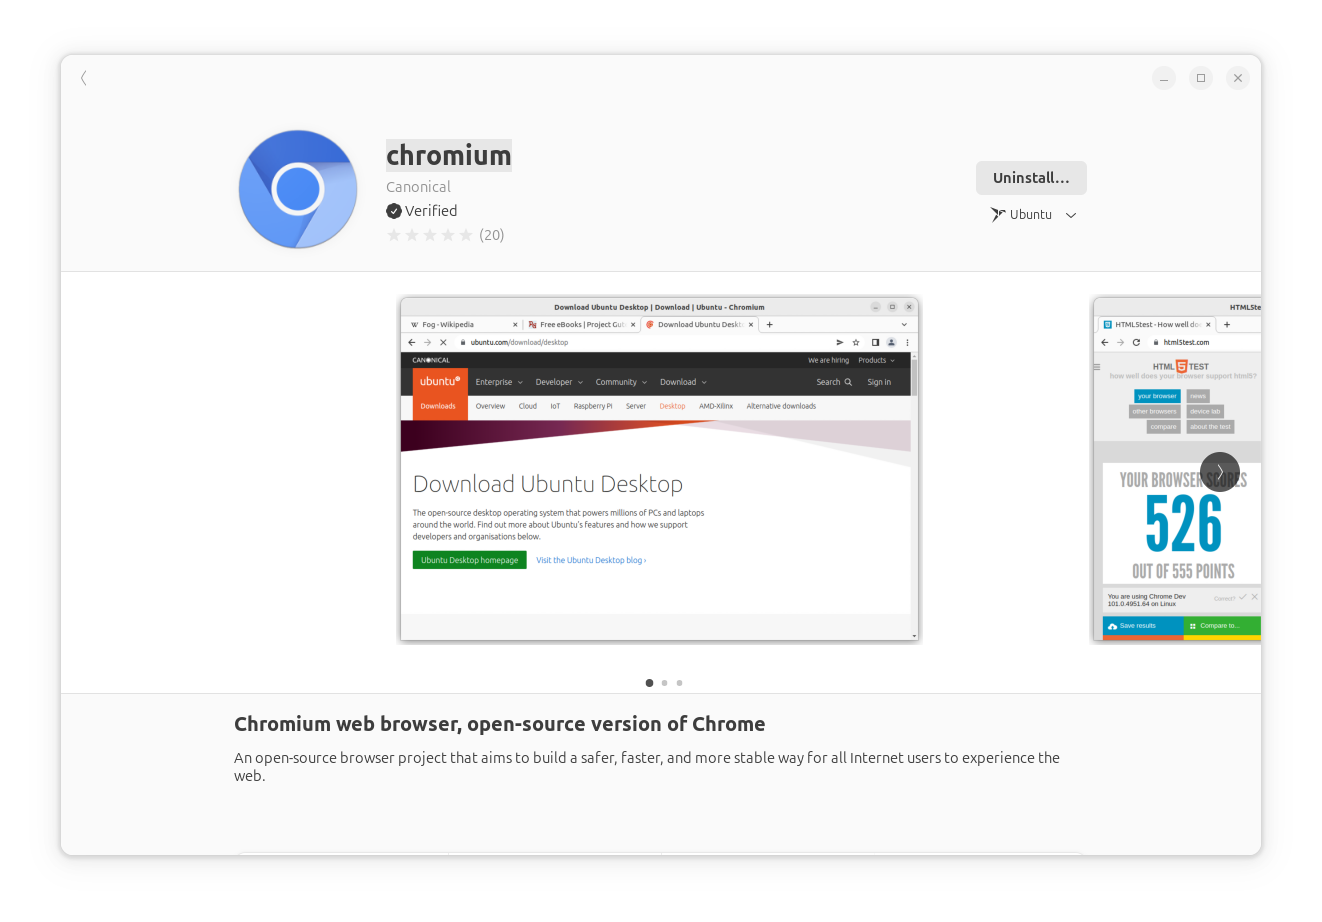
After starting the Jetson AGX Thor Developer Kit, please install Chromium from the Ubuntu App Center.
API Key & Token Generation
◆NGC API Key Generation
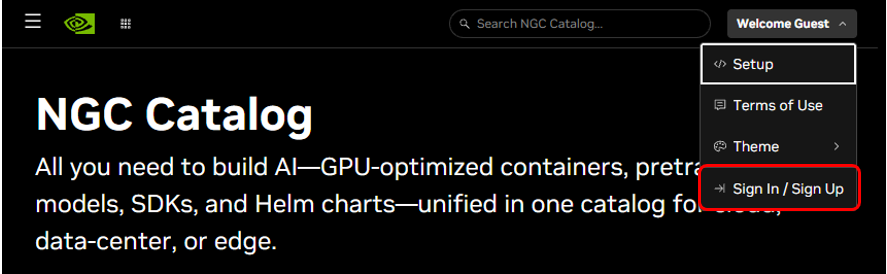
① Go to https://ngc.nvidia.com, click "Welcome Guest" in the upper right corner, and either "Sign Up" for an account or "Log In" if you already have an account.
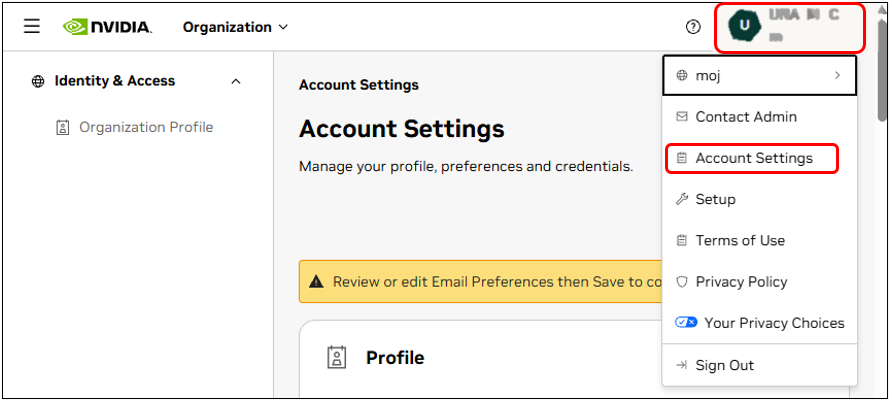
② After logging in, click on your username in the upper right corner and select "Account Settings".
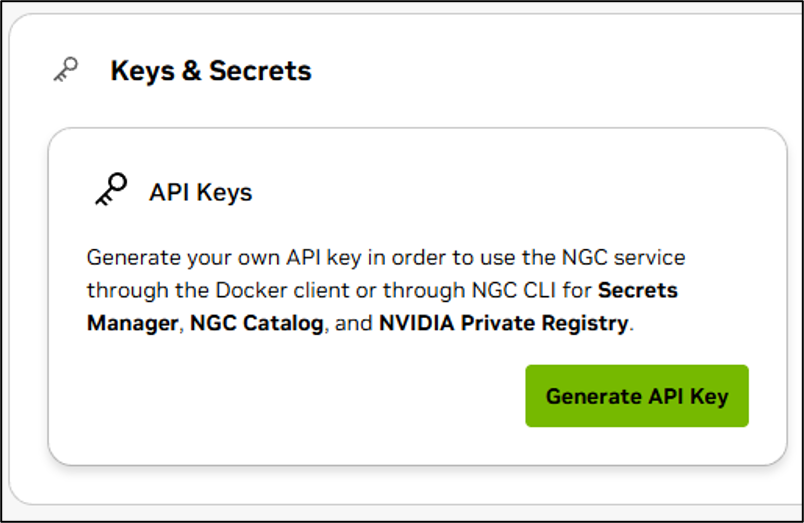
③ From "Keys & Secrets," click "Generate API Key."
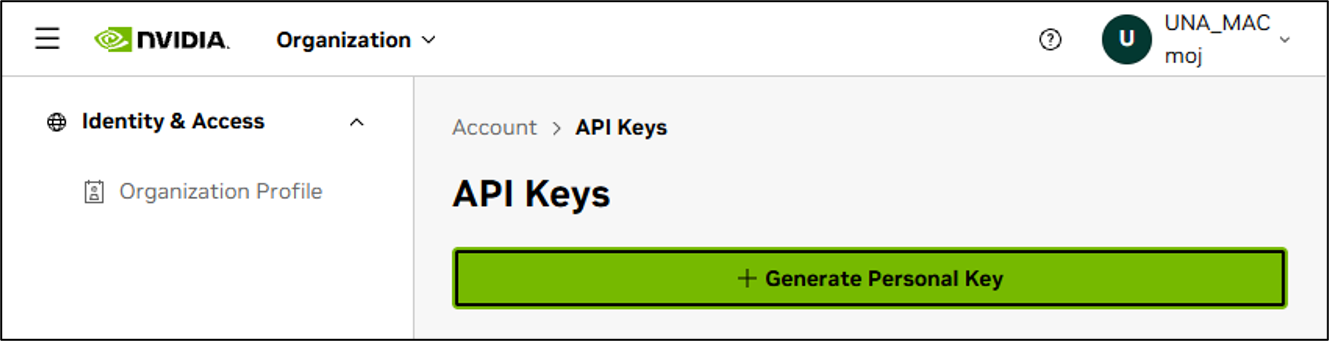
④ Once the "API Keys" screen opens, click "+ Generate Personal Key".
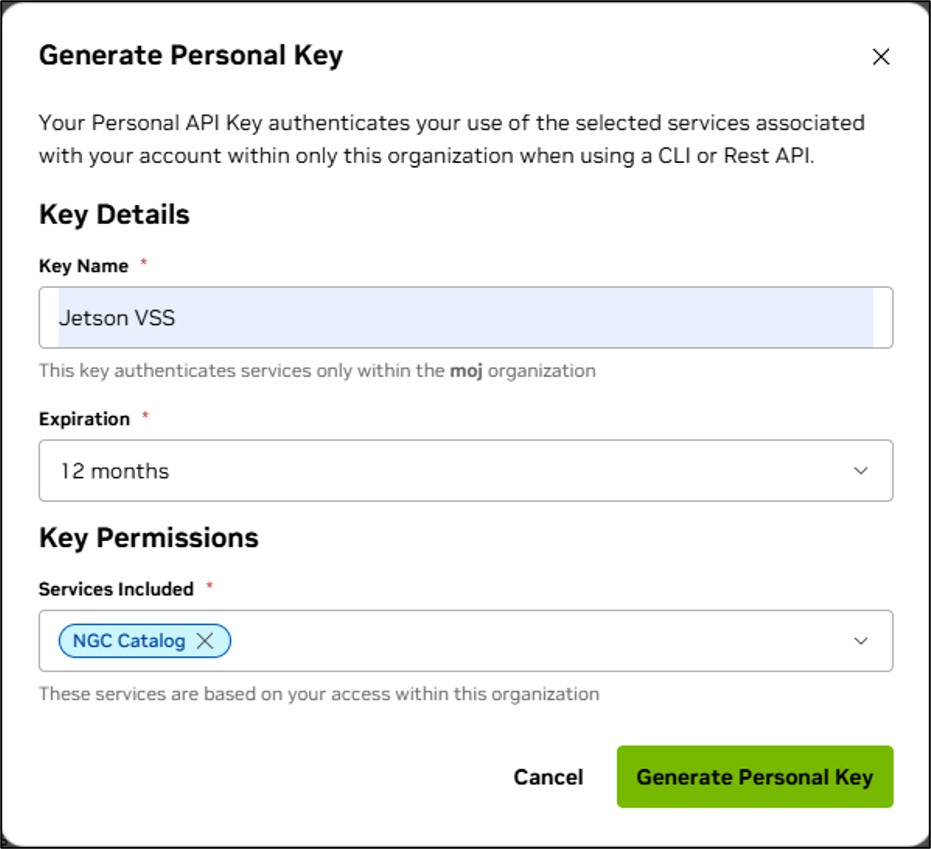
⑤ The "Generate Personal Key" settings screen will open. Please set the Key Name*, Expiration*, and Key Permissions*.
*For Key Permissions, please select "NGC Catalog".
⑥ Immediately copy and save the generated API key.
◆Generating a Hugging Face Access Token
① Hugging Face Access and check your account Please either "Register" or, if you already have an account, "Log in".
② Access Tokens Access and readingCreate a token with the necessary permissions.
③ Immediately copy and save the generated token.
1. Initial setup of the Jetson AGX Thor Developer Kit
◆Network-related settings in the Linux kernel
sudo ls -l /etc/sysctl.d
sudo bash -c "printf '%s\ n'  \
  'net.ipv6.conf.all.disable_ipv6 = 1' \
  'net.ipv6.conf.default.disable_ipv6 = 1' \
  'net.ipv6.conf.lo.disable_ipv6 = 1' \
  'net.core.rmem_max = 5242880' \
  'net.core.wmem_max = 5242880' \
  'net.ipv4.tcp_rmem = 4096 87380 16777216' \
  'net.ipv4.tcp_wmem = 4096 65536 16777216' \
  > /etc/sysctl.d/99-vss.conf"
sudo sysctl --system
◆Jetson Thor power mode and operating clock settings
# Set max power mode
sudo nvpmodel -m 0
After entering the above command, restart the system.
# Set max clocks
sudo jetson_clocks
◆Cache Cleanup Settings
Create a cache cleaner script and run it in the background.
sudo tee /usr/local/bin/sys-cache-cleaner.sh << 'EOF'
#!/bin/bash
# Exit immediately if any command fails
set -e
# Disable hugepages
echo "disable vm/nr_hugepage"
echo 0 | tee /proc/sys/vm/nr_hugepages
# Notify that the cache cleaner is running
echo "Starting cache cleaner - Running"
echo "Press Ctrl + C to stop"
# Repeatedly sync and drop caches every 3 seconds
while true; do
     sync && echo 3 | tee /proc/sys/vm/drop_caches > /dev/null
     sleep 3
done
EOF


sudo chmod +x /usr/local/bin/sys-cache-cleaner.sh


sudo -b /usr/local/bin/sys-cache-cleaner.sh
◆ Export NGC API Key & Hugging Face Token
# Set your NGC API key
export NGC_CLI_API_KEY='your_ngc_api_key'
export NVIDIA_API_KEY='your_ngc_api_key'


# Set your Hugging Face token
export HF_TOKEN='hf_your_token_here'
Please configure the NGC API key and Hugging Face token that you generated using the "Generate API Key & Token" procedure.
2. Installing Docker
Docker version 28.3.3 or later, and version 29.5.0 or earlier, must be used.
① The default installation of the Jetpack SDK may include a version other than the one listed above, so uninstall Docker using the following command.
sudo apt remove $(dpkg --get-selections docker.io docker-compose docker-compose-v2 docker-doc docker-buildx podman-docker containerd runc | cut -f1)② Set up the Docker apt repository.
# Add Docker's official GPG key:
sudo apt update
sudo apt install ca-certificates curl
sudo install -m 0755 -d /etc/apt/keyrings
sudo curl -fsSL https://download.docker.com/linux/ubuntu/gpg -o /etc/apt/keyrings/docker.asc
sudo chmod a+r /etc/apt/keyrings/docker.asc


# Add the repository to Apt sources:
sudo tee /etc/apt/sources.list.d/docker.sources <<EOF
Types: deb
URIs: https://download.docker.com/linux/ubuntu
Suites: $(. /etc/os-release && echo "${UBUNTU_CODENAME:-$VERSION_CODENAME}")
Components: stable
Architectures: $(dpkg --print-architecture)
Signed-By: /etc/apt/keyrings/docker.asc
EOF


sudo apt update
③ Installing Docker packages
*Install Docker version 29.5.0 using the command below.
VERSION_STRING=5:29.5.0-1~ubuntu.24.04~noble
sudo apt install docker-ce=$VERSION_STRING docker-ce-cli=$VERSION_STRING containerd.io docker-buildx-plugin docker-c
④ After installation, please verify that Docker is running.
If Docker is not running, please start it manually.
sudo systemctl status docker
sudo systemctl start docker
⑤ To run Docker without sudo (as a non-root user), execute the following command:
sudo groupadd docker
sudo usermod -aG docker $USER
newgrp docker
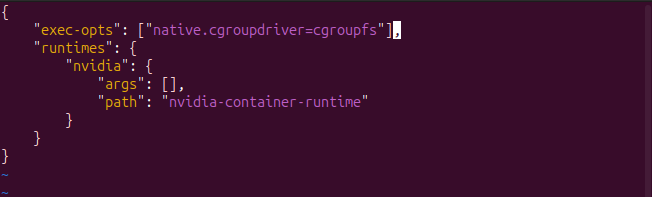
⑥ Edit the Docker daemon configuration file (/etc/docker/daemon.json).
Add the following to your configuration file:
"exec-opts": ["native.cgroupdriver=cgroupfs"]
⑦ Restart Docker to enable editing.
sudo systemctl daemon-reload
sudo systemctl restart docker
3. Installing the NVIDIA Container Toolkit
Running NVIDIA containers requires the NVIDIA Container Toolkit.
Run the following command to install the NVIDIA Container Toolkit.
#前提条件となるソフトウェアのインストール sudo apt-get update && sudo apt-get install -y --no-install-recommends \ ca-certificates \ curl \ gnupg2
#リポジトリの設定 curl -fsSL https://nvidia.github.io/libnvidia-container/gpgkey | sudo gpg --dearmor -o /usr/share/keyrings/nvidia-container-toolkit-keyring.gpg \ && curl -s -L https://nvidia.github.io/libnvidia-container/stable/deb/nvidia-container-toolkit.list | \ sed 's#deb https://#deb [signed-by=/usr/share/keyrings/nvidia-container-toolkit-keyring.gpg] https://#g' | \ sudo tee /etc/apt/sources.list.d/nvidia-container-toolkit.list sudo sed -i -e '/experimental/ s/^#//g' /etc/apt/sources.list.d/nvidia-container-toolkit.list sudo apt-get update
#NVIDIA Container Toolkitパッケージのインストール export NVIDIA_CONTAINER_TOOLKIT_VERSION=1.20.1-1 sudo apt-get install -y \ nvidia-container-toolkit=${NVIDIA_CONTAINER_TOOLKIT_VERSION} \ nvidia-container-toolkit-base=${NVIDIA_CONTAINER_TOOLKIT_VERSION} \ libnvidia-container-tools=${NVIDIA_CONTAINER_TOOLKIT_VERSION} \ libnvidia-container1=${NVIDIA_CONTAINER_TOOLKIT_VERSION}
4. Installing NGC CLI
① Download and install the NGC CLI.
curl -sLo "/tmp/ngccli.zip" https://api.ngc.nvidia.com/v2/resources/nvidia/ngc-apps/ngc_cli/versions/4.10.0/files/ngccli_arm64.zip


sudo mkdir -p /usr/local/bin
sudo unzip -qo /tmp/ngccli.zip -d /usr/local/lib
sudo chmod +x /usr/local/lib/ngc-cli/ngc
sudo ln -sfn /usr/local/lib/ngc-cli/ngc /usr/local/bin/ngc
② Set the API key in NGC CLI
*"API Key & Token Generation Use the NGC API key generated during the procedure.
ngc config set5. Download sample video and deployment package.
① Download sample video
 # Download sample data
 ngc registry resource download-version nvidia/vss-developer/dev-profile-sample-data:3.2.0
 EXTRACT_DIR=./sample-data
 mkdir -p "${EXTRACT_DIR}"
 tar -xf dev-profile-sample-data_v3.2.0/dev-profile-sample-data.tar.gz -C "${EXTRACT_DIR}"
 rm -rf dev-profile-sample-data_v3.2.0
② Download the deployment package
sudo apt-get install git-lfs
git clone https://github.com/NVIDIA-AI-Blueprints/video-search-and-summarization.git
cd video-search-and-summarization
git checkout tags/v3.2.1
git lfs install
git lfs pull
6. LLM (Nemotron Nano 9B model) startup and agent workflow deployment
It is started using the deployment execution script (deploy/docker/scripts/dev-profile.sh).
*Startup may take several tens of minutes. Upon successful startup, "[INFO] State up completed" will be displayed.
deploy/docker/scripts/dev-profile.sh up -p base \
    --hardware-profile AGX-THOR \
    --llm nvidia/NVIDIA-Nemotron-Nano-9B-v2-FP8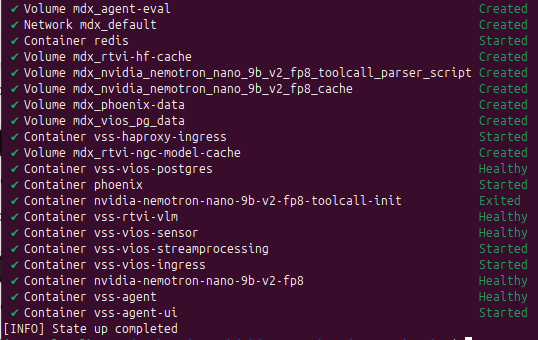
7. Access the Agent UI
① Open a web browser (Chromium), enter http://<HOST_IP>:7777 in the URL bar, and launch the UI.
*Please check the <HOST_IP> using the ifconfig command as needed.
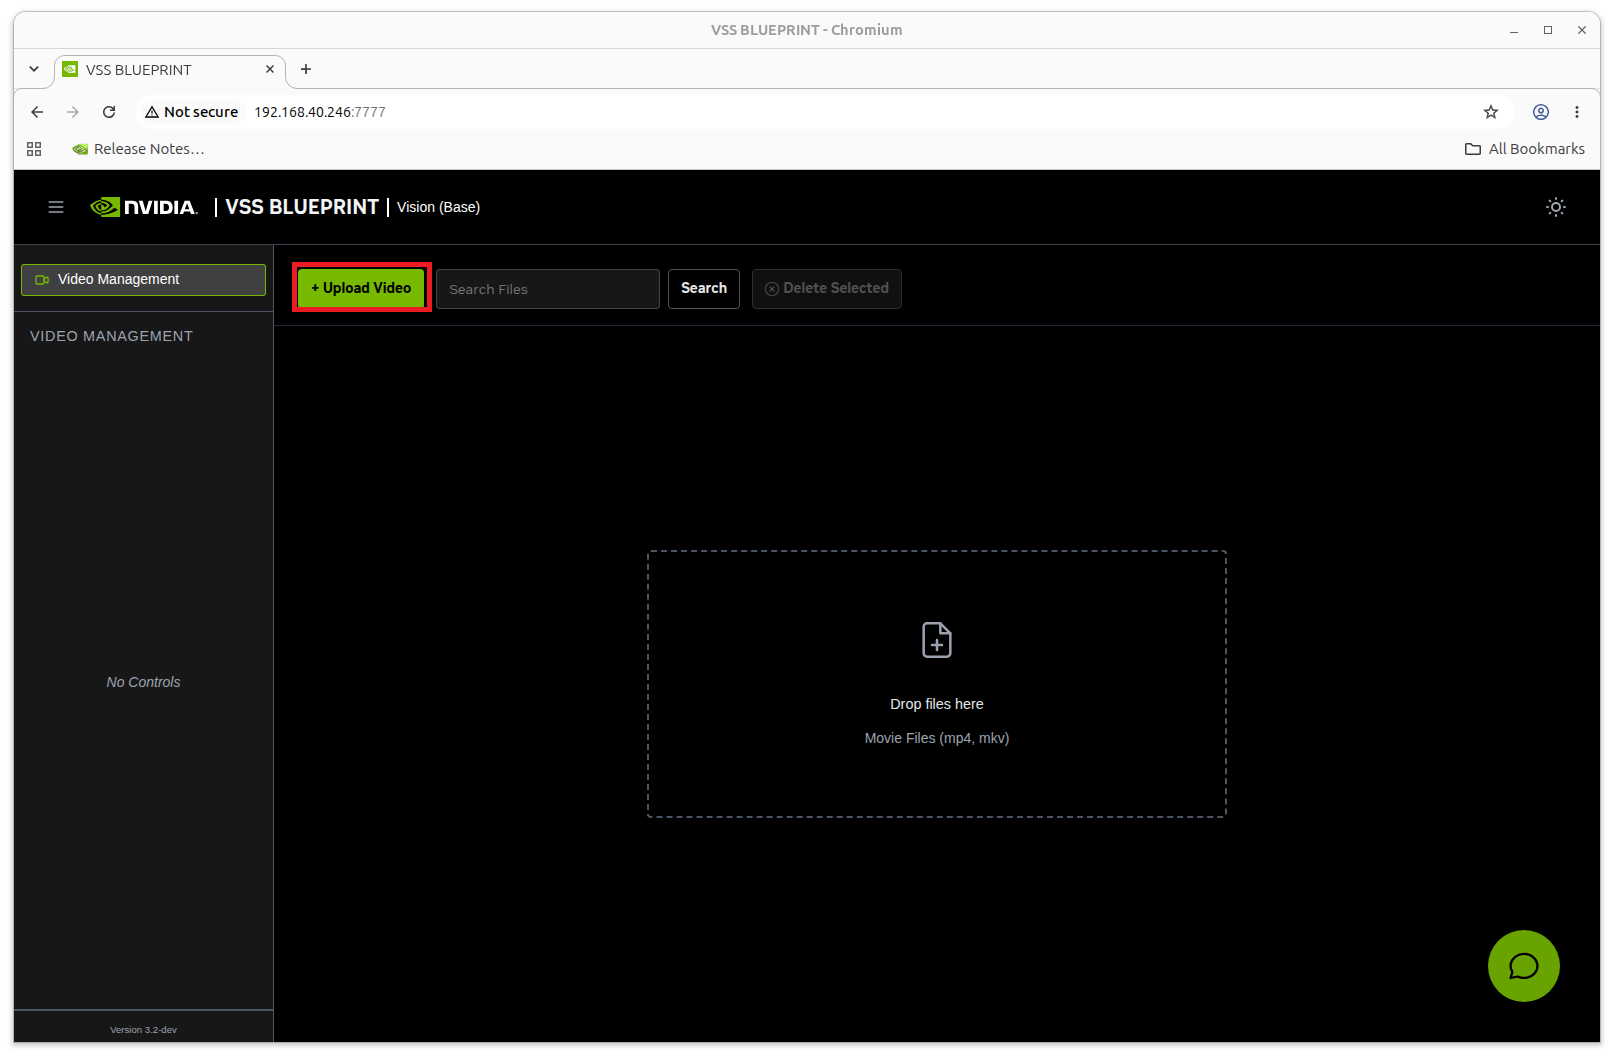
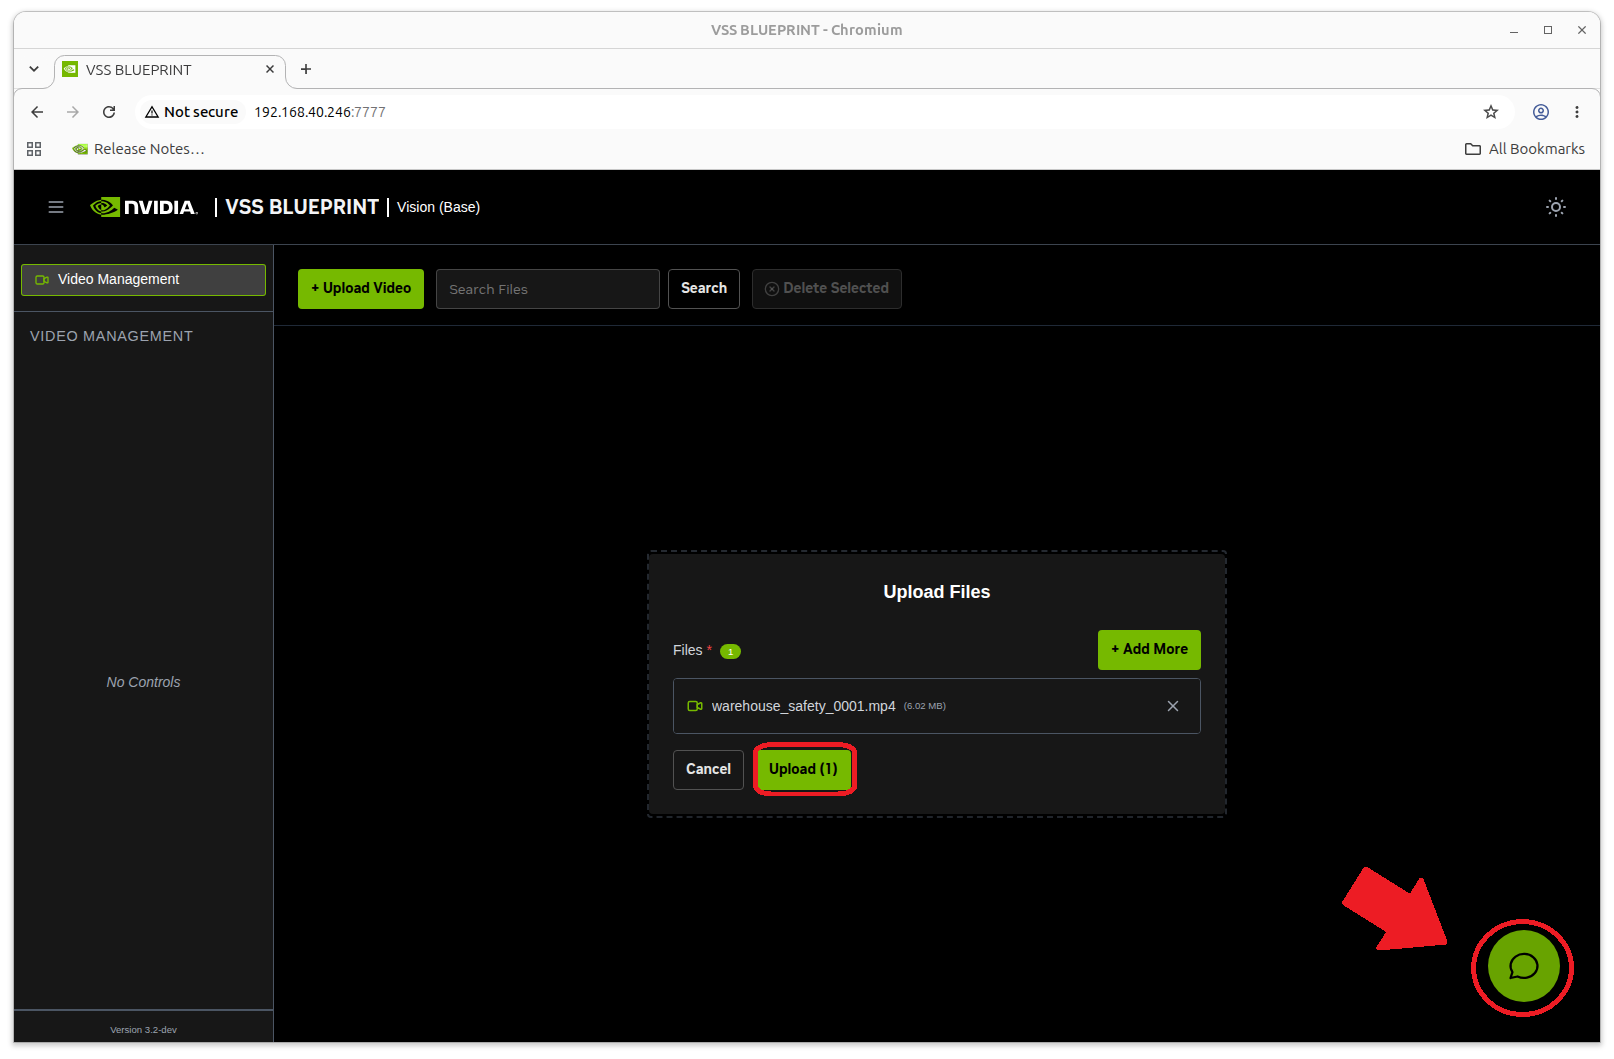
② Upload a sample video
Click the "+ Upload Video" icon and specify the video file.
Each video file is located in the following directory.
”sample-data/dev-profile-sample-data/warehouse_safety_0001.mp”
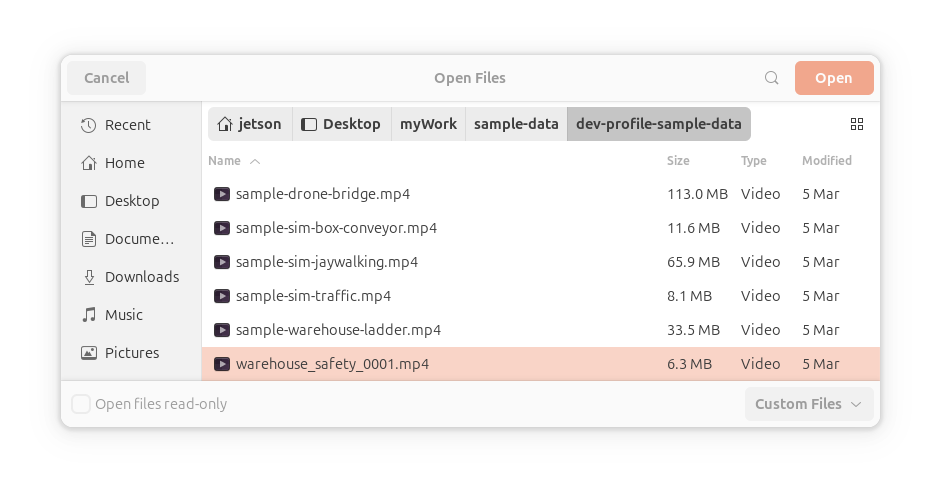
③ Confirm that the correct video file name is selected, and then click "Upload(1)".
Next, click the chat icon in the lower right corner of the screen to open the chat window.
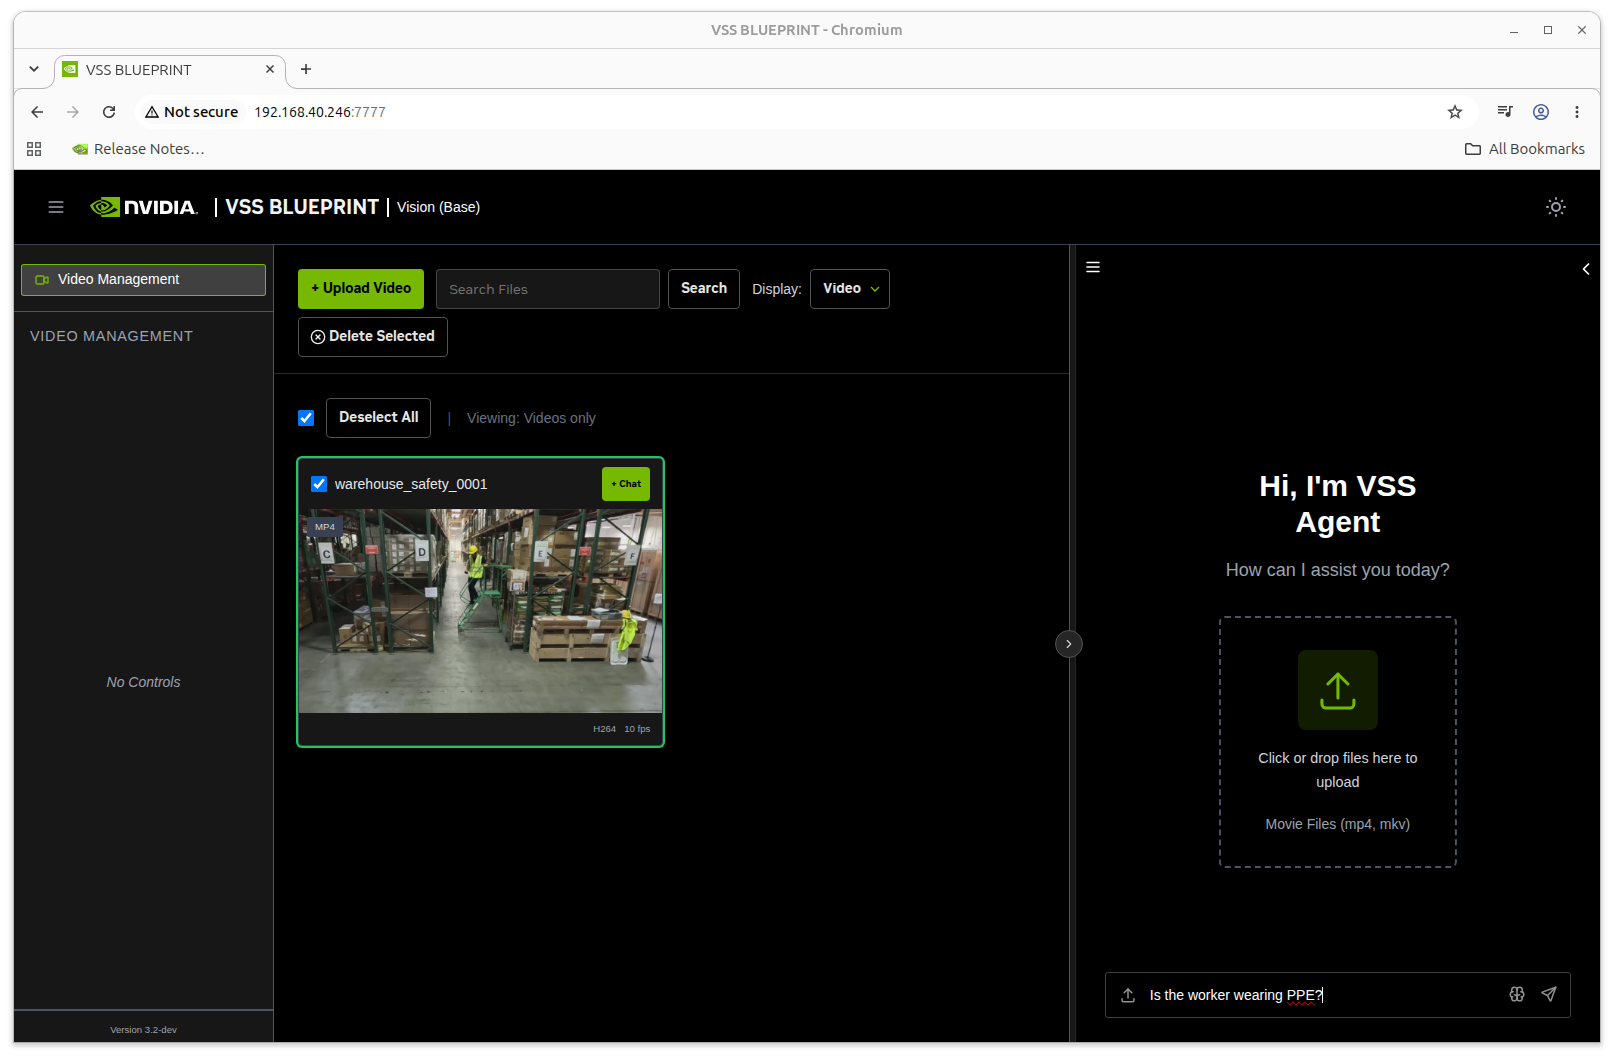
④ Ask the agent questions about the uploaded video.
Example 1) Is the worker wearing PPE?
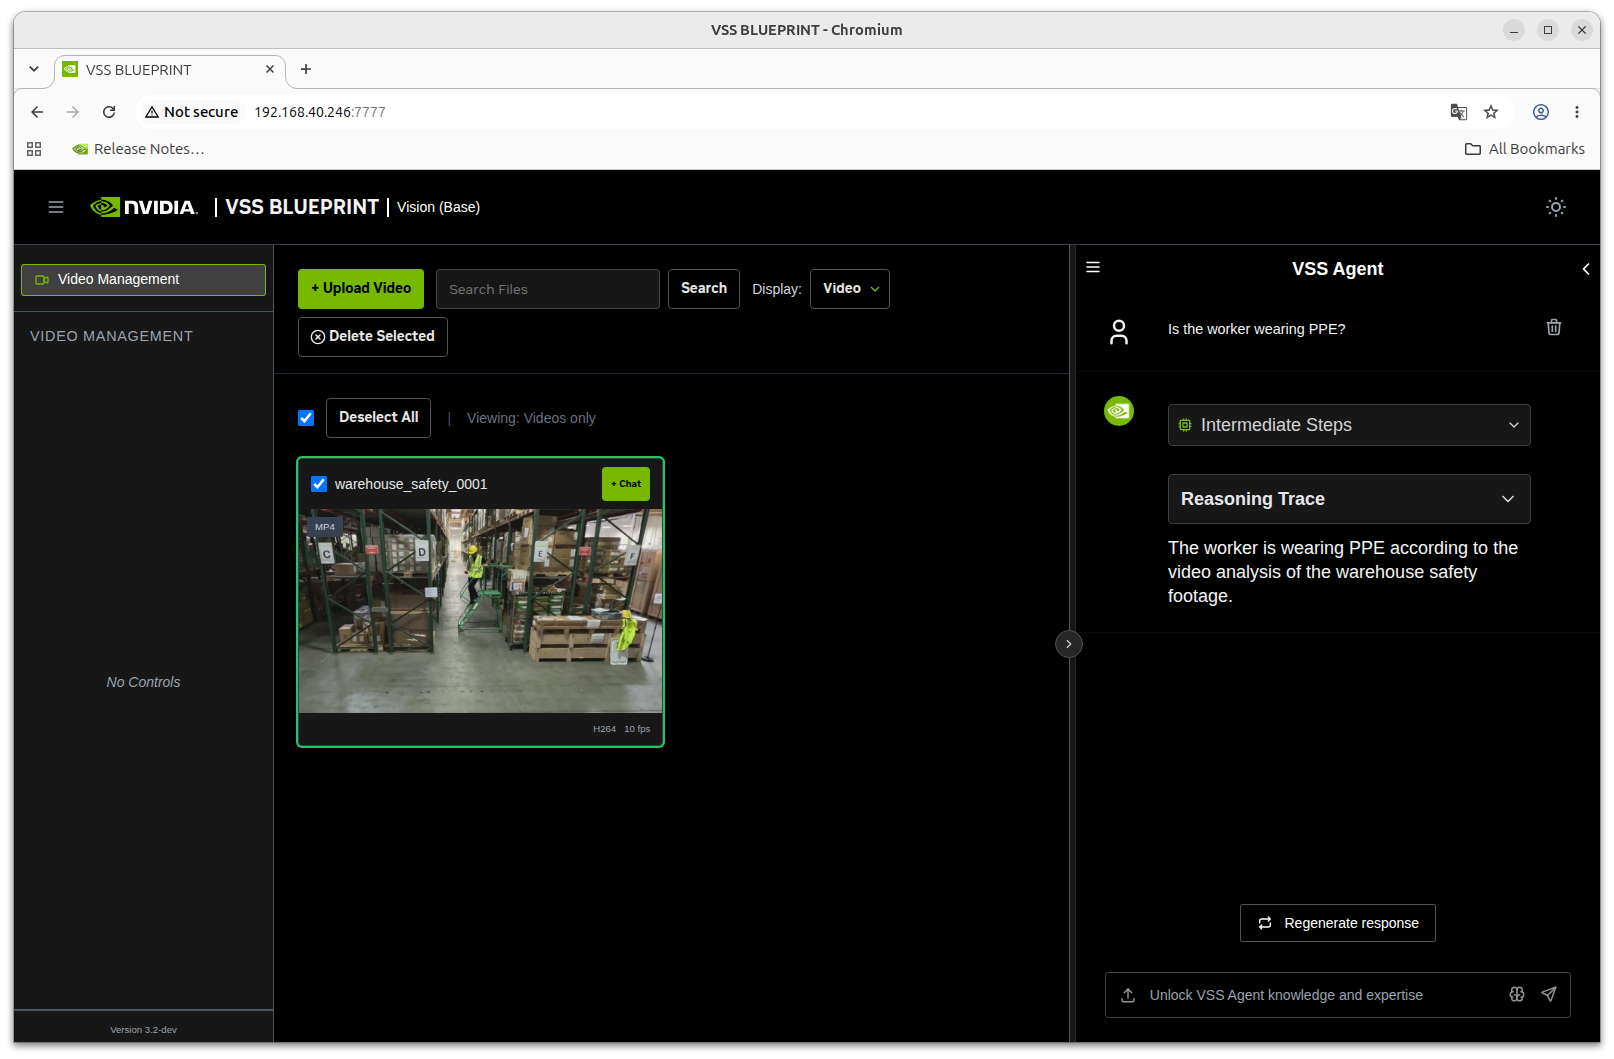
⑤ Let's ask some additional questions in the same way.
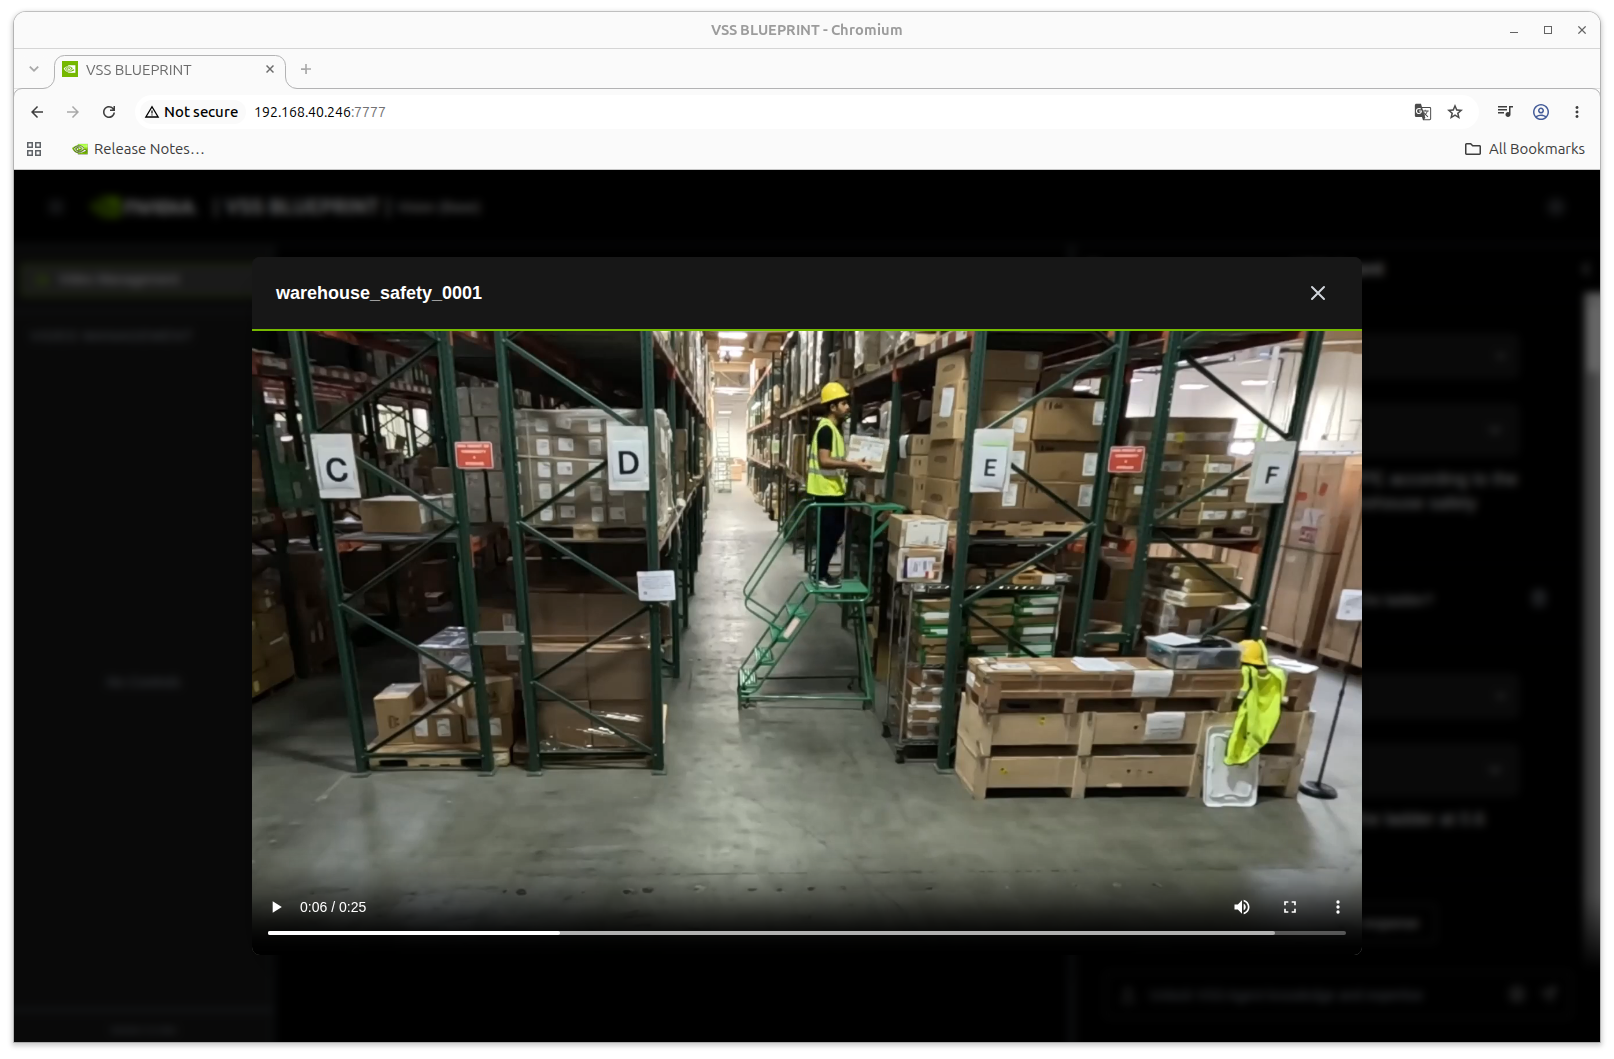
Example 2) When did the worker view up the chip?
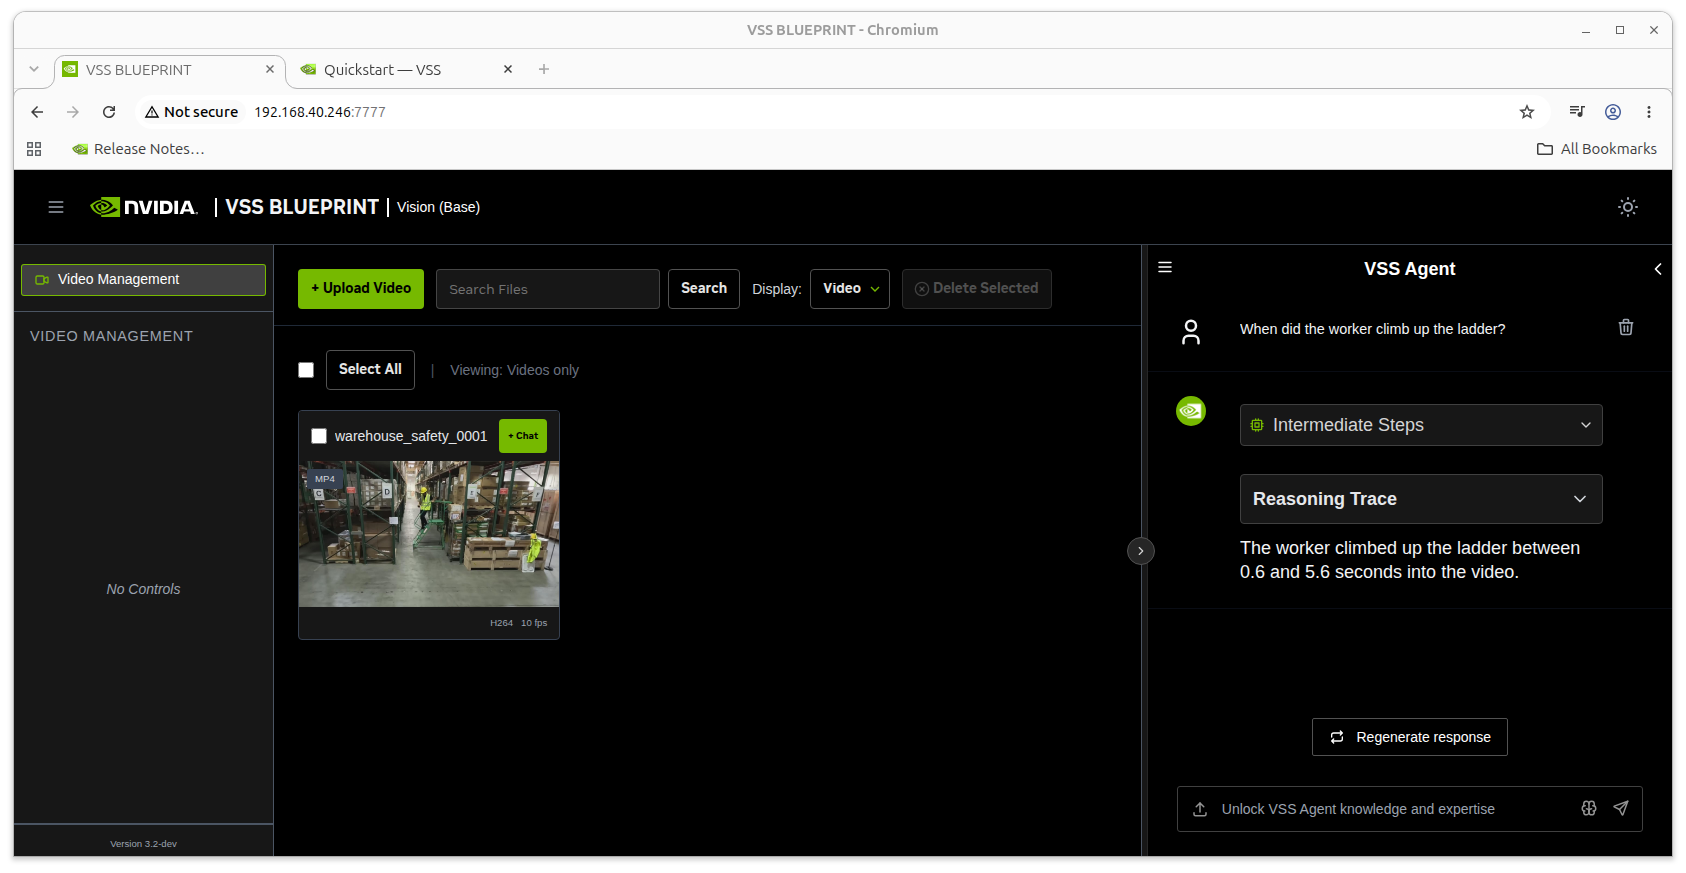
If you play the sample video and check it, you can see the worker stepping up onto the platform around the 0.6 to 5.6 second mark, where the agent gives their response.
⑥ Generate the report
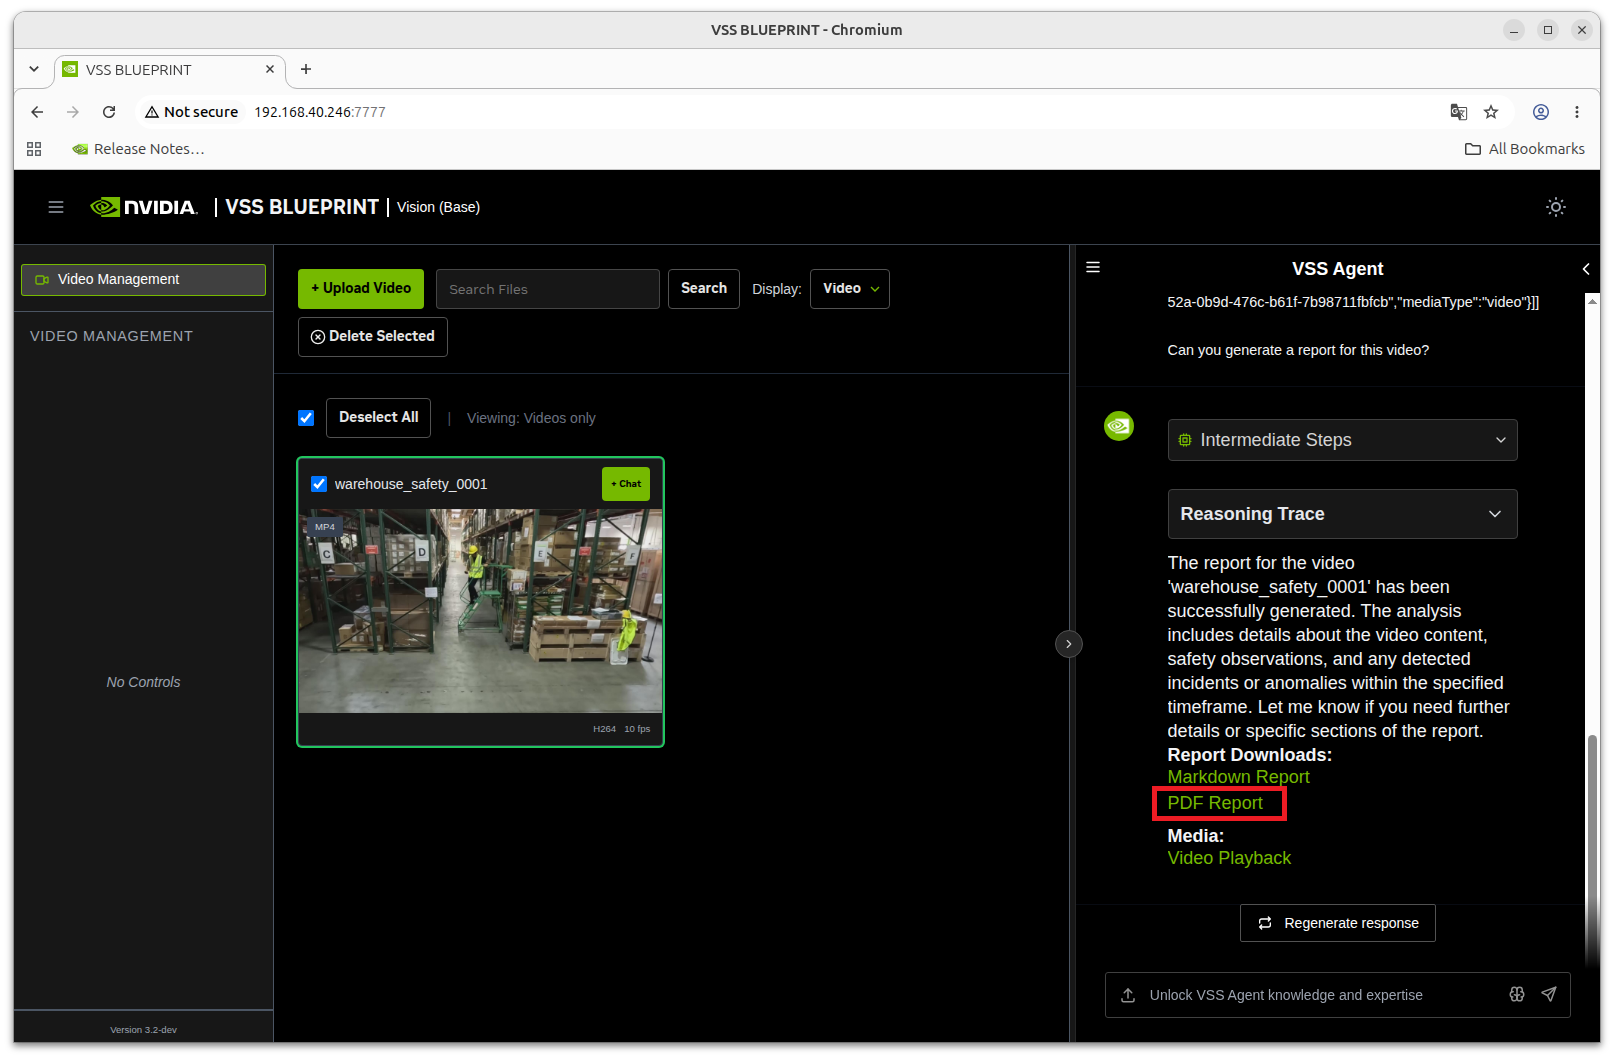
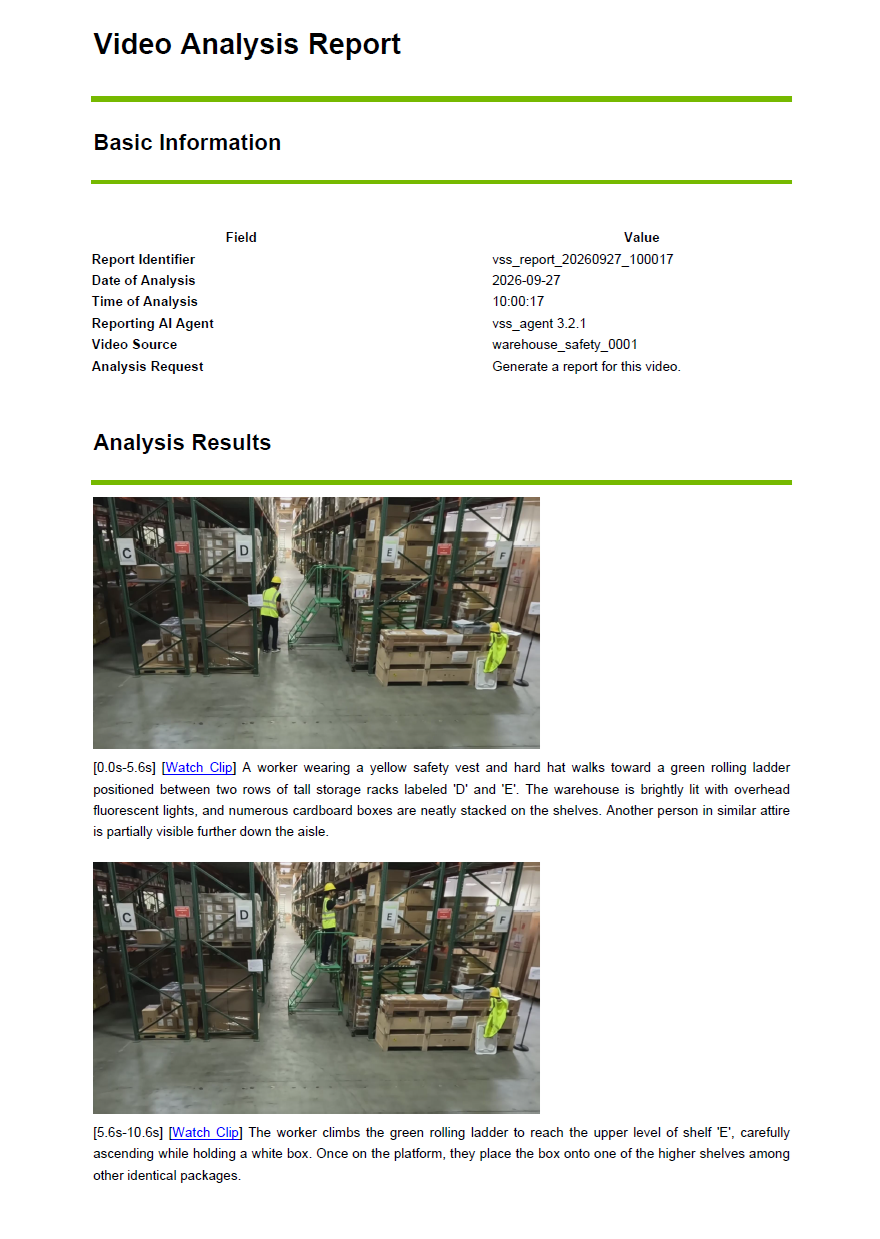
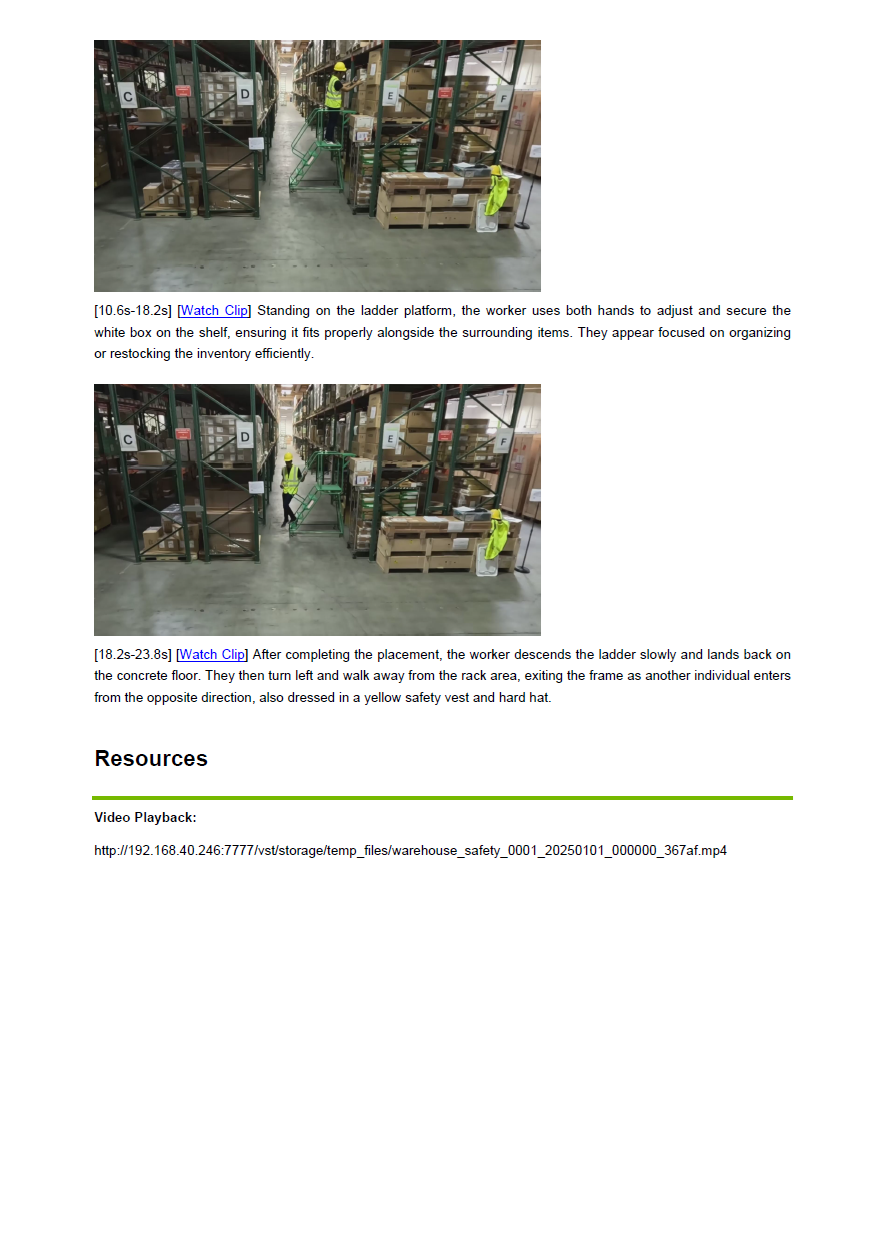
You can also ask your agent to create a report about the video.
Example 3) Can you generate a report for this video?
⑦ Finally, shut down the Docker container to complete the process.
./deploy/docker/scripts/dev-profile.sh downSummary
The increased performance of edge AI devices and the miniaturization/optimization of LLM models have made it possible to implement applications that combine generative AI and video analysis AI using Jetson alone.
This makes it possible to implement AI agents tailored to specific uses and needs.
If you are interested in using Jetson for edge AI, generative AI, or video analysis AI, please feel free to contact us.
Inquiry