- Semiconductor BusinessHOME
- Products and Services of Macnica,Inc.
-
technical information

-
Events and Seminars
- Handling Manufacturer
- Support
- Inquiry
- Click here to purchase products
- Semiconductor business e-mail magazine registration
![]()
![]() Narrow down by specifying conditions
Narrow down by specifying conditions
現在2189件がヒットしています。check

The Intel® FPGAs & Programmable Devices home page may require you to sign in to access some pages, and you will need an Intel account (formerly My Intel account) to sign in. For example, the Intel® FPGA Self-Service License Center.
This sectiondescribes how to set the authentication method using the smartphone app "Microsoft Authenticator" in the Microsoft Azure AD authentication process settings. I will guide you.
[Notes]
Please refer tothis contentfor how to register a new Intel account and the previous step of setting up the Microsoft Azure AD authentication process.
Setting method
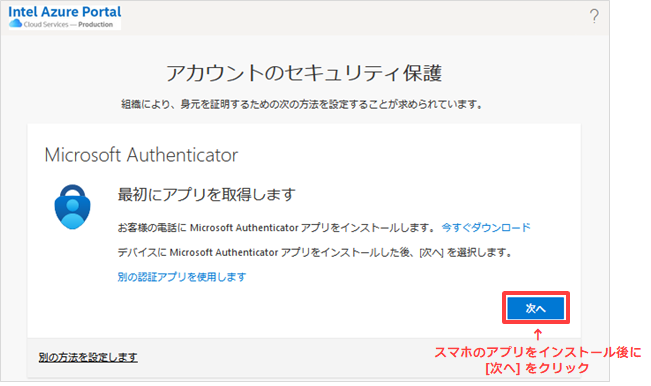
1. Install the dedicated app "Microsoft Authenticator" on the smartphone used for authentication in advance.
After the installation is complete, select [Next] on the computer screen "Securing your account".
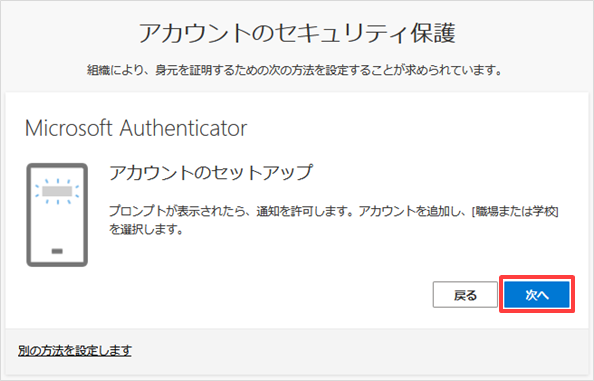
2. "Account Setup" will appear. Click Next.
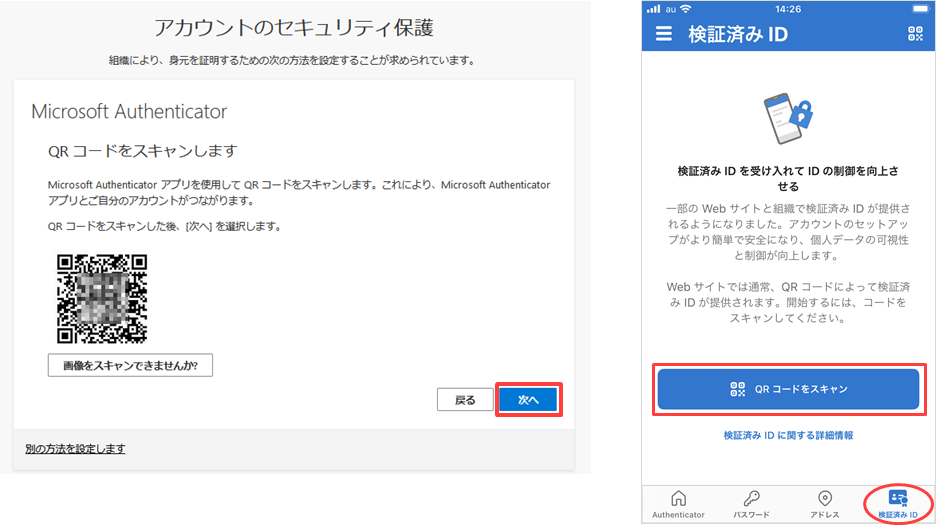
3. A QR code will appear on your computer screen. Launch Microsoft Authenticator installed on your smartphone and scan this QR code.
After scanning the QR code, click Next.
4. After that, the computer screen and the Microsoft Authenticator screen will be displayed as follows.
Click Authorize in Microsoft Authenticator.
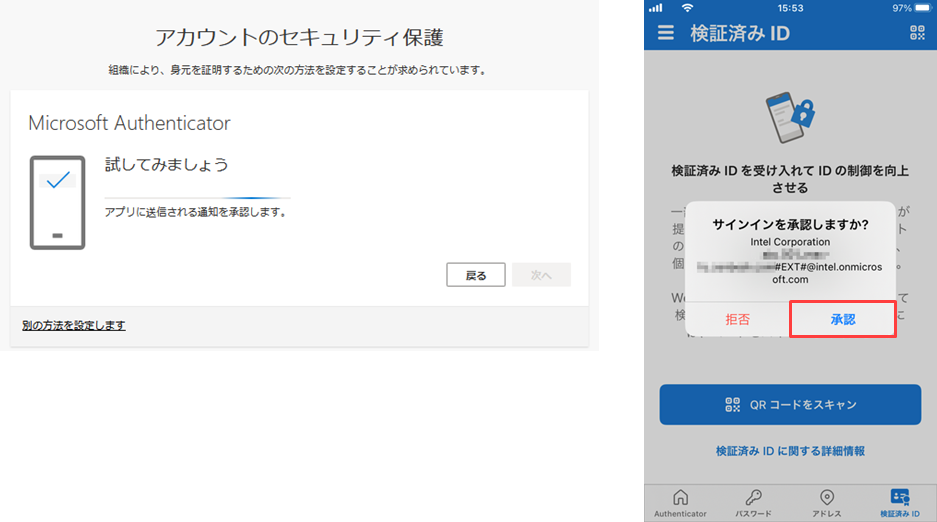
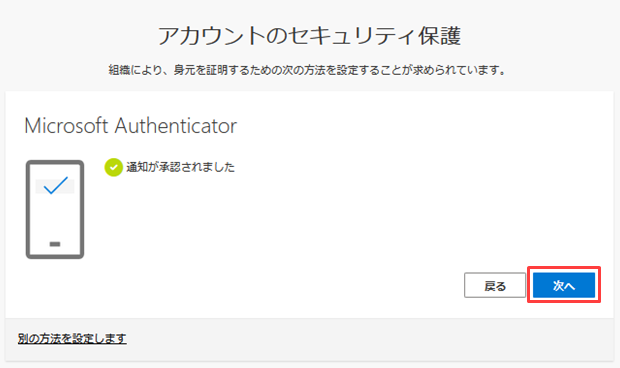
5. You will see that the notification has been approved. Click Next.
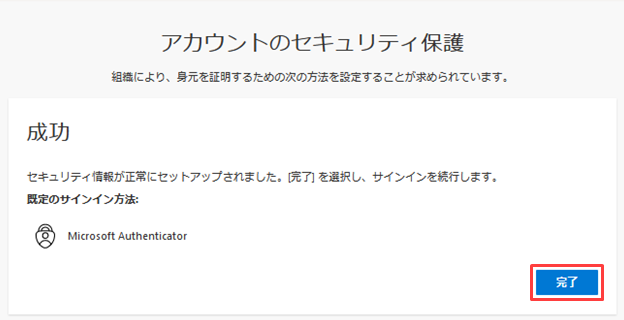
6. You will see that the setup was successful. Click Done.
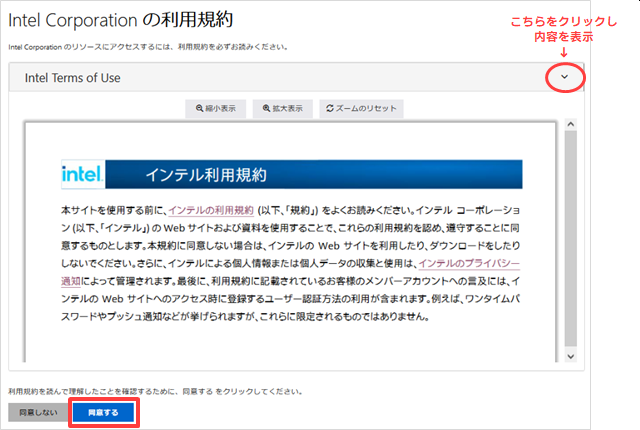
If the "Intel Terms of Service" is displayed, read the contents and click [Agree].
This completes the configuration of the Microsoft Azure AD authentication process.
When you sign in to Intel websites in the future, use the email address you registered with and the MFA authentication process you set up.