- Semiconductor BusinessHOME
- Products and Services of Macnica,Inc.
-
technical information

-
Events and Seminars
- Handling Manufacturer
- Support
- Inquiry
- Click here to purchase products
- Semiconductor business e-mail magazine registration
![]()
![]() Narrow down by specifying conditions
Narrow down by specifying conditions
現在2189件がヒットしています。check


hello.
My name is Intel F. Hanako and I provide technical support for Intel® FPGA products at Macnica.
Intel FPGA development software Quartus ® Prime Pro Edition includes
There are two file conversion tools for FPGA configuration:
Both conversion functions take an FPGA .sof file as an input file and convert it into an output file format depending on the configuration memory used.
Each file conversion tool supports different FPGA families.
| FPGA |
File conversion function |
|
|
Programming File Generator |
Convert Programming Files |
|
|
Intel Agilex® 7 Stratix® 10 |
✔※ |
× |
|
Arria® 10 Cyclone® 10GX |
× |
✔ |
| remarks | Features Supported from Quartus Prime Pro Edition 18.0 |
Features traditionally used in Pro and Standard Editions (For operation, please refer to this content.) |
* Quartus ® Prime Pro Edition's Programming File Generator also supports Intel ® MAX ® 10 and Intel ® Cyclone ® 10 LP.
Here we will show you how to generate configuration memory files .pof / .jic / .rpd using the Programming File Generator.
Method of operation
- Launch Programming File Generator
- Select FPGA family and configuration mode
- Select file format to generate
- set .sof
- Select configuration memory (only when generating .pof/.jic)
- Select FPGA to transfer Serial Flash Loader (only when generating .jic)
Screen operations are explained in detail below.
1. Start Programming File Generator
Select File menu > Programming File Generator to launch the GUI.

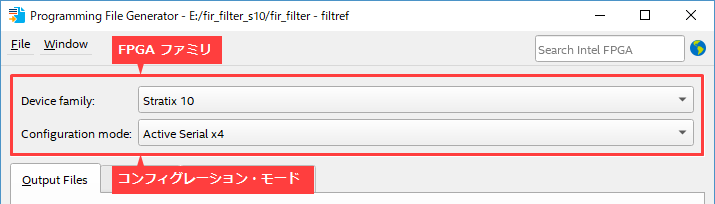
2. Select FPGA family and configuration mode
Select the appropriate FPGA family and configuration mode.
|
Item |
Overview |
choice |
| Device family | Specifies the FPGA family for configuration. |
Agilex, Stratix 10, Cyclone 10 LP, MAX ® 10 |
| Configuration mode | Specifies the method of configuration. |
Active Serial x4, AVST x8, AVST x16, AVST x32 |
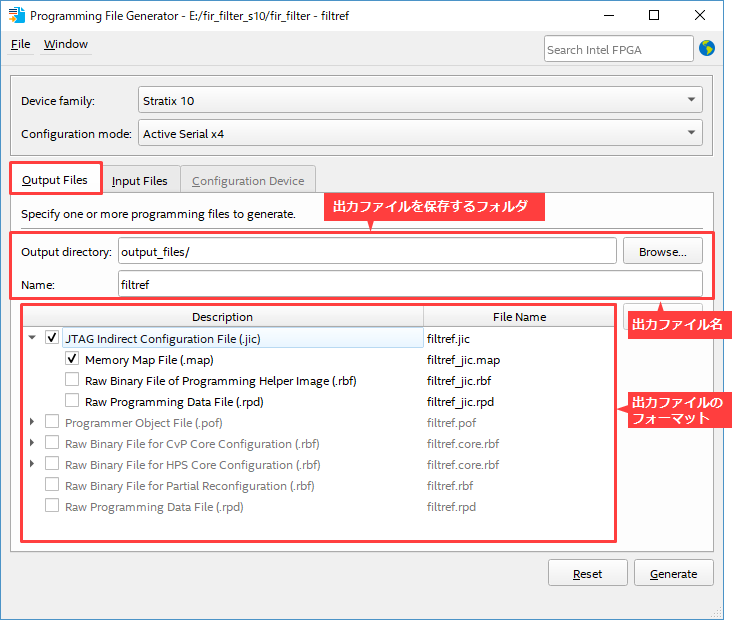
3. Select the file format to generate
On the Output Files tab, select the folder, file name, and file format for the output files.
|
Item |
Overview |
choice |
| Output directory | Specify the folder to save the output files. | Any |
| Name | Specifies the output file name. | Any |
| Select the format of the generated file. |
|
4. set .sof
In the Input Files tab, click the Add Bitstream button and select the .sof for the target FPGA.
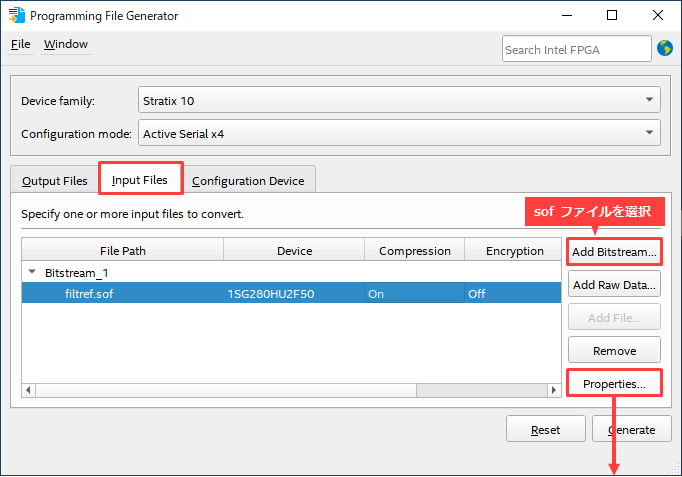
If you highlight and select the sof file part after selecting the file
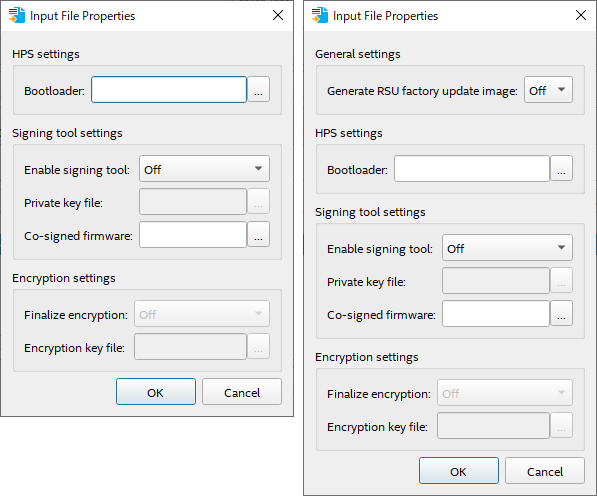
The Properties button becomes clickable.
You can configure security options and Bootloader settings.
The Compression function is automatically set to On.
Add options as needed.
To generate the rpd file, click the [Generate] button and finish the work.
To generate pof and jic files, proceed to step 5 below.
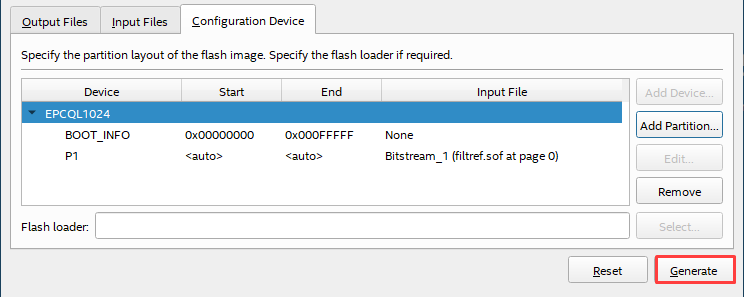
5. Select configuration memory (only when generating .pof/.jic)
Click the [Add Device] button on the Configuration Device tab and specify the configuration memory.
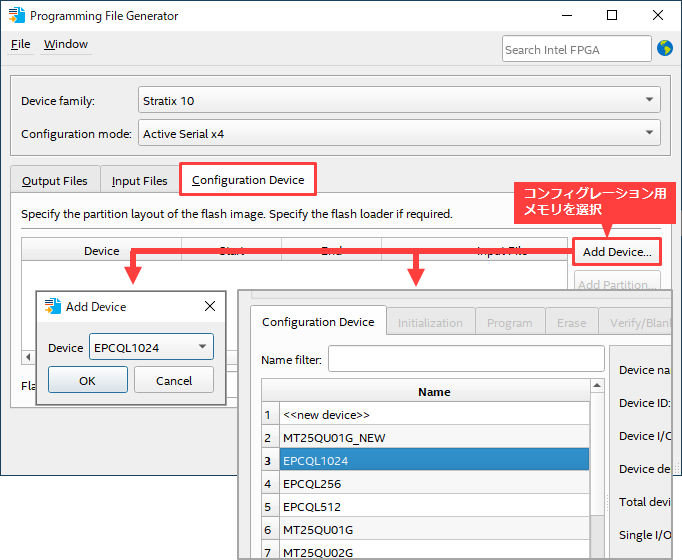
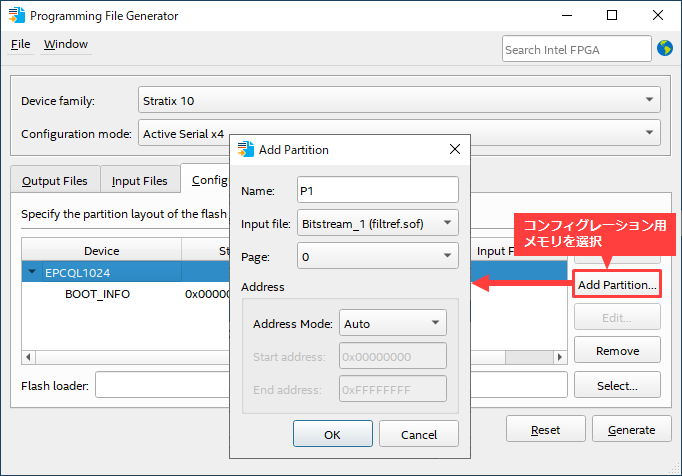
Next, highlight the selected configuration memory, click the [Add Partition] button, and specify the sof file set in step 4 and the page number to store it.
|
Item |
Overview |
| Name | Assign an arbitrary name to the set contents. |
| Input file | Select the sof file set in step 4. |
| Page | Specify the page to store the sof file. |
| Address | Specify an address if necessary. |
To generate a pof file, click the [Generate] button to finish the work.
To generate a jic file, proceed to step 6 below.
6. Select FPGA to transfer Serial Flash Loader (Only when generating .jic)
Click the [Select] button to select the FPGA to transfer the Serial Flash Loader (SFL).
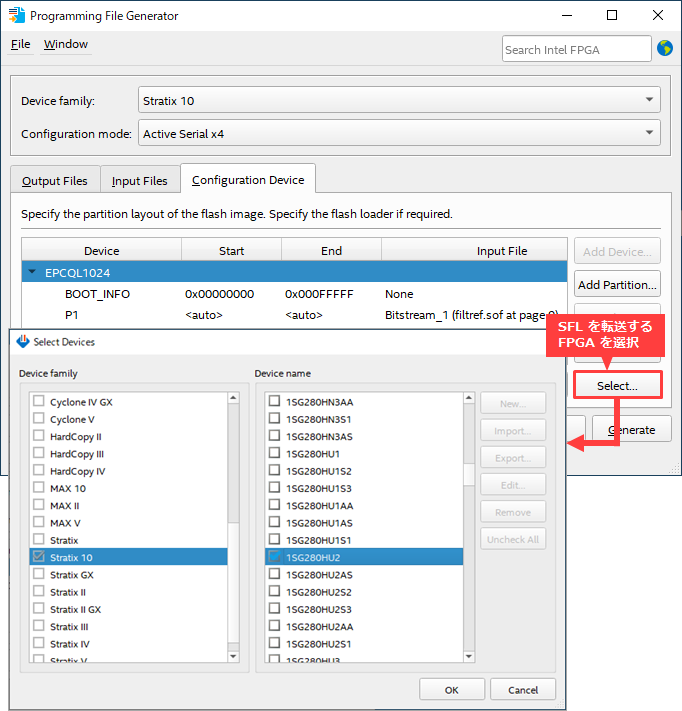
Click the [Generate] button to finish the work.
