- Semiconductor BusinessHOME
- Products and Services of Macnica,Inc.
-
technical information

-
Events and Seminars
- Handling Manufacturer
- Support
- Inquiry
- Click here to purchase products
- Semiconductor business e-mail magazine registration
![]()
![]() Narrow down by specifying conditions
Narrow down by specifying conditions
現在2182件がヒットしています。check
![[Introduction to accelerometers] ~Let's get accelerometer data~](/business/semiconductor/articles/Article_134574_cover.png)
In the [Introduction to Accelerometer] series, we will explain the basic usage and application methods, focusing on analog devices' accelerometers.
In this article, we will introduce acceleration sensors and how to actually acquire acceleration data using the digital MEMS acceleration sensor "ADXL345" and "Arduino".
[Introduction to accelerometer] Click here for the series list
What is an accelerometer
An accelerometer is an inertial sensor intended for measuring acceleration. Acceleration is expressed as velocity [m/s^2] per unit time, but in general MEMS accelerometers use [g] in the gravitational unit system, 1[g]≒9.8[m/ s^2].
When a force such as impact or vibration is applied to the accelerometer, acceleration can be detected according to the law of inertia. In addition, gravitational acceleration acts on the earth, and the inclination (inclination) of the device can be obtained by taking advantage of this property. Furthermore, it is possible to obtain the velocity by integrating the acceleration, and to obtain the displacement by integrating the velocity.
Today, it is used in a variety of applications, and is used in many systems, from familiar smartphones and wearable devices to industrial and industrial products. For more information, please refer to Analog Devices' application note "ANJ-005 What is an Accelerometer?"
Let's use the accelerometer
Acceleration data is acquired using the acceleration sensor ADXL345, the Arduino board, which is an open hardware platform, and the development environment Arduino IDE. For Arduino, please refer to the official Arduino website.
The content of the program acquires acceleration data at a frequency of 100 times per second (100Hz cycle) and displays the results on the serial console on the Arduino.
Things to prepare
Here is what I prepared to evaluate the accelerometer this time.
・PC with Arduino IDE installed (Download Arduino IDE from here)
・USB cable (for Arduino and PC connection)
・ Arduino Nano compatible board
・Breadboard and wire
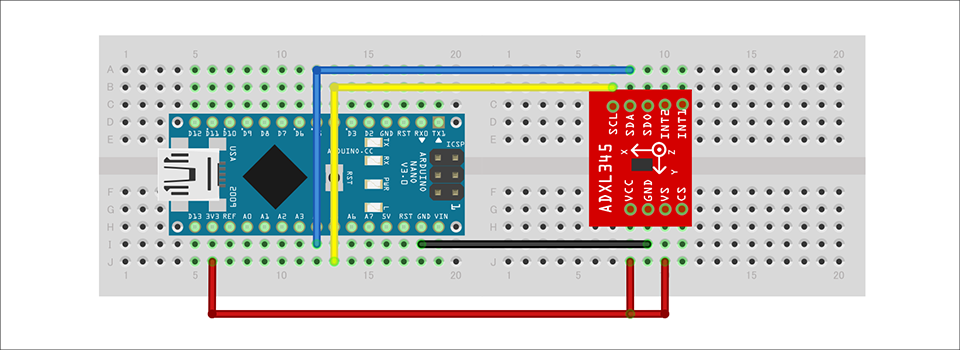
Combine the above parts to form a circuit as shown in the figure below. Power supply to Arduino Nano is supplied by USB bus power from PC. The ADXL345 supports SPI and I2C interfaces, but this time we will use the I2C interface.
Program
The ADXL345 enables flexible settings by rewriting internal registers. In the program created this time, the Measure bit of the POWER_CTL register (address: 0x2D) was written to 1, and only the measurement mode was changed from standby mode.
The ADXL345 initializes internal registers when power is applied. In the initial state, the acceleration range is ±2g, and the acceleration data update rate is 100Hz. The acceleration range and data update rate were left as they were in the initial state.
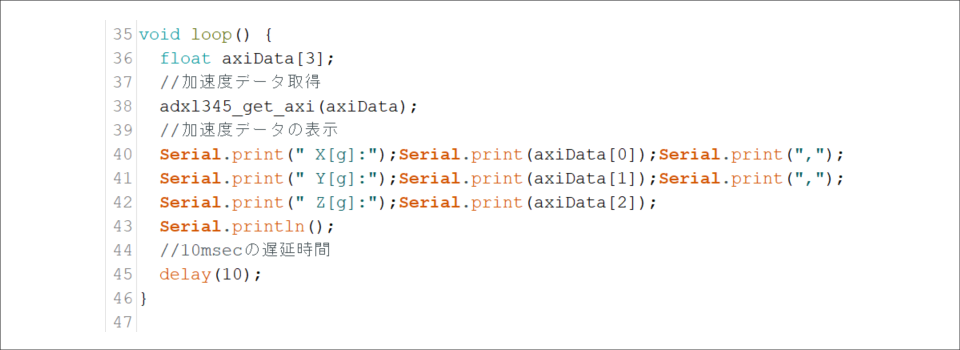
In addition, the software side inserts a waiting time of a certain period, acquires the 3-axis data of acceleration data X, Y, Z, and displays it. See the datasheet for the ADXL345 registers. You can download the project file created with the Arduino IDE, so please download it if you are interested.
operation check
Let's check the operation using the "serial plotter" function of the Arduino IDE. The serial plotter function is very convenient and automatically graphs variable data.
Three-axis acceleration data of X (blue), Y (red), and Z (green) are displayed in chronological order on the screen. If you move the sensor up and down, you can see that the green Z-axis data changes with the movement.
In the same way, when you move the sensor horizontally toward the monitor screen, the Y-axis acceleration data (red) and the X-axis acceleration data (blue) change according to the movement of your hand.
Download the source file verified this time
We provide the Arduino project file that we implemented this time. Apply here and give it a try!
About Accelerometer ADXL345
The ADXL345 used this time is a 3-axis digital output acceleration sensor. The main features are as follows.
・A standard accelerometer that is very easy to use with built-in ADC, operation function block, and FIFO
・Acceleration data adopts general I2C/SPI in digital serial method
・The 3-axis type sensor is a rectangular coordinate (X, Y, Z), and the acceleration acting on each axis can be obtained.
・The maximum detectable acceleration can be set in the range of 2g to 16g, and the sampling range is as wide as ~3.2kHz, so it can be applied to various applications such as impact, tilt, and motion detection.
・Flexible mode to reduce current consumption
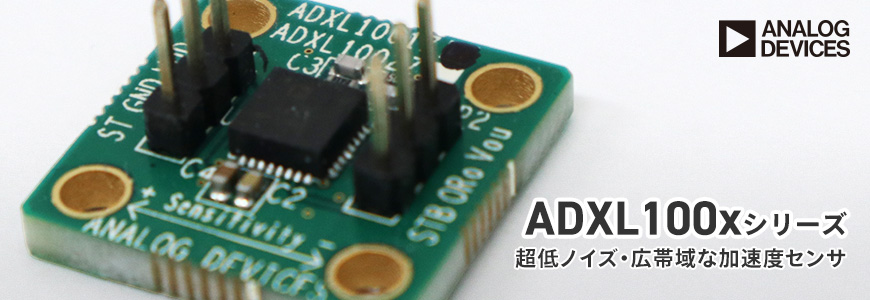
For more information on the ADXL345, please refer to the datasheet.
Also, this accelerometer is very easy to use, so if you want to evaluate an accelerometer from now on, please try it on the evaluation board.
At the end
If you have any questions about the contents of this article, or if you have any problems with selecting or using accelerometers, please contact us from the following.
Click here for recommended articles/materials
ADcmXL3021 High performance 3-axis MEMS sensor that can be installed with standard machine screws
Accelerometer (ADXL362) Enables Ultra-Low-Power Motion Switch
Analog Devices Manufacturer Information Top
If you want to return to Analog Devices Manufacturer Information Top, please click the button below.