- Semiconductor BusinessHOME
- Products and Services of Macnica,Inc.
-
technical information

-
Events and Seminars
- Handling Manufacturer
- Support
- Inquiry
- Click here to purchase products
- Semiconductor business e-mail magazine registration
![]()
![]() Narrow down by specifying conditions
Narrow down by specifying conditions
現在2164件がヒットしています。check
In a previous article Accelerating development with an Arduino-compatible development support platform, we introduced an Arduino-compatible development support platform and sensor shield board for rapid prototyping from Analog Devices (ADI).
This time, I would like to briefly introduce the procedure to operate the development platform board (EVAL-ADICUP360) and the sensor shield board (EVAL-ADXL362-ARDZ) equipped with the acceleration sensor.
For the development environment (IDE), we used an Eclipse-based interactive development environment provided free of charge by Analog Devices. This platform makes it easy to evaluate accelerometers.
We have also released a video that explains the tilt detection using the accelerometer while actually operating the development platform. If you are interested in watching the video, please contact us from the button at the bottom of the page.
Hardware preparation
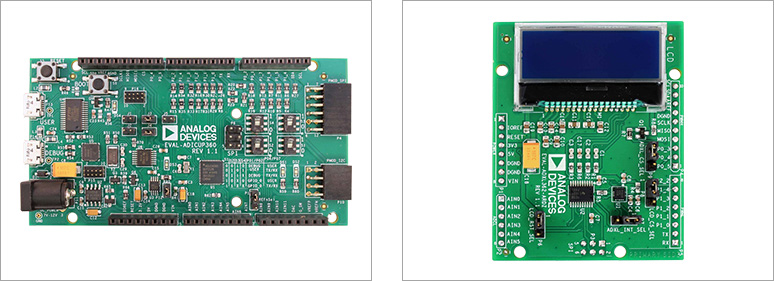
The following two boards are prepared.
- Platform board: EVAL-ADICUP360
- Sensor Shield Board: EVAL-ADXL362-ARDZ
Each board has a JP pin and a SW pin. See here for settings.
Accelerometer Demo [Analog Devices Wiki]
The power supply can use the USB bus power of the PC.
All that's left is to connect the shield board and platform board and the hardware is ready!
Preparing the development environment
Download development environment and sample project
The following two points are required to operate the sensor board.
- Shieldboard sample project
- Platform board development environment (IDE)
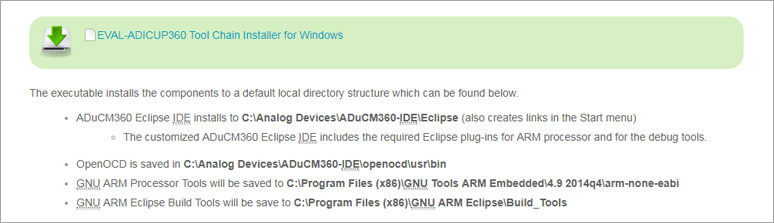
It is provided as a Tool Chain package here, so download it to your PC and install it.
Tool Chain for EVAL-ADICUP360 [Analog Devices Wiki]
program writing
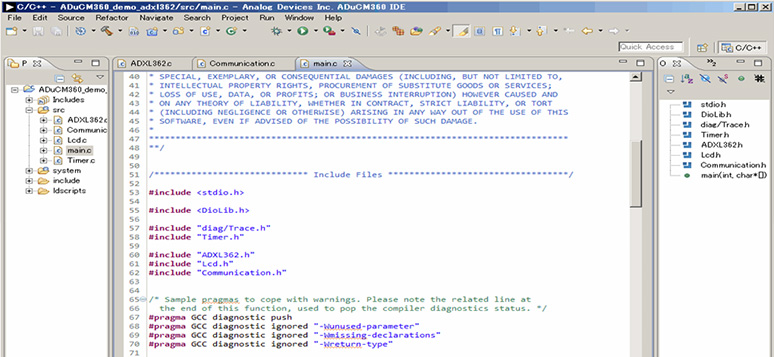
After the installation is complete, start the IDE, import the sensor board sample project, and write the program to the board. Please refer to this user guide for instructions on how to proceed.
Please download the shield board project file from the following URL.
https://github.com/analogdevicesinc/EVAL-ADICUP360
The project file for the accelerometer shield board used this time is ADuCM360_demo_adxl362.
operation check
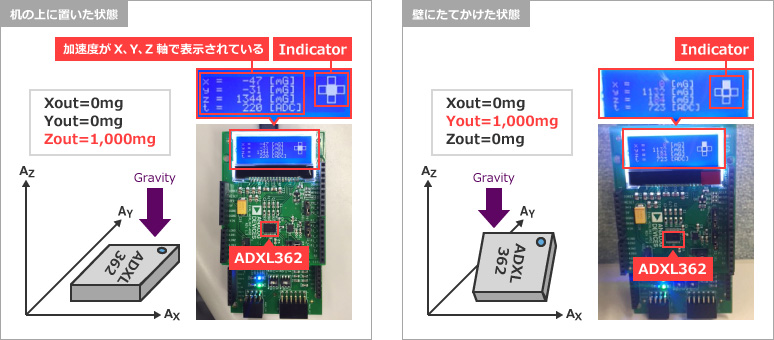
Program writing to the board was completed, and the operation was confirmed as shown in the figure below.
The liquid crystal display has an indicator that displays the magnitude of acceleration [mg] in the X, Y, and Z directions, and the status.
When placed on the desk, you can see that the gravitational acceleration is working in the Z-axis direction. Also, when I leaned it against the wall, I was able to confirm that the gravitational acceleration is acting on the Y axis.
See here for details of the program.
Accelerometer Demo [Analog Devices Wiki]
I tried to move
Please take a look at this video to see how the "development platform board (EVAL-ADICUP360) and acceleration sensor shield board (EVAL-ADXL362-ARDZ)" introduced so far work.
Summary
Analog Devices' support page has a lot of videos and manuals, so it took only about 30 minutes from downloading and installing the tool to checking its operation.
I think that it is a very useful tool for those who want to try the operation of the accelerometer immediately.
As I introduced in the previous article, there are various other sensor shield boards available, so please try them!
Also, if you have any questions about the products introduced in this article, please feel free to contact us from the following.
Click here for recommended articles/materials
Accelerate development with an Arduino-compatible development support platform
Click here to purchase products
Platform board: EVAL-ADICUP360
Sensor Shield Board: EVAL-ADXL362-ARDZ