- Semiconductor BusinessHOME
- Products and Services of Macnica,Inc.
-
technical information

-
Events and Seminars
- Handling Manufacturer
- Support
- Inquiry
- Click here to purchase products
- Semiconductor business e-mail magazine registration
![]()
![]() Narrow down by specifying conditions
Narrow down by specifying conditions
現在2183件がヒットしています。check

Last time, I checked the contents of the human detection reference design (Object Counting) provided by Lattice.
Among them, I found a part where a shell script was executed to execute training of the neural network model, and there were places where it was necessary to execute python to check the training data. If you try to execute these in a Windows environment, you will have to change the script part and review the python code according to Windows, which seems to be troublesome. Lattice's reference design document is also described in a form that assumes a Linux environment, so this time I would like to take a look at the Linux environment construction.
To be honest, I haven't touched Linux that much, and when I have to type a command on the CUI terminal, I always have to look it up on the internet to proceed. I decided to proceed with the . From the results, I was able to build it somehow, so I think that this content that I will explain from now on will be helpful.
【table of contents】
1. First, prepare an Ubuntu machine
3. Installing the CUDA Toolkit
Prepare an Ubuntu machine
There are various Linux OSes in the world, but the most commonly used Linux OS for deep learning development seems to be the OS called Ubuntu. There seem to be various reasons, but since the Lattice reference design documents are written on the premise of using this Ubuntu OS, I also prepared a PC with this Ubuntu OS installed.
Looking at the reference design document, the Ubuntu version is listed as 16.04 LTS, but standard support for this 16.04 LTS will end on April 30, 2021. It seems that the 16.04 LTS installer is still available on the web, but I was worried about using an old one from now on, but I decided to try using the new version 20.04 LTS. Did. If something goes wrong, I'll try to install 16.04 LTS again. There are various useful information on the web about how to install Ubuntu OS, so please refer to those.
Prepare NVIDIA GPU card
In addition, training of neural network models requires extremely high computing power, so GPUs are commonly used to speed up processing. It seems that the processing time may differ by more than 10 times compared to training with CPU only. I also decided to use NVIDIA's GPU card because the reference design also describes the environment construction when using GPU.
In my case, I decided to use a GPU card with a GeForce GTX 1050 Ti GPU that happened to be left at the company.
Install the CUDA Toolkit
We will proceed with the installation according to the reference design document, but first we will install the CUDA Toolkit.
Since the GPU is originally a processor for image processing, in order to use the GPU for general numerical calculation purposes such as the training process of the neural network model this time, this CUDA Toolkit and a live called cuDNN that will be installed later It looks like you need to install rally.
And here comes the problem... The CUDA Toolkit installation command described in the reference design document is based on using Ubuntu 16.04 LTS, so it does not match this 20.04 LTS. Therefore, I investigated and tried various installation methods for 20.04 LTS. that's how below
#cuda-ubuntu2004.pin ファイルのダウンロードと移動 $ wget https://developer.download.nvidia.com/compute/cuda/repos/ubuntu2004/x86_64/cuda-ubuntu2004.pin $ sudo mv cuda-ubuntu2004.pin /etc/apt/preferences.d/cuda-repository-pin-600 #パッケージ認証キーの取得 $ sudo apt-key adv --fetch-keys https://developer.download.nvidia.com/compute/cuda/repos/ubuntu2004/x86_64/7fa2af80.pub #リポジトリ情報の更新とパッケージのインストール $ sudo add-apt-repository "deb https://developer.download.nvidia.com/compute/cuda/repos/ubuntu2004/x86_64/ /" $ sudo apt-get update $ sudo apt-get -y install cudaLast
$ sudo apt-get -y install cuda
but it doesn't go smoothly and when I run
"E: Unable to fetch some archives. Try apt-get update or --fix-missing option."
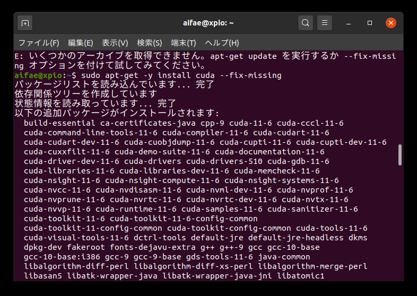
I got a message. according to the message
$ sudo apt-get -y install cuda --fix-missing
When I tried with the option, the installation was completed.
However, the version of CUDA Toolkit that could be installed by this method is 11.6.1-1. The reference design document is supposed to install CUDA 9-0, so this is also a different version than originally.
Since the version is already different from the beginning, there is already nothing to be afraid of. If something goes wrong, I will reconsider at that time and move on to the next step. properness….
Install NVIDIA driver
It's not mentioned in the Lattice reference design document, but after doing some research, it seems that the nVIDIA driver is usually installed before installing the CUDA Toolkit, so I installed it at this timing as well. I left it.
First, check the recommended driver with the following command.
ubuntu-drivers devices
You'll see the recommended drivers for your environment.
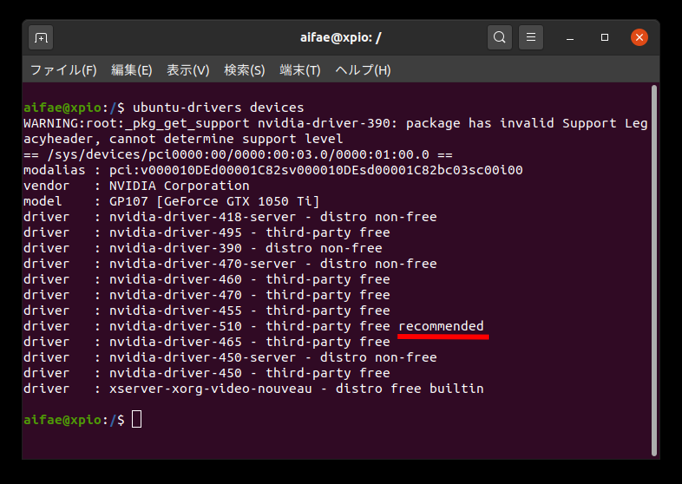
Since there was a comment "recommended", I installed nvidia-driver-510 by executing the following command.
$sudo add-apt-repository ppa:graphics-drivers/ppa
$sudo apt update
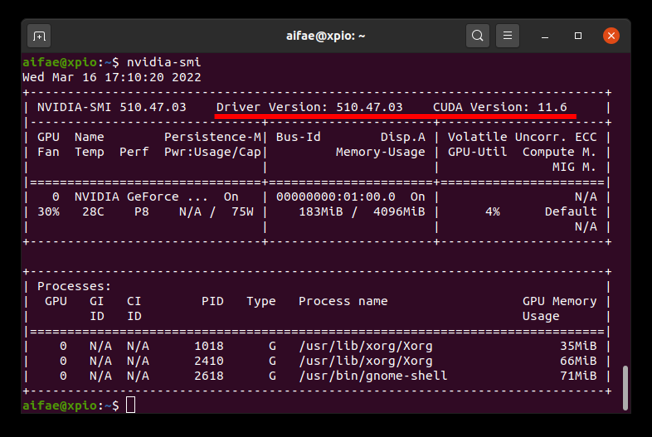
$sudo apt install nvidia-driver-510Execute the "nvidia-smi" command (NVIDIA System Management Interface command) to see if the driver is properly installed.
CUDA version is 11.6.
Install cuDNN
Next, we will install cuDNN. Again, the version listed in the reference design document is old, so it seems necessary to install the one that matches the actual situation.
The cuDNN library can be downloaded from NVIDIA's NVIDIA Developer site, but I needed to register an account to download it, so I registered. cuDNN can be downloaded from the following site.
https://developer.nvidia.com/rdp/cudnn-download
Check the License Agreement and click the Download link below it.
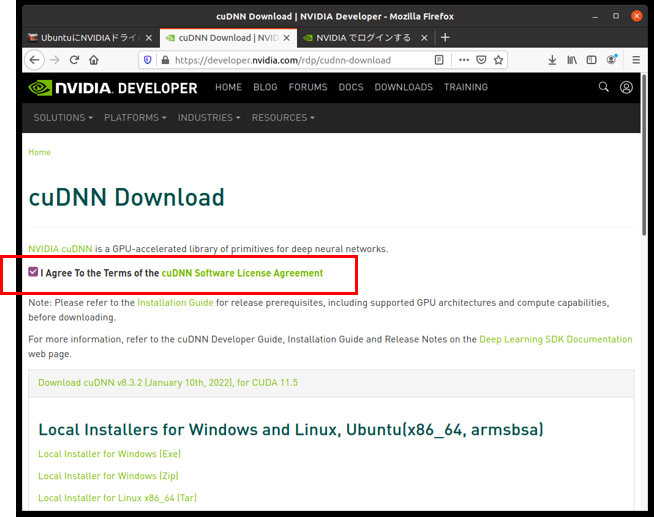
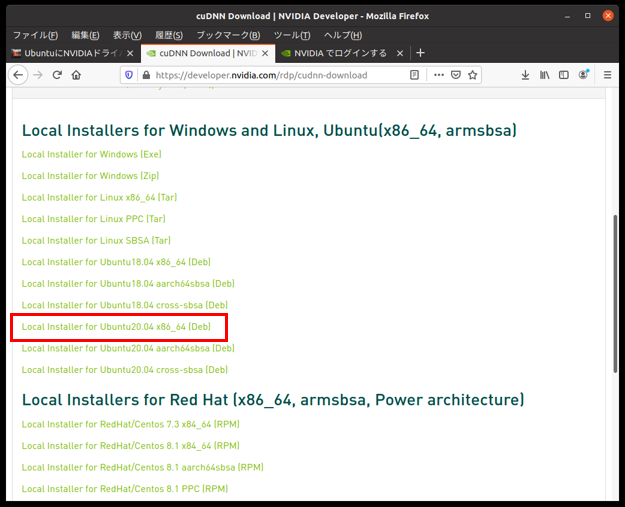
Various installers are prepared according to the installation environment, but this time I downloaded "Local Installer for Ubuntu20.04 x86_64 (Deb)" according to my environment.
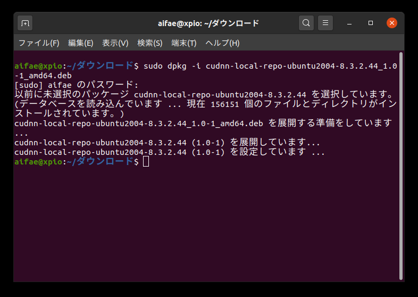
The downloaded file is a file called debian package, and it seems that the command "dpkg -i" is executed to install this package, so I was able to install it successfully with this command.
Install Anaconda
The installation of NVIDIA has been completed somehow, but there is still a long way to go, and it seems that I will unintentionally dabble in something bad.

Next, install the environment for running Python.
The reference design document specifies Anaconda as the Python execution environment, so install it. Access the following site and download the installer.
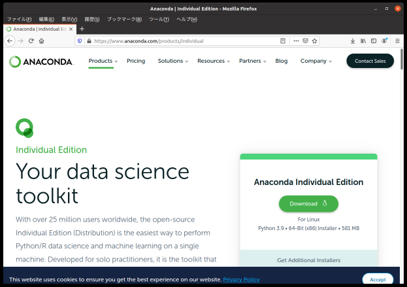
Download the Linux version installer.
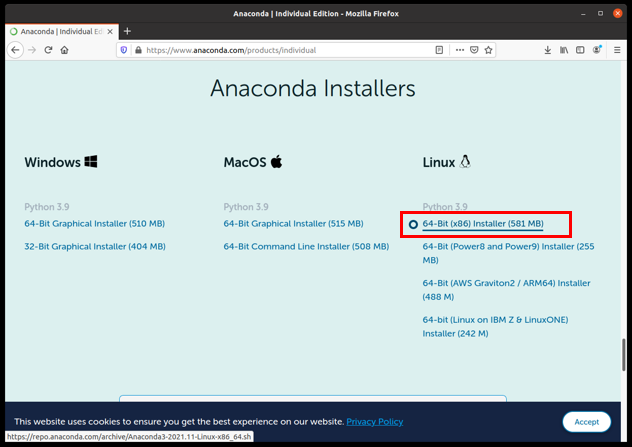
I was able to download an installer in the form of a sh file, so I installed it with the sh command.
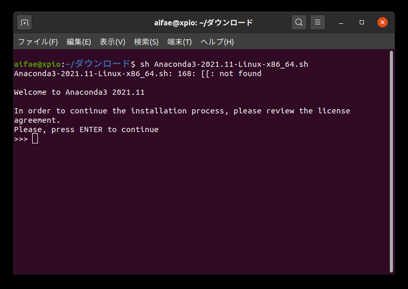
During the installation, there was a check of the License Agreement, confirmation of the installation location, etc. When I answered each appropriately, various logs flowed and the installation was completed successfully.
Create a virtual environment
After installing Anaconda, the terminal display changed a little, and (base) was added to the beginning of the line.
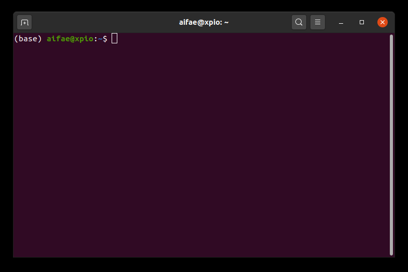
After investigating, this seems to be due to a mechanism called Anaconda's virtual environment.
・The virtual environment is managed by the Anaconda system.
・Users can freely create multiple virtual environments.
・Users can install the library for each virtual environment, switch to their favorite environment, and run in that environment.
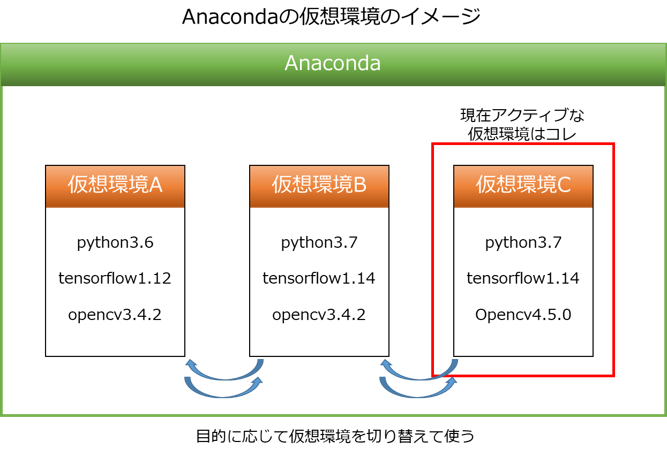
The library has versions, and depending on the combination of versions, it may not work well, or the library itself may not be installed properly.
In addition, it seems that there are merits such as easy isolation when there is a problem by operating with the minimum library configuration for each application you want to operate. One virtual environment is equivalent to one personal computer. Very convenient.
Since the version of the library can be found here and there in the Lattice reference design document, it seems better to prepare multiple virtual environments so that they can be used by switching between them.
The virtual environment can be created with the following command.
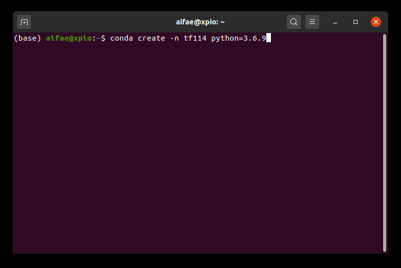
conda create -n <new virtual environment name> python=version number
It seems that Lattice's reference design is basically confirmed to work with Python 3.6, so create a virtual environment with the latest 3.6.9 among them. Set the virtual environment name to tf114 in anticipation of the Tensorflow version that will be installed later.
conda create -n tf114 python=3.6.9
Once the virtual environment is created, switch to the created environment with the following command.
conda activate tf114
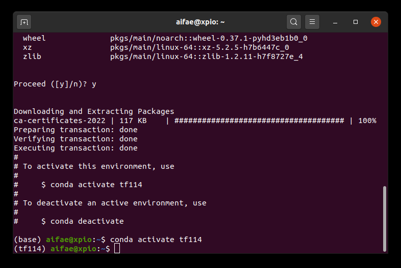
The first character has been switched to (tf114). We will continue to install the necessary libraries for this environment.
Install Tensorflow
Since the framework used in the reference design is Tensorflow, we will install the Tensorflow library in the created virtual environment.
We will use the conda install command to install the library.
conda install <library name>== version number
Omitting the version number part seems to install the latest library at that time.
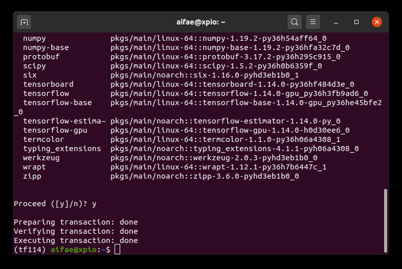
This time install 1.14.0. Also, Tensorflow has a GPU version and a non-GPU version, and the library name of the GPU version is tensorflow-gpu.
conda install tensorflow-gpu==1.14.0
In the middle
proceed ([y]/n)?
Press the y button on the keyboard to proceed to the next step and complete the installation.
Installing other libraries
If you look at the reference design documentation, you'll find many other libraries that you'll need. Have them installed.
$ conda install –c conda-forge easydict $ conda install joblib $ conda install keras==2.2.4 $ conda install -c conda-forge opencv=4.5.0 $ conda install pillowIf you specify "-c conda-forge" as an option for the install command, it seems to mean installing a package library managed by a community called conda-forge.
Also, if you install keras and opencv without specifying the version, it seems that problems will come up later, so I installed it with specifying the version.
The environment construction is now complete. It was long….
Next time, I will take a look at the contents of the main dataset.
Inquiry
Please feel free to contact us if you have any questions about the evaluation board or sample design, or if there is anything you would like us to cover in this blog!