Okta
Octa
Brief description
Describe Okta's user management features.
Okta user management features
Okta has three user types: This chapter explains how to create Okta-Mastered People, and the next chapter explains how to create Directory-Mastered People (AD linkage).
- Okta-Mastered people
A user associated with an account created on Okta. It is also possible to create a large amount at once by importing a CSV file. Belongs to the Okta group. There are at least 4 attributes. (first name, last name, username, and email address) - Directory-Mastered people
Users associated with accounts created in an external directory service such as AD and imported into Okta. By default, Directory-Mastered people cannot change the directory password, but you can change the settings so that OktaSuper Administrators can change it. Directory-Mastered people are governed by Directory user profiles. Therefore, user attributes are managed within the directory service. It is also possible to manage specific attributes from Okta instead of within the directory service. Directory-Mastered people can be associated with both Okta groups and directory groups. - Application-Mastered people
A user associated with an account created in an external HR application or similar and imported into Okta.
Examples of services that can use this feature are listed below. (AD and LDAP are Directory-Mastered people)
https://help.okta.com/en/prod/Content/Topics/Security/administrators-admin-comparison.htm
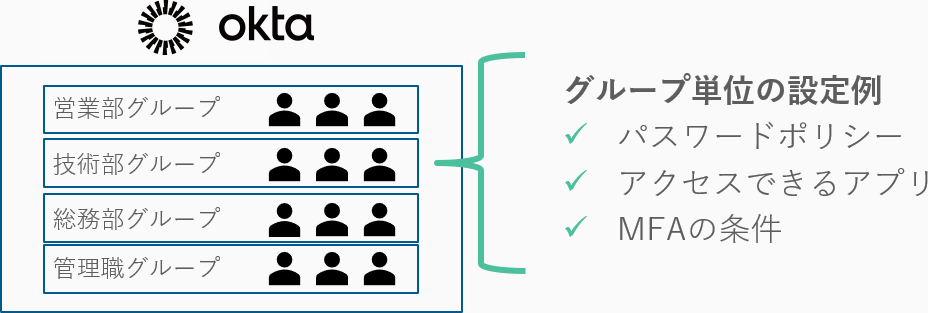
Okta's user group feature
Okta users can be grouped and managed.
By grouping, it is possible to manage various settings for each group.
It is common to group by department or role.
A user can belong to multiple groups.
User status
I will explain each user status.
A green status may result in a charge.
Gray status is not billable.
| status | explanation |
| Staged | Status when the user has not been activated after creation. |
| Pending user actions | Activation unapproved status by user. Status during the user activation step when the user has not yet clicked the activation link in the activation email or set a password. |
| Active |
Enabled state. In the following cases, the user will be in Active state.
|
| Password Reset (Recovery) |
In the following cases, the user will be in the state of Password Reset.
|
| Locked out | If you attempt to log in more than the configured maximum number of login attempts, you will be locked out. |
| Suspended | It becomes Suspended when the administrator sets the user to Suspend. This state has no effect on the application's assignment state. |
| Deactivated (Deprovisioned) | Deactivated when the administrator deactivates the user or removes provisioning. In this state, the application assignment is deleted by the user. |
Create users and groups
I will explain how to create users and groups on Okta.
How to create users on Okta describes manual creation and csv import.
User created (manual)
- Transition to Directory>People screen

- Click Add Person

- Enter the following items for the user information to be created and click Save.
- First name
- Username
- Last name
- Primary email
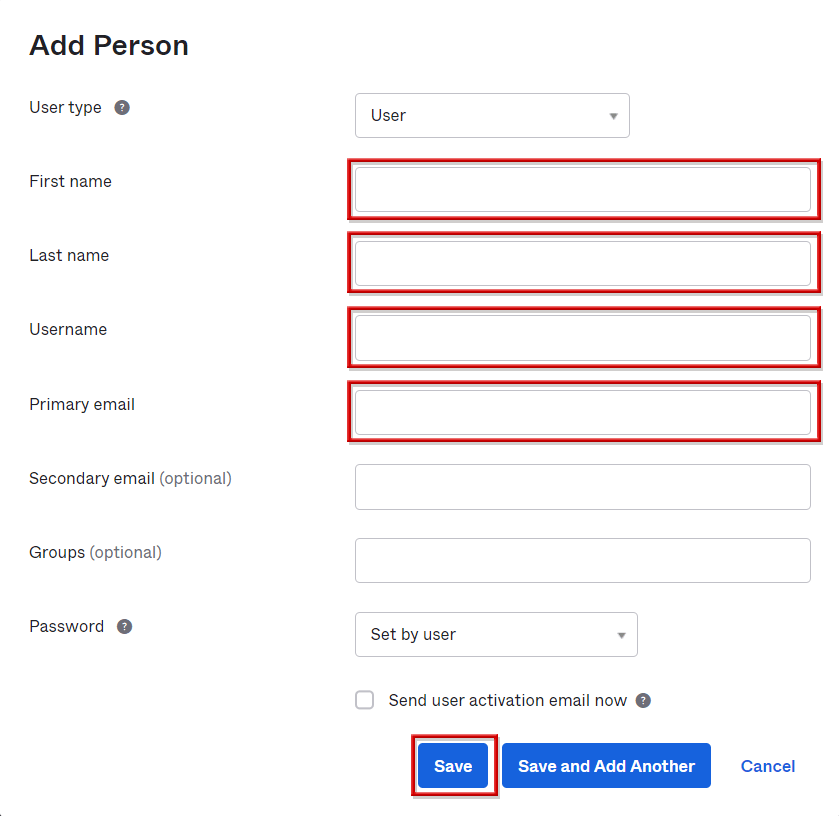
*By selecting Set by admin for Password, the administrator can set a temporary password. Check Send user activation email now for immediate user activation.
- An email will be sent to your primary email address, so click Activate Okta Account

- Enter a new password and secret question and click Create My Account
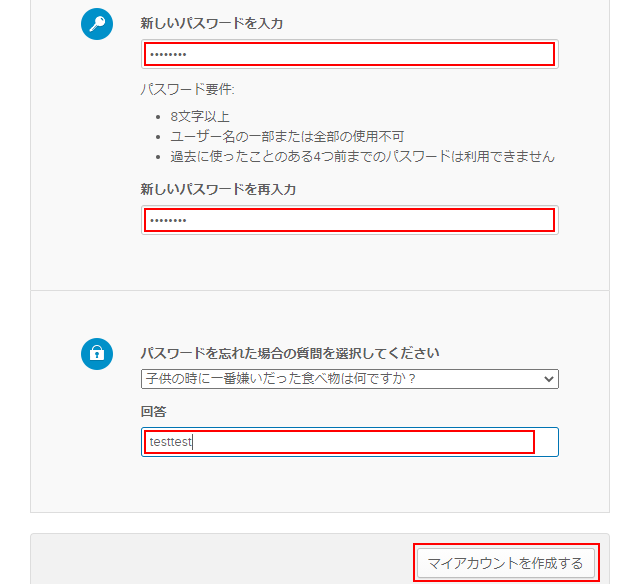
The secret question is a question to verify your identity when resetting your password.
If you do not want to use a secret question, go to the Security>Authentication>Password tab of the Okta dashboard and Box Additional self-service recovery option>Security Question in the password policy and save.
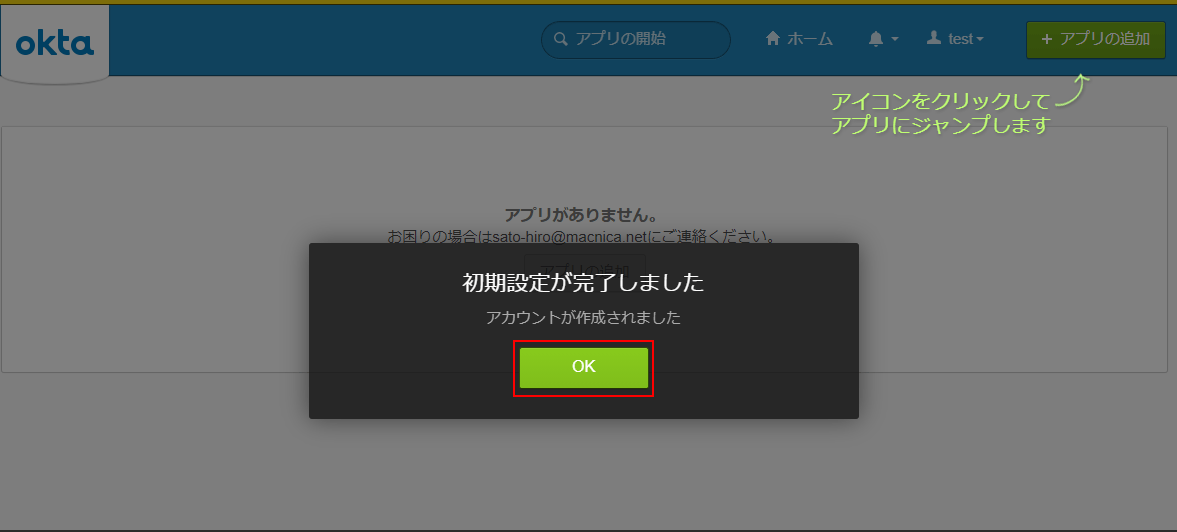
- Press OK to complete new user creation
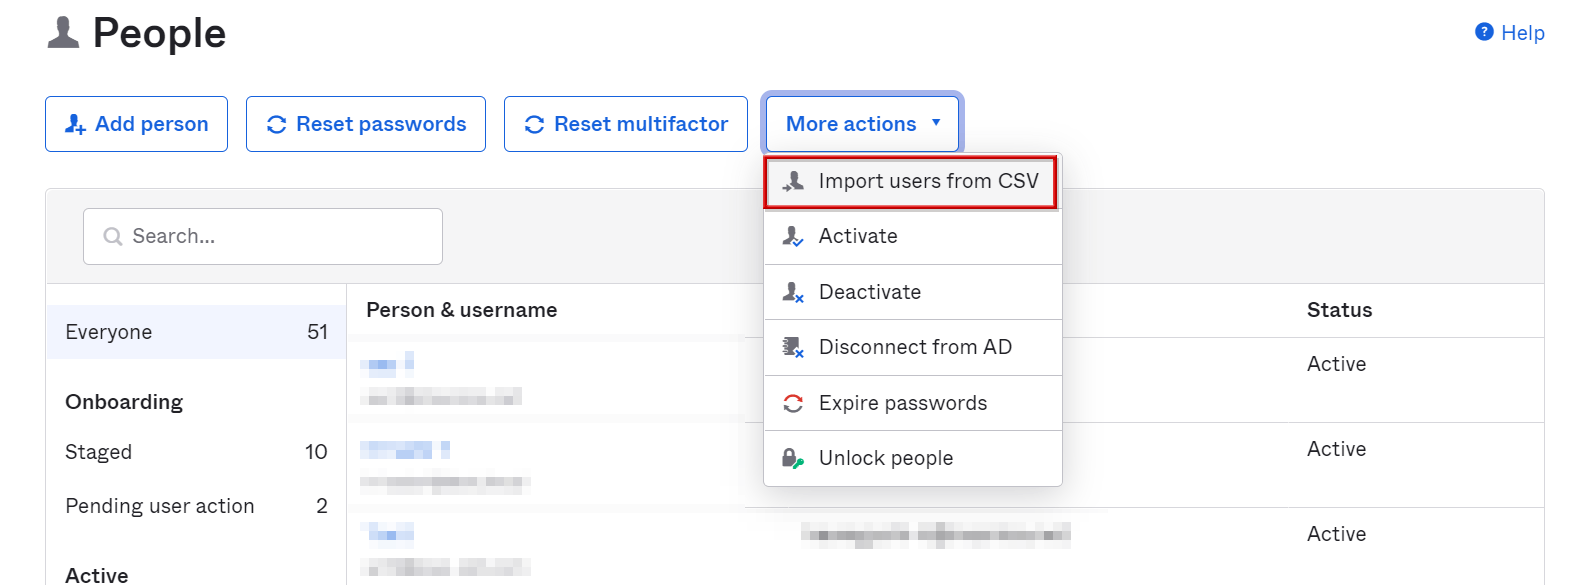
User creation (csv import)
- Transition to Directory>People screen

- Click More Actions > Import Users From CSV
- click this template
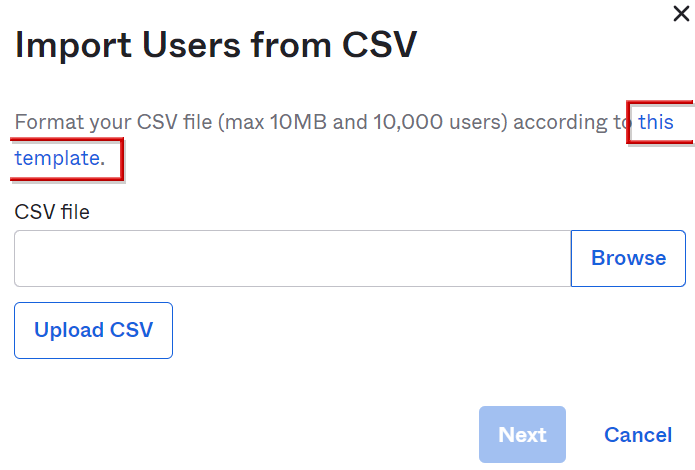
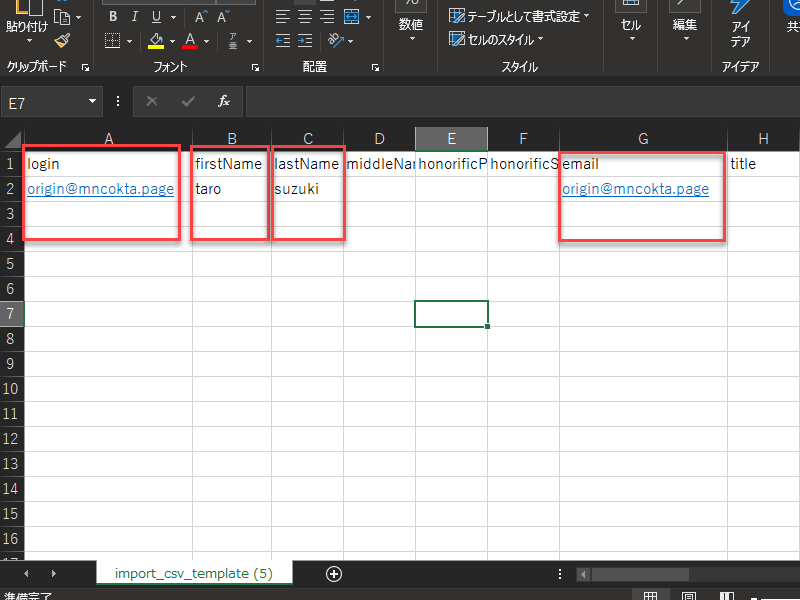
- Once the template file is downloaded, enter the information of the user you want to create on each line.
* Default required information is “login”, “firstName”, “lastName”, “email”
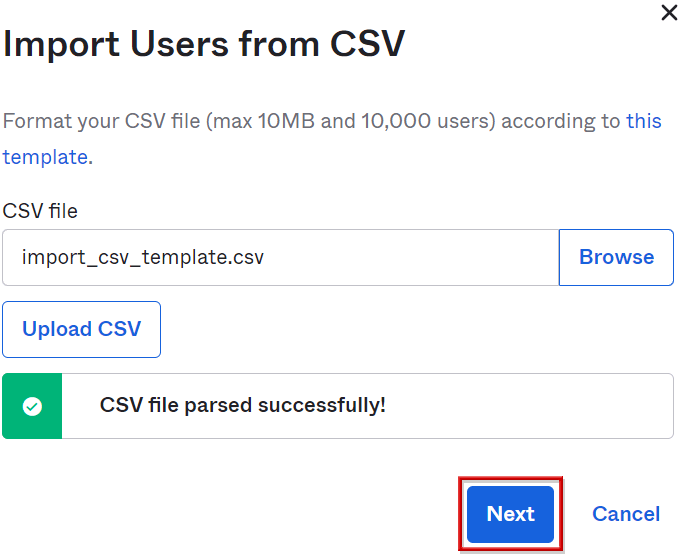
- Specify the created CSV file in “Browse” and click “Upload CSV”
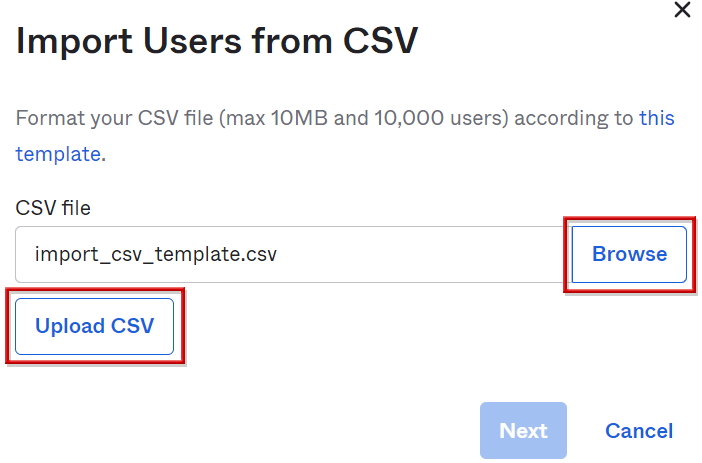
- When "CSV file parsed successfully!" is displayed, click Next
- Check Automatically activate new users and click Import Users
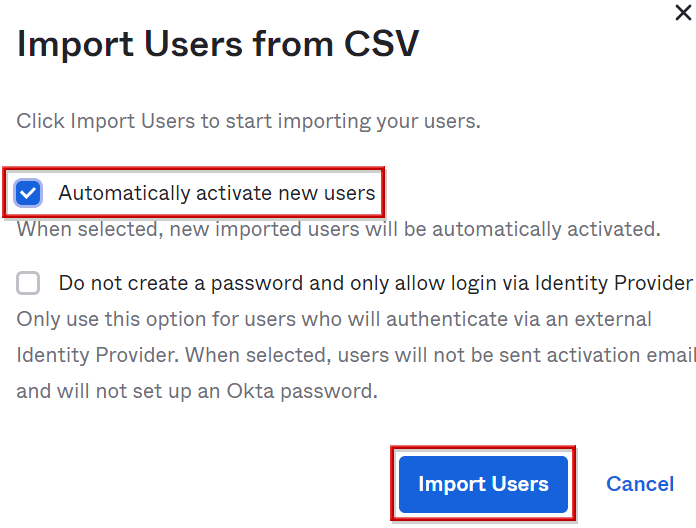
*By checking the box, an activation email will be automatically sent to the user.
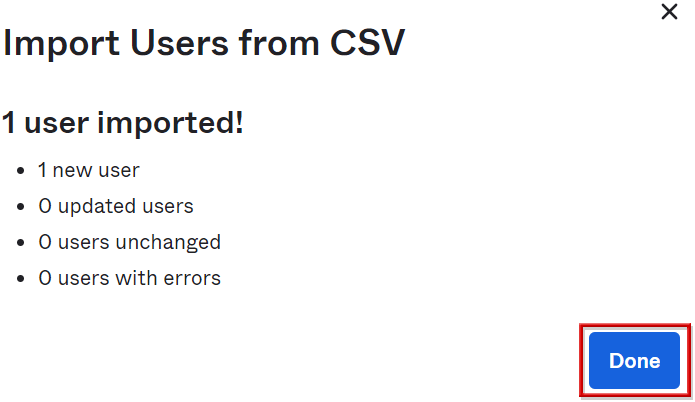
- Click Done to complete the import
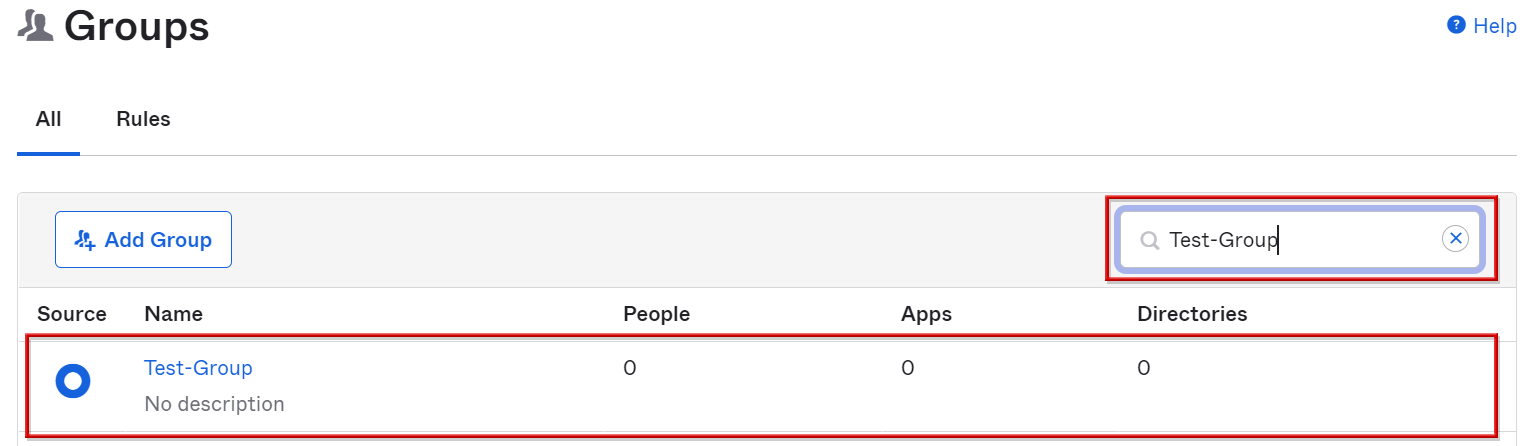
group creation
- Transition to Directory > Groups screen
- Click Add Group
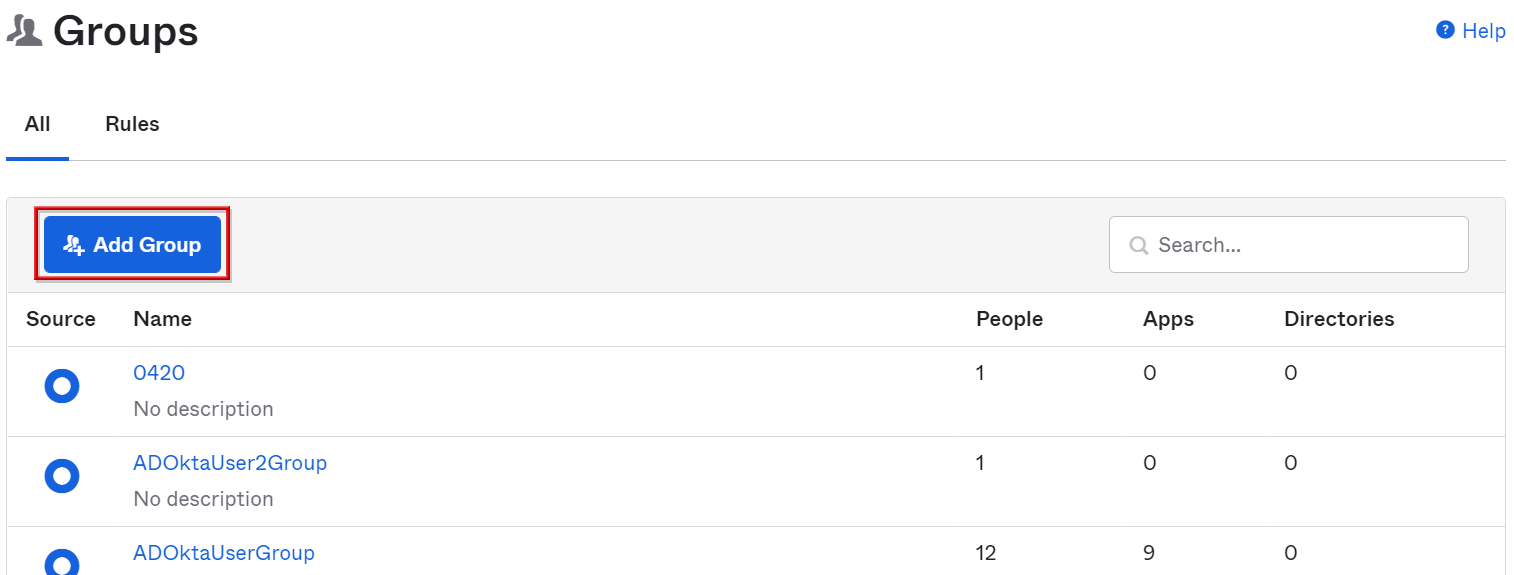
- Enter the group name and click Add Group
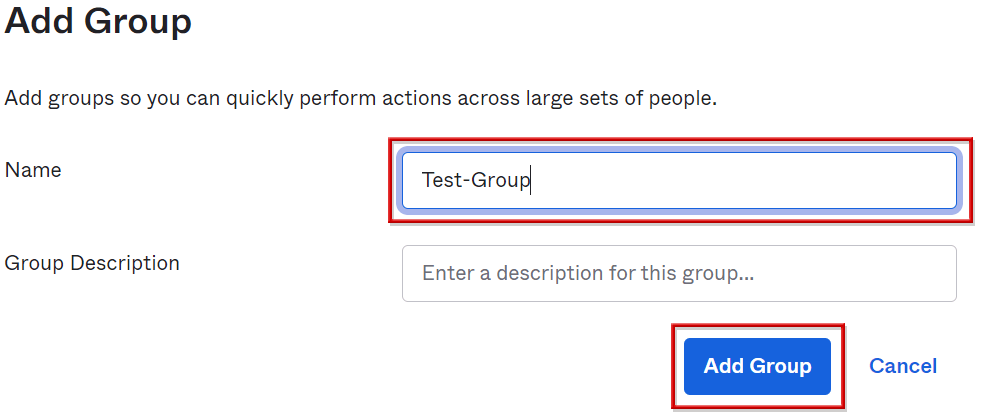
- Extract the new group name in the search window and confirm that the group has been created
Add User to Group
Learn how to add users to groups in Okta.
There are two ways to add users to groups in Okta: manual addition and automatic addition rules.
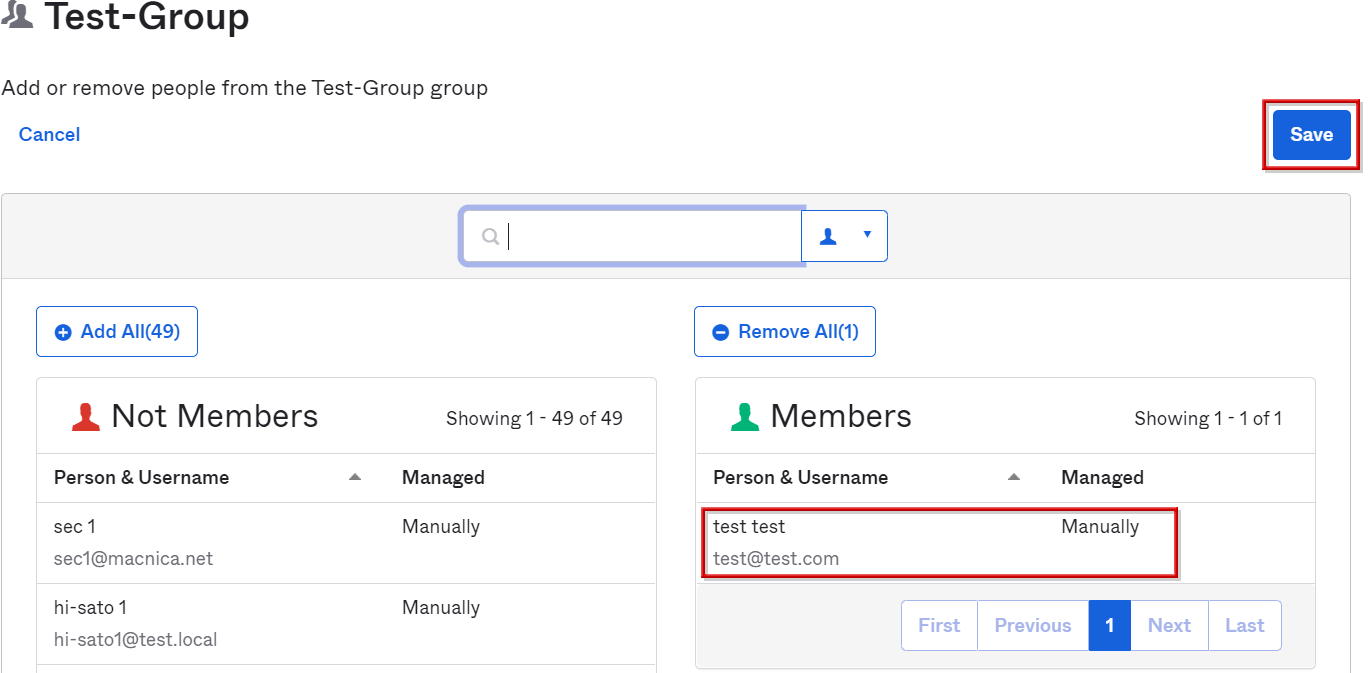
Add users to groups (manually)
- Go to the Directory > Groups screen and click the appropriate group
- Click Manage People
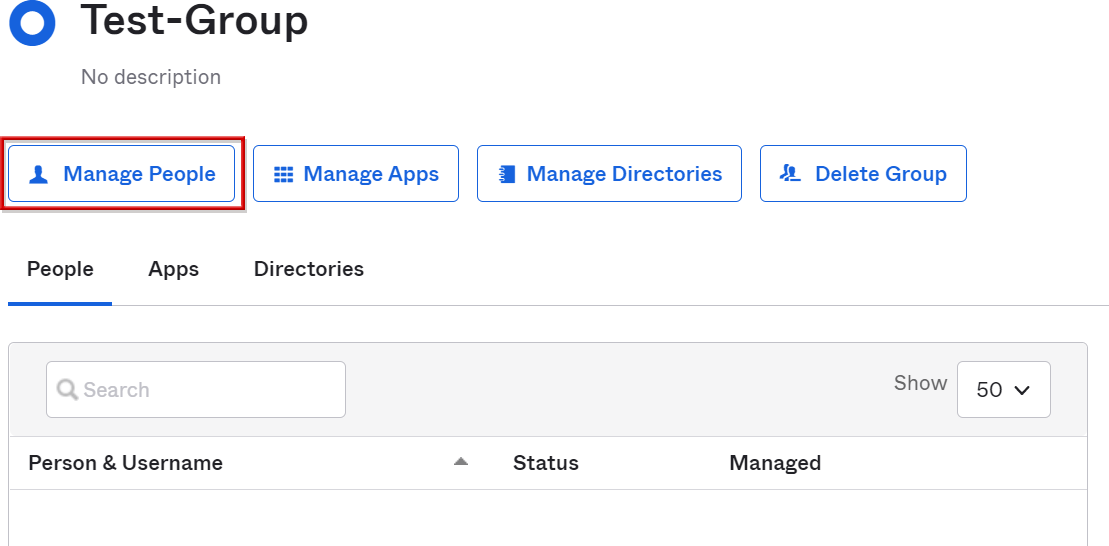
- Display the corresponding user in Not Members in the search window and click +
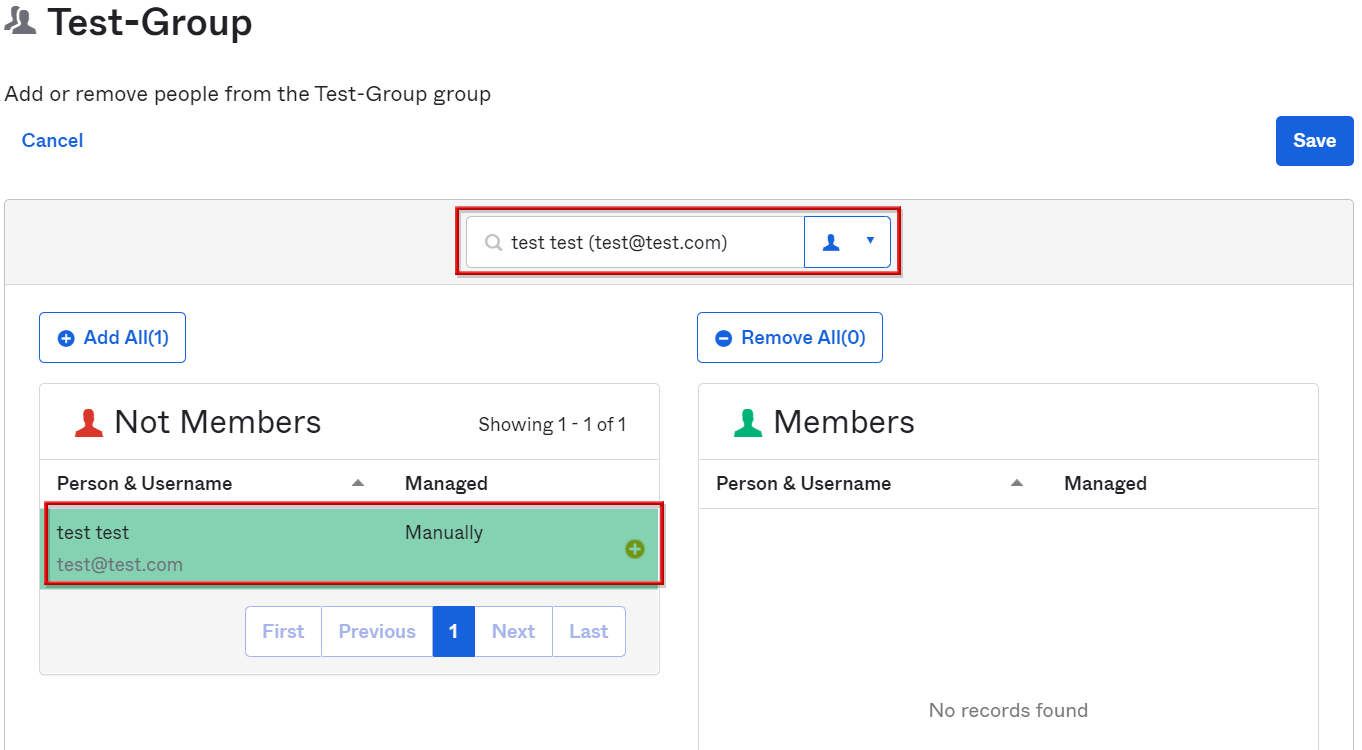
- After confirming that the user has been added to Members, click Save to complete the user addition
Add user to group (rule applied)
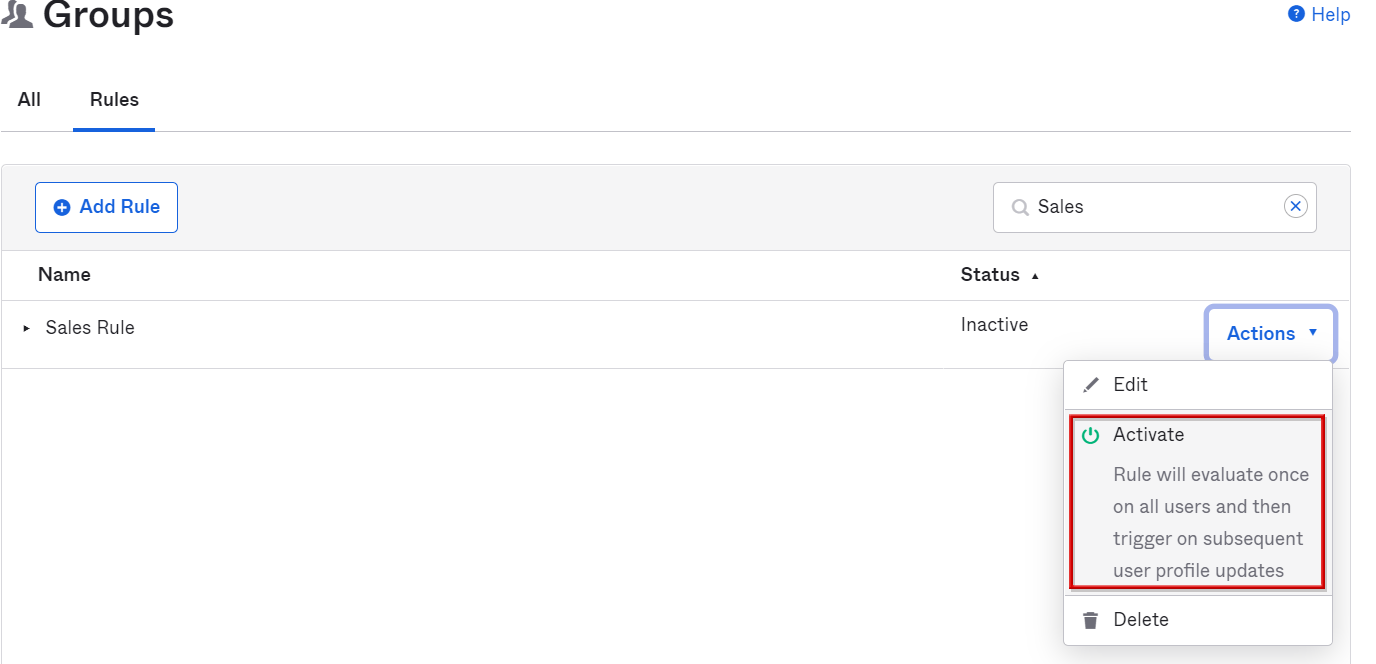
- Move to the Directory > Groups screen and click Add Rule on the Rules tab

- Enter the rule name, set the conditions to apply to the group, and click Add Rule
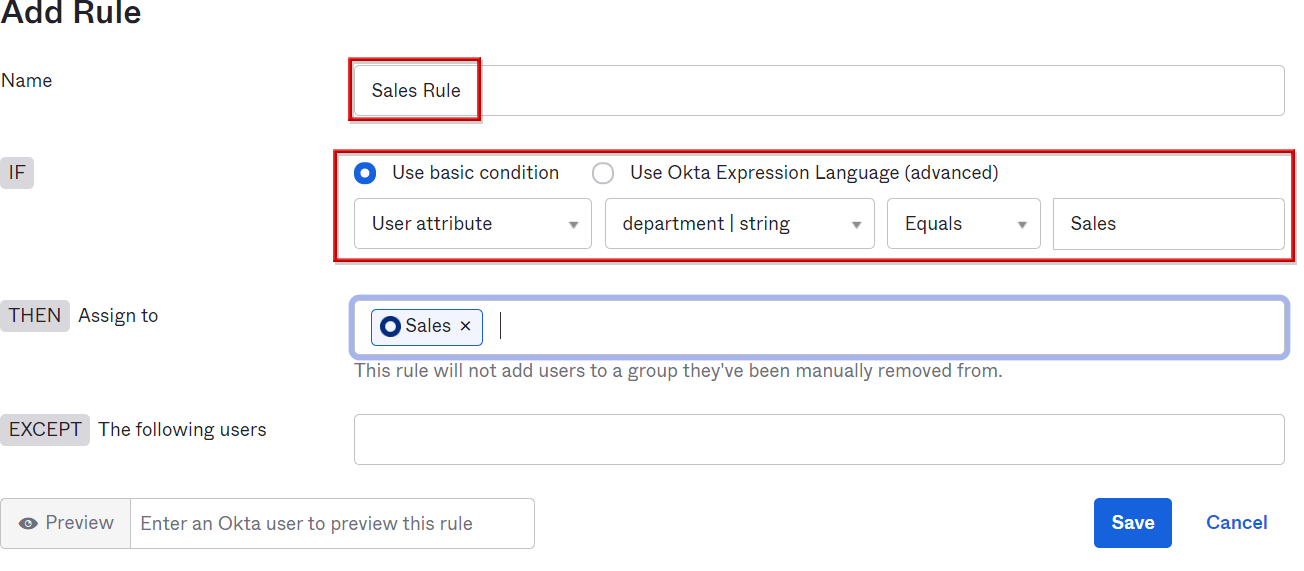
*The above rule adds to the Sales group when the department of the User attribute is "Sales".
- Since it is Inactive after adding the rule, select Activate to make it Active
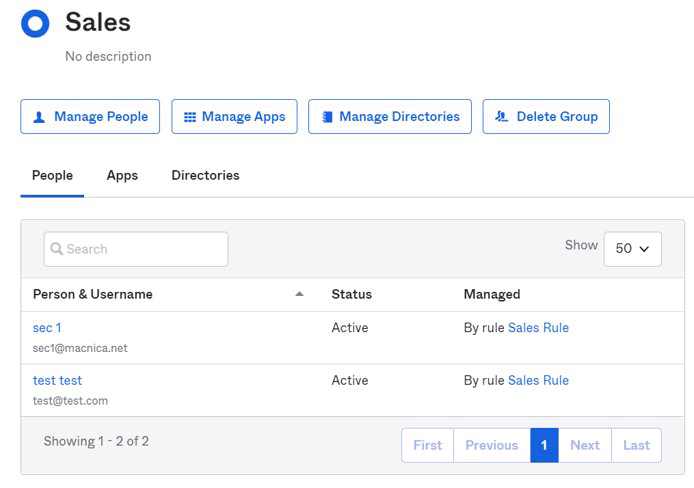
- If it can be confirmed that the user has been added to the group according to the applicable rules, the setting is complete
Grant administrator rights
Users logging into the Okta dashboard must be granted administrator privileges. I will explain the procedure.
Grant administrator rights
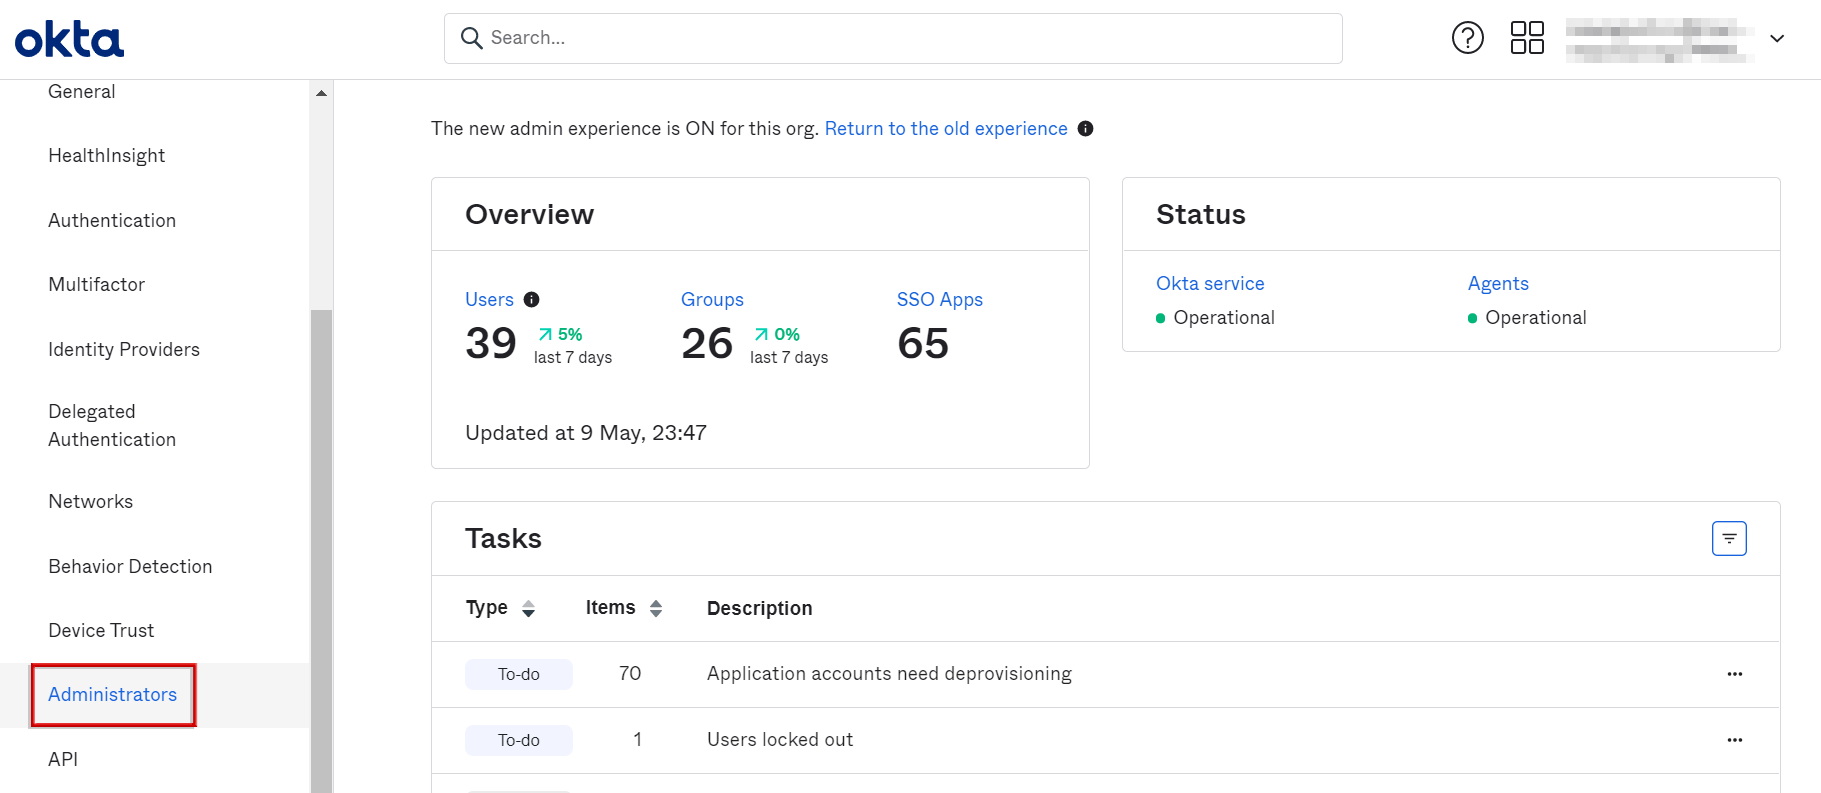
- Transition to the Security>Administrators screen
- Click Add Administrator
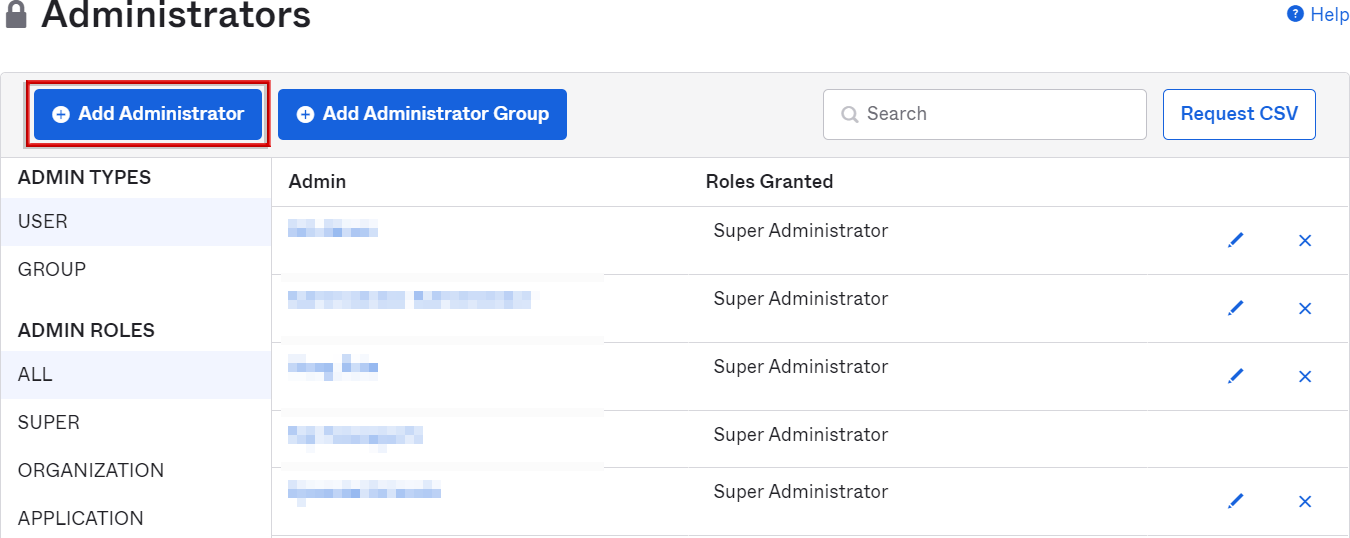
* When granting administrator privileges on a group-by-group basis, it is possible by clicking Add Administrator Group.
- Select an account, check the admin role to assign, and click Add Administrator
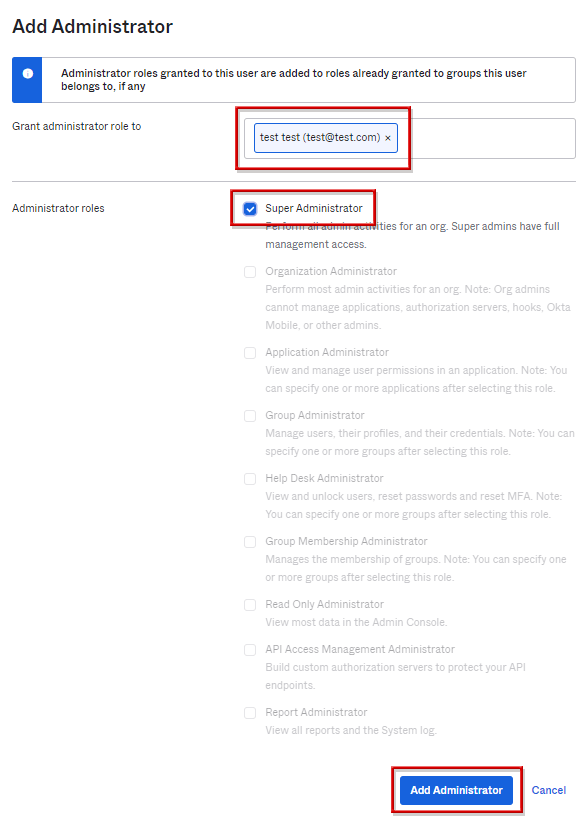
*For each management role, please refer to the Okta manual below.
https://help.okta.com/en/prod/Content/Topics/Security/administrators-admin-comparison.htm
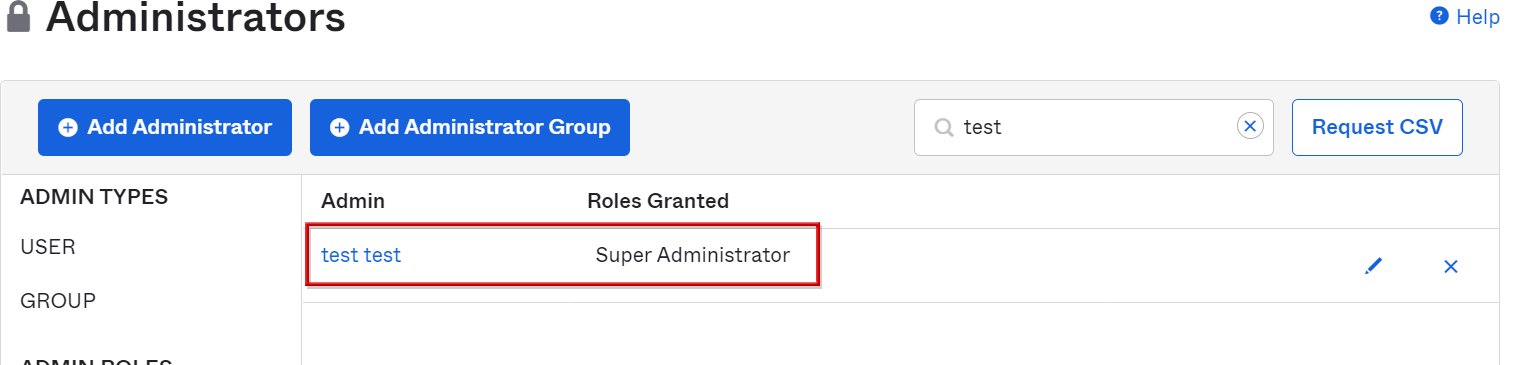
- If you can confirm that administrator privileges have been granted to the relevant user, the settings are complete.
Inquiry/Document request
In charge of Macnica Okta Co., Ltd.
- TEL:045-476-2010
- E-mail:okta@macnica.co.jp
Weekdays: 9:00-17:00